Monday, April 25, 2011

Island Rice


We served our Island BBQ Kabobs over a bed of this sweet and scrumptious 'Island Rice'...and yes, just because there's pineapple in it I am calling it 'Island', hehe. I had been dying for the chance to make a marinade and heat up the bbq, so I jumped on the opportunity when it arose last weekend. However, my afterthought was, "oh wait, I can't just serve meat alone! What should I make to go with it?" This rice was the last minute 'mad scientist' creation that ensued. Sometimes those end up being the best recipes, and we think this one definitely earned that ranking :) The pineapple and cilantro gave the rice a light and fresh flavor that was perfect for a summer BBQ and complimented the flavors in the kabobs as well. 


Recipe: 

  • 2 cups Rice
  • 2 cans Pineapple, crushed or chunks (reserve juice)
  • about 4 cups reserved Pineapple Juice (from above pineapple in rice, and from kabob pineapple cans if serving with kabobs
  • 1/2 bunch Cilantro, chopped (plus extra for garnish)
Cook rice according to instructions on its packaging, but substitute pineapple juice in place of the water. If you don't have enough pineapple juice, then use water to make up the difference. 

When the rice is done cooking, fluff with a fork and stir in the pineapple and the chopped cilantro. 

Serve on a platter and top with Island BBQ Kabobs. Garnish with extra cilantro from rice, and lime wedges from kabob marinade. 


Friday, April 22, 2011

Island BBQ Kabobs


Last weekend we had more BEAUTIFUL beach weather. Peter and I went for our Saturday morning walk, then we took a cruise down the coast to get Peter a new pair of sandals at the Rainbow Sandals factory in San Clemente. On our drive back home, we called a bunch of friends to meet us at the beach and join us for a BBQ afterwards. So far, it had been a perfect 'summer' day... and it was only going to get better. I had been dying to try a new marinade, so on the way home we picked up a couple pounds of meat from the deli, whipped up a quick marinade, and let the meat marinate while we were at the beach. When we came home it was only 20 minutes to cook the rice and grill the kabobs and we were eating dinner in no time!


Island Kabobs: 
  • approximately 2 lbs Beef, cut into 1 inch cubes
  • Island Marinade (see below)
  • 1 Red Onion, cut into large chunks then separate layers
  • 1 can pineapple rings, cut into quarters (reserve juice for marinade and side rice)
  • 8 long, metal skewers


Island Marinade: 

  • Zest of 1 Lime
  • 2 Tablespoons Lime Juice
  • 1/2 cup Pineapple juice
  • 1/2 cup Soy Sauce
  • 1/4 cup Honey
  • 1/4 cup minced Garlic
  • 1 Tablespoon Cayenne Pepper
  • 1 1/2 Tablespoons Dijon Mustard
  • 2 Tablespoons Corn Starch


Combine all marinade ingredients, except corn starch, in a bowl big enough that will later fit all the meat as well. Then reserve 1/2 cup of the marinade out of the bowl to use for basting the kabobs while on the bbq. 
Whisk 2 Tablespoons of corn starch into this 1/2 reserve marinade- this will thicken into somewhat of a glaze as we paint it onto the meat over the bbq. 
Stir all your meat into the marinade, cover with plastic wrap, and let marinate for 1 hour or more... while you're enjoying the beach :) 
**The longer the meat marinates, the better it is because the acidic juices will tenderize the meat more with time. 

Assemble kabobs by skewering the ingredients, alternating between the onion slices, meat, and pineapple quarters. Discard the marinade that remains in the bowl. Heat bbq to medium high. (while grill is heating, start the Island Rice side dish. This way, the rice and kabobs will be done at the same time!) When the BBQ is hot, place the kabobs right onto the grill.


If you haven't done so yet, whisk 2 tablespoons of corn starch into the 1/2 cup reserved marinade. After the kabobs have grilled on one side for about 7 minutes or so, flip them and brush them with the marinade glaze. 

Proceed to cook the kabobs on the second side for another 7 minutes, basting continually with the marinade glaze. Serve these delicious island kabobs over a bed of island-style rice!

It was so fun to set the table outside, bring out some music, and enjoy this pseudo-summer weather while dining outdoors with our friends!

Tuesday, April 19, 2011

Summery Strawberry & Spinach Salad


I have been so excited about strawberries coming in to season! I feel like every time I go to the market, I come home with another box of strawberries! They are so sweet and juicy and they work with just about everything! ...snacks, desserts, salads, breakfasts, smoothies, garnishings... strawberries really are a super food; both in their extensive uses and in their nutrients :)


This strawberry salad is packed full of nutrient-dense ingredients yet has a fresh and light taste. It is a great summer salad!


Recipe:
1 bag of Spinach, or Spinach & Spring Green Mix, about 8-10 oz.
15 Strawberries, thinly sliced
1/2 batch (approx. 1 1/2 cups) of Candied Walnuts, or 1/2 cup Sliced Almonds, or a mix of both
6 oz. of crumbled Feta Cheese
1/4 small Red Onion, thinly sliced
1/2- 3/4 cup dried Craisins
toss with Raspberry-Red Wine Vinaigrette to coat


Toss all ingredients and plate it up as a scrumptious chopped side salad:


Or have fun plating it up fancy:

Or serve it with a breast of grilled, sliced chicken for protein if this salad is to be your main entree:

Sunday, April 17, 2011

Raspberry-Red Wine Vinaigrette


With all the strawberries coming in to season, I have been going hog wild with strawberry recipes. Though there are no strawberries in this particular dressing, it does go very well on a strawberry and spinach salad (for which I made this dressing on this particular evening :)


Recipe:
1/2 cup fresh Raspberries (or 1/4 cup of raspberry preserves)
1/4 cup Red Wine Vinegar
1/4 cup Balsamic Vinegar
1 Tablespoon of Sugar or Honey
1/2 teaspoon Dijon Mustard
1 small Garlic clove, finely minced
1/8 teaspoon salt
1/8 teaspoon pepper
1/4 cup Vegetable Oil


Add all your ingredients, except the olive oil,  into your blender or food processor. Turn on your processor for about 30 seconds until all those ingredients have pureed together .


Then add the oil in a small but steady stream so that the dressing can emulsify:

And you will get a BEAUTIFULLY-colored, creamy-textured, and smooth vinaigrette!


Enjoy over a yummy summer strawberry & spinach salad!

Wednesday, April 13, 2011

Pesto Chicken Roulade


Sometimes it's hard to find something fun and new to do with chicken. Well, this is one super yummy, healthy, and unique answer to that problem. 


Two and a half years ago, my sister in law, Ashley, was pregnant with Kinley, my first niece. Because Ashley couldn't be around the paint fumes, I helped paint the baby room along with both of Kinley's soon-to-be Grammies. As a thank you, Ashley made this delicious pesto chicken roulade for our lunch break from painting. And so the addiction began... Since then, I have made this dish a number of times! It is a great one to make for others because it is so easy to make, but impressive and intricate looking. It makes for an easy but fancy meal! In fact, this is the chicken dish (or his own variation of it :) that Peter made me for our Valentines dinner this year!


Shopping List (for 2 servings): 

  • 2 Chicken breasts or breast cutlets (I prefer the breast cutlets because they start out thin already so it makes the pounding out a little easier... but beware not to get the ones that look like chicken-finger-sized cutlets)
  • Pesto Sauce (I use just about 4 tablespoons, but you can use more or serve extra on the side if you like)
  • 1 big handful of Fresh Spinach ( you can also use frozen... Frozen is usually a better deal because you get so much more of it for your money)
  • Parmesan Cheese (Maybe 3 Tbsps?)
  • Shredded Italian Cheese (Mozzarella, Fontina, etc- or any combination thereof)- just a few big pinches will do.
  • 2 tbsp olive oil and/or butter, for searing in the pan

First, steam some spinach (or thaw your frozen spinach). Then let it cool so that you can handle it to really squeeze out all the liquid.


While the spinach is cooling down, place your chicken breast cutlets between two pieces of plastic wrap. Using a meat mallet, pound out the chicken to about 1/4 to 1/3 of an inch thick. You would be surprised at how little it takes to pound out the chicken, so don't use too much force or pound for too long or else you will get super thin areas that will rip and tear when you roll it up later.
**Helpful Tip: I use the smooth side of the meat mallet because I've found that the textured side tears up the chicken too much. 


Pat the chicken dry with some paper towels. Now, spread a good spoonful of pesto onto each chicken, then some of the spinach, then shredded cheese, and finally a good topping of grated parmesan:


Starting at a short end to roll up your chicken, then carefully seal it up using some toothpicks.
**Helpful tip: use the same number of toothpicks in every chicken. Otherwise you will cook them and one toothpick may have been missed until one of your guests bite into it! I usually find that 7 toothpicks do the trick, so I use that as my magic number every time; even if one roll only needs, let's say 5, I will still stick in 2 extras anyway. That way you know exactly how many you need to pull out of each roll before you serve it. I've tried 'remembering' which one had 5, and which one had 7, and which one had 6..... trust me, it doesn't work. Make life easy on yourself and stick the same amount of toothpicks in each one so that it is fool-proof to not serve toothpicks to your unsuspecting dinner guests.


Heat olive oil and/or butter (I use 1 tbsp of each, but using all olive oil would be a healthier option) in your oven safe frying pan. Make sure the pan is nice and hot, then sear your chicken and let it sit for a couple minutes to cook through a little bit, then roll and repeat until all 'sides' and ends are seared and golden brown. 


With the 'seam'-side up (so that the fillings won't run out while cooking), spoon on a little more pesto and parmesan along the seam:


Place in a preheated 350 degree F oven for about 12-15 minutes, until the chicken is cooked all the way through and there is no pink. 
When it is done, let is sit for a few minutes or else the hot melty cheese and pesto will run right out:


When it has rested for a few minutes, slice the chicken into medallions so that you can see the beautiful swirly design and all the pretty green spinach and pesto that is rolled up inside!


I served mine aside large slices of tomato. I drizzled the savory leftover pan sauces and a some balsamic vinegar over the tomato slices and it was to die for. I think I am going to serve it with tomatoes like this every time now!

Monday, April 11, 2011

Huevos Rancheros


Peter absolutely LOVES huevos rancheros for breakfast. Luckily for me, they are super easy and fast to make. In fact, this is ready so fast that it is another one of those quick, weekday work-morning staples, just like our breakfast b-egg-les.


Huevos rancheros is a traditional Mexican dish served upon fried corn tortillas. However, in an attempt to make it healthier, I've found that toasting my tortillas under the broiler gives them that same traditional crisp but without those fried calories.


Shopping List: 

  • Corn Tortillas
  • Grated Cheddar Cheese
  • Eggs
  • Tapatio or hot sauce of your choice
  • Pico de gallo Salsa
  • fresh Cilantro
  • *Other possible additions: Avocado slices, and Refried beans.

First I turn the broiler on in my oven. When the broiler is hot and ready, toss your corn tortillas directly onto the top rack (one tortilla for each huevo ranchero). 


While the tortillas are crisping, start the eggs:
Make sure the frying pan is nice and hot before the eggs are cracked into it; this will help the eggs firm up when they hit the pan and prevent them from running all over. We want each one in a nice little size that will fit on top of each tortilla nicely, so we can't have them running all over the pan. Use your spatula to corral each egg together if you need to.
When the eggs get white and opaque on the bottom, but still shiny and slightly runny on top, break the yolk into the top of the egg and turn off the stove top. Sprinkle a little grated cheddar on top; let the cheese melt and the the eggs continue to sit in the pan to cook through with the heat off.


While the eggs are finishing cooking, flip the tortillas so that they are nice and crispy on both sides. Then, gather together all the other ingredients. Sprinkle a bed of cheddar on top of the warm, crispy tortilla. This will act as a glue that will hold the egg in place on top of the tortilla. (Or you could opt for the more traditional 'glue' here; refried beans.)


Slide your soft cooked fried egg right on top of the cheddar melting on the tortilla. Then simply dress up the egg with your desired toppings. I like to adorn with a couple spoonfuls of fresh salsa, a few big shakes of Tapatio, and finally some freshly chopped cilantro. If I have avocados on hand, sometimes I will even place a few slices of avocado on top of this simple and flavorful breakfast. 
Pick 'em up like an open faced sandwich and eat with your hands :) but keep some napkins handy. 
Oh man, looking at these pics makes me want to cook up some more huevos rancheros right now!

Friday, April 8, 2011

Cinnamon Rolls


In the fall, I visited my friend, Rose, who had recently moved to Washington DC. While I was there, I was tempted by LOTS of delicious cinnamon rolls at bakeries, cafes, and farmers markets. I felt like they were calling my name everywhere we went! I've never had a thing for cinnamon rolls before, but that's all it took. However, I didn't give in to those calling to me on my visit; instead, it made me want to come home and create a perfect cinnamon roll. This is the one. 


I found this killer recipe on another blog and I'll never have to try another recipe again. Seriously, this one is killer. I've only had this magic recipe in my hands for 4 months now, but I've made them at least half a dozen times already (not sure if I should admit that). I even made a double batch on Christmas morning for our families. Having so much practice in such a short period of time, I have built in as many shortcuts as I could. You can even start them in the evening so that you don't have to wake up super early for fresh rolls at breakfast time! I will include the timeline that I like to follow, in bold and underlined print (like this), to make this as easy as possible for you to follow and make at home. I think this is the final cut. Easy. Delicous. Done. I hope you enjoy :)


Shopping List: 


  • 1 Tbsp active dry yeast
  • 1/2 C warm water (think jacuzzi temp, not boiling.)
  • 4 C all-purpose flour
  • 1 tsp salt
  • 4 large eggs
  • 1/4 C sugar
  • 2 sticks butter, (plus an optional 2 Tbsp butter):                      1/2 C (1 stick) real butter at room temp (for dough)                   + 6 Tbsp (3/4 stick) real butter at room temp (for filling)          + 2 Tbsp (1/4 stick) melted butter (for glaze)                            (+ *optional* 2 Tbsp butter, for tops of rolls before cooking)
  • 3/4 C packed brown sugar
  • 1 Tbsp cinnamon
  • 1 C powdered sugar
  • 2 Tbsp milk
  • 1 tsp vanilla extract

(This part I start before dinner):
In a small glass bowl or measuring cup, warm 1/2 C water in microwave (approx 30 seconds), dissolve maybe 2 tsp to 1 Tbsp sugar in warm/hot water, and sprinkle in 1 Tbsp. active dry yeast. Let stand in a warm spot for about 30 minutes.
(it should foam up pretty tall- if not, then the yeast is either no longer active, or the water was too hot and killed the yeast bacteria).


**Helpful Hint: Just like I mentioned in my Challah Bread post, a great warm incubator for proofing yeast is an oven that was heated to 100 degrees F, and then turned off.

If you have a stand mixer, dump in your yeast mixture at this time, and proceed to add the following ingredients and use the dough hook attachment (no higher than speed 2) to mix for about 10 minutes or so. 
(If you do not have a stand mixer, add the following ingredients into a large -preferably metal- bowl with the yeast mixture and combine with a fork):
Add the 4 large eggs, 1/4 cup sugar, 1 stick of room temp butter, 1 tsp salt, and 4 cups flour to the yeast mixture. 
Dough should pull away from sides of bowl. Add a bit more flour to reduce stickiness if needed, but don't add too much otherwise the finished cinnamon rolls will taste dry. It should be dense, moist, and pliable JUST like playdough, except shinier. It should not be too wet or sticky. 

Now rub a little vegetable oil all over the dough ball and place back into the large metal bowl. Cover top of bowl with plastic wrap, set in a warm spot (again, I preheat oven to 100 degrees and then turn it OFF and put my bowl in the oven and close the door). Let rise until at least doubled, about 2 hours.


While dough is rising, prepare filling. Beat 6 Tbsp butter, 3/4 C. brown sugar, and 1 Tbsp cinnamon together (takes only about 1 minute). It will be rather thick.


(Now prepare/eat/go out for dinner while the dough rises for a couple hours, then after dinner/dessert...):
Transfer the dough to a floured work surface. Roll out into a LARGE rectangle about 1/4 inch thick or less... look how big it is! You can even see through the dough that it rolled out way beyond the size of my large silicon dough mat surface!


Spread filling onto dough. Use a spoon (or your fingers) to spread it out evenly. 


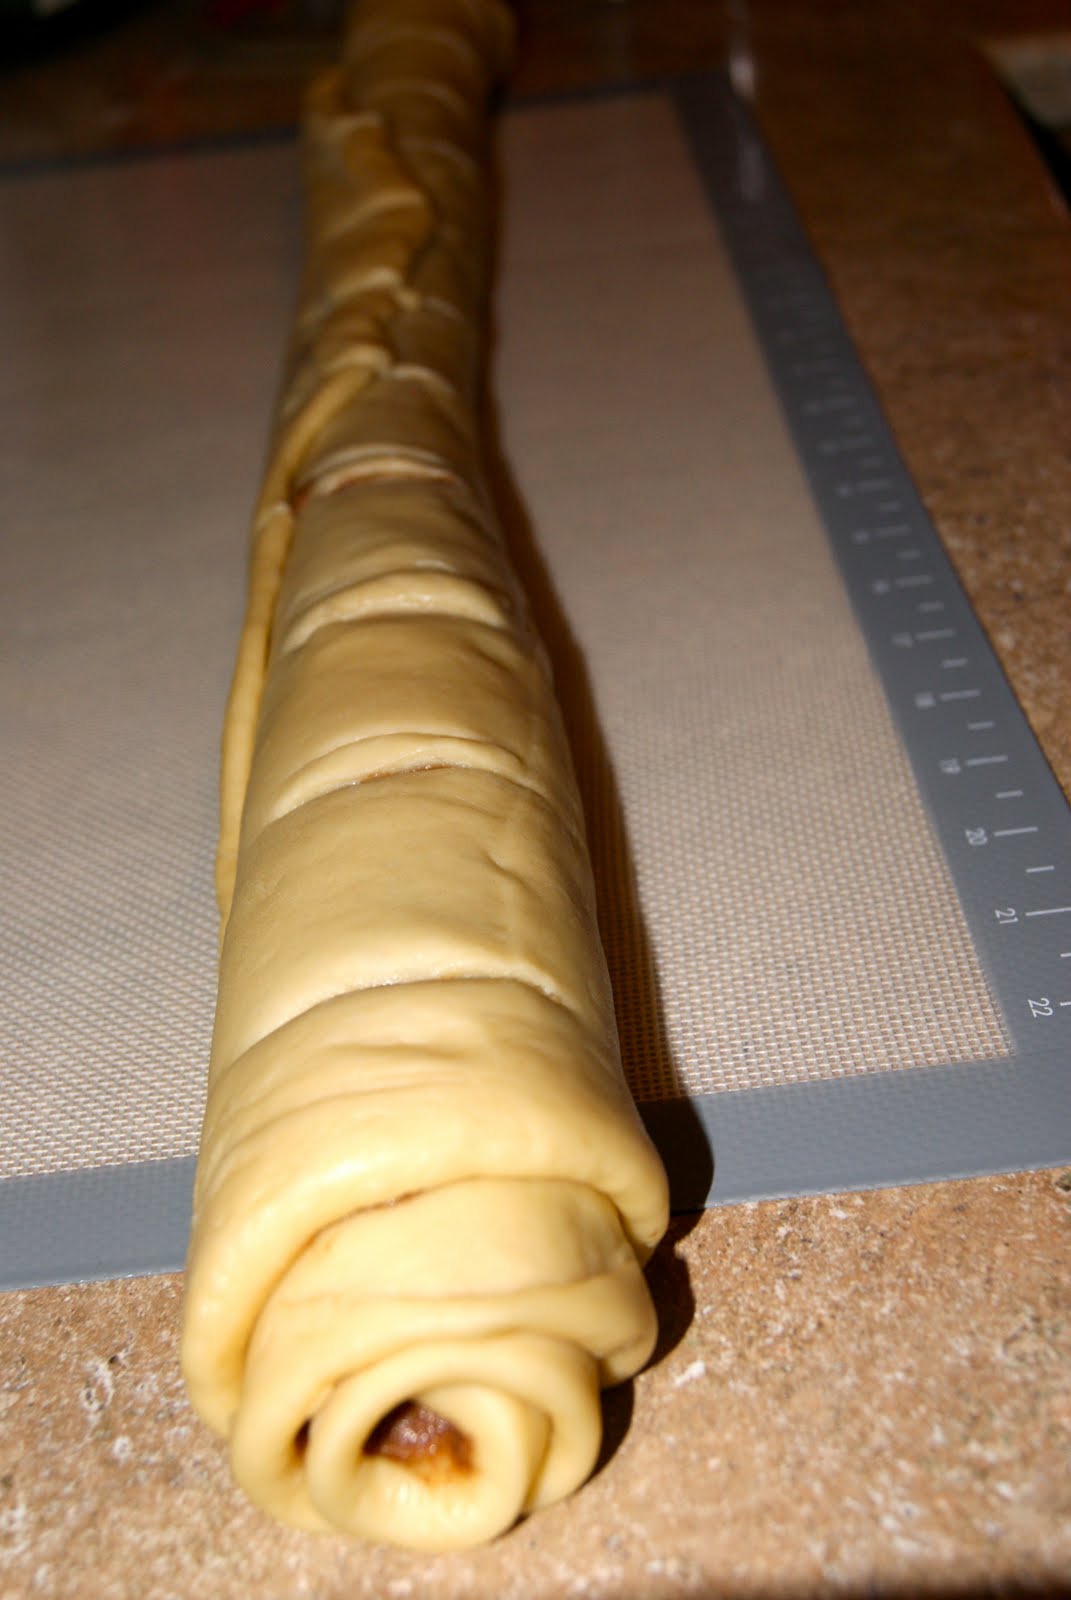
Then roll up length-wise, and score the rolls so you know you're going to cut them into even sizes (about 2.5 or 3 inches each to yield 12 rolls). 
** OR you could roll it from the short end and you would get less rolls, but they would be HUGE fatties!
Either way, be sure to score the rolls before you slice them: I'm the daughter of a contractor, trust me- I know how important it is to measure twice and cut once. The other way around just doesn't work. Here, you can end up with one little runt if you don't measure them out first.

Then slide dental floss underneath the rolls, cross over the top where it is scored, and pull. You'll get razor sharp cuts without smashing your rolls. This preserves the pretty spiral design. If you cut with a knife, it kind of tends to smoosh the spiral... not as pretty.

BUTTER or spray your dish before placing rolls in it! Place rolls in baking dish. Cover tightly with plastic wrap and you can either, place in the fridge overnight. Or I've had best luck bypassing the fridge and just letting them rise in that oven until I wake up in the morning around 6:30 or 7 am. This makes them very big and fluffy!


This is what they looked like when I went to bed:
This is what they looked like when I woke up:

**(If you placed them in the fridge overnight, remove them in the morning and let warm and rise in that preheated/OFF oven spot until half again as high, at least an hour or so... so you'll have to set your alarm for really early (like 4 am) if you want them ready in time for breakfast. -this is why I prefer to make them late at night and just let them rise in the oven until the morning.)

(30 to 40 minutes before you want them ready on the table):
Preheat the oven to 350. 
**Optional: paint 2 tbsp melted butter over the tops of the rolls. Bake until golden brown, about 20-30 minutes. 


While rolls are baking, mix the glaze. 1 C. powdered sugar, 2 Tbsp melted butter, 2 Tbsp milk, 1 t vanilla extract. (Or you can make a cream cheese frosting instead. Cream cheese frostings are super yummy on cinnamon rolls as well... that's what Cinnabon uses) 
Let cool in the pan for 5-10 minutes. WAIT the full time necessary to cool before you glaze, otherwise it will instantly melt and fall into the crevices between the rolls, and you won't see the pretty white glaze. 


Enjoy while warm :)

And you can never go wrong with a cup of coffee to accompany this roll :)

Tuesday, April 5, 2011

Crispy Onion Rings


Peter is such a good sport about letting me watch my cooking shows :) Occasionally, he will even watch one with me because he knows I love it so much. That is like, oh my goodness... the best of both worlds for me! These onion rings were a recipe that came from one of those episodes that we watched together.


We came out of church on Sunday and the weather was so incredibly gorgeous, so we decided to call a bunch of friends and kick off our first BBQ of the year. Peter asked if I would make the onion rings from the cooking show that we had watched together, and he would throw some burgers on the BBQ. I was so excited to have our friends over and to try out the new recipe! Good food is even better when it's shared with good friends.


Recipe:
  • 2 large sweet onions
  • 1 1/2 cups Flour
  • 1 Tablespoon Cayenne
  • 2 teaspoons Lawry's Seasoning Salt
  • 1 Egg
  • 12 ounces (or 1 can, or 1 1/2 cups) Club Soda, COLD so that it puffs up nicely when it hits the hot oil :)
  • Salt, for sprinkling on the fresh hot rings
First, slice your onions into 1 inch rings (each large onion will make about 4 big medallions whose layers can be carefully popped out into individual rings)

In a dutch oven, heat about 1 liter of vegetable oil until it spits and spatters when you flick some water droplets into it. While your oil is getting up to temp, whisk together the flour, cayenne, Lawry's, egg, and club soda. 

Dip your rings into the coating and drop into the hot oil. They should bubble and fizz and float on top. Let it cook for about 20 seconds or so, and then flip to the other side until it is golden and crispy.
**(Only do a few rings at a time; if you dump in a bunch at once, the oil temperature will drop too much and the rings will take much longer to cook and end up soaking up a ton of oil and becoming soggy. We don't want that.)

As each ring is done cooking, pull it out and place it straight onto a plate layered with some paper towels to absorb any extra oil. Sprinkle with salt while hot, and enjoy these sweet, salty, crispy treats!