Tuesday, May 31, 2011

Decadent Flourless Chocolate Cake


This past memorial day weekend, Peter was gone river rafting on the Kern River for a bachelor party. Therefore, I got to plan some fun girl days! On the actual Memorial Day afternoon, I planned a picnic with my friends Lindsey and Laurie. We set up our picnic on a grassy park right above the beach so that we could also set up CROQUET to play on the lawn! 


In college, Peter and his NINE roommates set up croquet in their front yard; they played all the time- it was awesome... Halftime during the Laker game? Croquet! Free time? Croquet! Want to procrastinate studying? Croquet! These boys turned a recreational past-time into a competitive sport. They played so hard that the set fell to pieces by the time they all graduated. So I got Peter a new croquet set for his birthday last month. We have all been playing it together down here now, and it has been so nostalgic for us all :) However, since the boys are croquet masters from all that practice during their college days, we girls are getting beat up on! This is why it was necessary for us to sneak in a little practice while the boys were gone river rafting :)


To go along with our european lawn game, I planned a french/european 'poet's picnic' (baguette, cheeses, fruit, etc). But I also wanted to make something fun for dessert--- What better than a recipe I learned from Julia Childs- the very woman who brought french cooking to America! It was decided; I would make the flourless chocolate cake that I had learned from one of her cooking shows some time ago :) I added a chocolate ganache glazing and berries whereas Julia Childs added just a sprinkling of powdered sugar atop the cake instead. Either way would be good, but from our experience the ganache was divine. And the cake is so rich that the berries are almost an essential companion. (Also, we couldn't pack ice cream for the picnic of course, but over the following days we enjoyed the leftovers with berries and vanilla ice cream and that was a match made in heaven).


Recipe (serves about 15 since only small slices are required due to its density & richness)


Flourless Chocolate Cake:

  • 2 sticks Salted Butter
  • 8 oz. Chocolate, >60% cacao (Julia used bittersweet, I used Semi Sweet)
  • 1 cup Unsweetened Cacoa
  • 1 1/4 cups granulated Sugar
  • 6 eggs

Chocolate Ganache:

  • 3/4 cup Half & Half or Heavy Cream (I use half & half because it is healthier and it was just fine... I know, I'm making a very unhealthy decadent cake!!!)
  • 8 oz. Semi Sweet Chocolate Chips
  • 2 Tablespoons Butter (this gives it that satiny shine and keeps it shiny)


Melt the 2 sticks of butter and stir in the 8 oz chocolate until melted. 
(I just used a 'double boiler' method of nesting a bowl above a pot of boiling water to melt my butter and chocolate together)


In a separate bowl whisk/sift 1 cup unsweetened cacoa with 1 ¼ cups granulated sugar.
Then stir in 6 eggs.


Then slowly temper in the hot butter/chocolate mixture (or else the eggs will scramble), and combine well:
(temper slowly add in a little bit of the hot chocolate and stir well. Continue adding small amounts of hot chocolate and stirring until it is all incorporated together.)

Butter bottom and sides of a 9 inch springform pan and pour cake batter into springform:

Bake at 350 degrees for about 40 minutes

While cake is cooking, prepare the chocolate ganache icing. Ganache is a chocolate glaze/icing that is typically 1 part chocolate and 1 part cream. The addition of butter gives it that glossy, satin-like shine.

Bring the half and half to a simmer using the double boiler method as above. Then melt in the 2 Tbsps butter. Turn off the heat and stir in the chocolate until completely combined. Remove bowl from pot and let ganache somewhat cool before glazing the cake.

Remove cake from springform pan and transfer to a cooling rack that is set up above a baking sheet (to catch the ganache drippings)

This was our fun picnic spread!

I used fresh strawberry slices to decorate the top of my cake, but I imagine raspberries could be very good as well.

Look at how moist and dense it is! That is the beautiful thing about flourless cakes :)

 Here are Laurie and Lindsey during one of our croquet matches that afternoon:

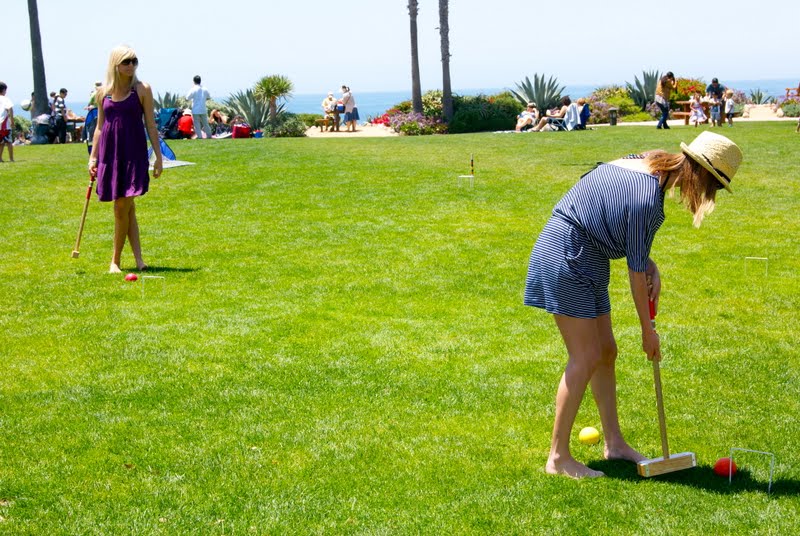
And here are all three of us with croquet mallets in hand :)

Peter came home from river rafting and was delighted to find the remains of this decadent cake in our kitchen! We found that it was best enjoyed warmed up with a side of creamy vanilla ice cream.

Friday, May 27, 2011

Coffee Ice Cream with Chocolate-covered Espresso Beans


This coffee ice cream would make a great mud pie with an oreo cookie crust, a fudge topping, and some chocolate covered espresso beans on top... I SHOULD HAVE DONE THAT! Next time :)

I have made coffee ice cream several times; usually I just use jarred instant coffee granules, but this time I used those 'Starbucks Via' instant coffee packages. It seems like everyone has those now, so I thought I'd  create the recipe using ingredients that you'll likely have already. I also gave it a few extra touches that came out GREAT, and I will do every time now! Those extra special additions were: fresh coffee grounds, and chocolate covered espresso beans.  Mmmmm....

I use my same vanilla ice cream recipe as the base for this coffee ice cream: 

 Recipe: 
  • 3 cups Half & Half
  • 1 cup Heavy Cream
  • 1 1/8 cups Sugar
  • 8 egg Yolks
  • 5 packets 'Via' Instant Coffee
  • 1 Tablespoon Fresh Coffee Grounds
  • 1 cup Chocolate-covered Espresso Beans


First, I combine the half & half and the cream in a large pot and bring that to a simmer over medium heat. Let it thicken for about 15 minutes.

While the half & half and cream are simmering, whisk together the egg yolks and the sugar....
...until it becomes a smooth, pastel-yellow mixture.

Slowly temper the egg mixture by adding 1 cup of the hot cream at a time- stirring together well in between each added cup. 
Otherwise, the eggs will cook/scramble if you add in all the hot cream at once.

Once the egg mixture is all tempered and combined, add it all back into the pot on the stove and bring it to a simmer again over medium-low heat. Stir constantly.

As it simmers, it will thicken. Eventually, you should be able to leave a finger streak in the thick custard that will coat the spoon...

after about 10 minutes:

After about 20 minutes:

Then add in both the instant coffee and the fresh coffee grounds. (I made coffee in a french press, then poured myself a cup of coffee and the scooped a tablespoon of the grounds out of the french press)

The instant coffee gives that great, rich, coffee flavor, 
and the grounds give a little flavor and a fun coffee-speckled look!

After about 30 minutes. Done.:

Pour it into a large bowl. Cover with plastic wrap and let cool overnight.

When it is all cooled, go ahead and churn it in your pre-frozen ice cream machine:

As the ice cream churns, it will become thicker and thicker, and it will grow in volume. But before it gets too thick, add in your roughly-chopped chocolate-covered espresso beans: 

After just about 30 minutes or so, the ice cream will already be a 'slightly-more-firm than soft-serve' consistency. You can enjoy it now...

...or you can pack it into a freezable container and let it firm up even more in the freezer until it becomes like a classic 'haagen dazs' ice cream.

The chocolate-covered espresso beans were SO GOOD in this ice cream!
Some other fun additions, if you can't find chocolate-covered espresso beans, would be:
toffee bits, chocolate chips, fudge ripple & almonds, oreo cookie pieces, ...sky's the limit!

Wednesday, May 18, 2011

Chewy Chocolate Chip Cookies


Okay. I make SO MUCH cookie dough in my little kitchen that it's only appropriate for me to share it with you! I don't mean to make so much cookie dough, but it is just so handy to have in stock in case of an emergency...and trust me, there are occasions that call for cookie dough in a flash! You might not think so, but when your husband invites a bunch of friends over- easy. Or when he tells you the night before that there is an office potluck or a cookie exchange at work the next day- done. Or when he needs a little treat and asks for a pizookie at night- check. (I'm just going to blame it all on Peter-- of course I don't ever eat cookies ;)


Sure, you could always buy some refrigerated store-bought cookie dough... but for half the price, why not make a WHOLE BOWL and store it yourself to have on hand?


This is a wonderfully chewy, chocolate chip cookie. Basically, I started with a classic recipe and then increased the brown sugar and decreased the white sugar. When you use brown sugar for these cookies, use dark brown sugar. The brown comes from molasses, and the darker it is the more molasses there is. You want more molasses because that is what makes the cookies bake out nice and chewy! Also, most baked-goods recipes call for unsalted butter, but I always use salted butter... always. It is important to have that salty contrast to enhance the flavor of whatever sweet goodies you are baking!


Recipe: 

  • 2 sticks of Salted Butter, at room temp
  • 1 cup of firmly packed Dark Brown Sugar
  • 1/2 cup Granulated White Sugar
  • 2 teaspoons Vanilla Extract
  • 2 eggs
  • 1 tsp Salt
  • 1 tsp Baking Soda
  • 2 1/4 cups Flour
  • 12 oz. (or about 2 cups) Chocolate Chips


In a medium sized bowl, cream together your softened butter, sugars, and vanilla. Then add in the eggs, salt, and baking soda. When that is all well combined, mix in the flour: 

Then I stir in the chocolate chips. I can't explain why I do this, but for some reason I just don't like using the mixer to stir in the chips. You can certainly use the mixer if you don't want to mess up a good spoon for no reason.

 Bake them at 350 degrees Fahrenheit for about 12 minutes (if they are this average cookie-size pictured here), or 15 minutes or so if you are making big cookies or pizookies.

When I take the cookies out of the oven, I transfer them to a cooling rack for just a few minutes so that they can mellow out and become flat and chewy!


Mmmmmm... cookie dough! 
 With the leftover bowl of dough, I let it chill for a few minutes in the fridge, roll it out into individual balls on a cookie sheet. Then I let that firm up in the fridge again....

 ...and then baggie them up in batches to be stored in the fridge or freezer. The only unfortunate thing is that Peter likes to sneak my stock of cookie dough balls... and then when an event arises and I need cookies on call- they're gone!


If you store your baggies of dough in the freezer,  you will want to let them sit out and thaw for a bit before baking them- otherwise, the centers may stay too cold and firm and they might not flatten all the way out when they bake. 
HOWEVER, I know I don't usually get that much notice before I need to pop some in the oven. If you find yourself needing cookies on short notice, I can pop them straight from the freezer to the oven. THEN PREHEAT the oven and let the cookies warm up while the oven does the same. Start your cook time once the oven reaches temp, and press the cookies down with a fork half way through baking :)

Monday, May 16, 2011

Nantucket Lemonade


Man! I am just on a BBQ roll! First the BBQ pulled pork, then the grilled Corn on the Cob, now a dressed-up Lemonade... I guess it's no secret that I'm ready for summertime and barbecues!!!


I only made this because I saw some SUPER CUTE napkins at the market that had a little picture on one side and the recipe on the other. I thought they would make a fun accessory to serve with the drinks on my table for a BBQ. 

This was so fun to make, because it was pretty for serving, and because it was a fun, new twist on the good 'ol fashioned lemonade! We all had so much fun with it that I had to share it! :)


Recipe: 

  • 5 cups Lemonade
  • 2 cups Cranberry Juice
  • 3 Tablespoons Fresh Lime Juice
  • 2 cups chilled Ginger Ale
  • * Optional: 3 cups Vodka

Healthy Alteration: 

  • 5 cups Crystal Light Lemonade (or another low/no sugar version)
  • 2 cups Diet Cranberry Juice (these very low sugar versions usually taste very similar the their fully-sugared counterparts, so this is an easy health swap to make.)
  • 3 Tablespoons Fresh Lime Juice
  • 2 cups chilled Ginger Ale, diet or low sugar if you can find it :)
Stir all the chilled ingredients together, and add 2 trays (32 large ice cubes) of ice cubes right before serving:
Aren't these the cutest little napkins!

Doesn't it make such a festive looking drink station for a fun, summery BBQ!

You could also throw in a few lemons that have been sliced into pretty little circular slices to float in this beautiful lemonade.

Wednesday, May 11, 2011

Grilled Corn on the Cob, TWO ways!


My last post was the BBQ pulled pork sliders that were for Peter's birthday celebration. Well, we also grilled up some corn on the BBQ as a quick and easy side to go along with those easy pulled pork sandwiches. I had never grilled corn on an actual barbeque before, so we just kinda' winged it. When Peter and I were on our honeymoon, we had corn right on the beach that was roasted straight on the grill right there ... so I thought it would be fun to do it that way for his birthday! 

When I bought these ears of corn at the market, I asked a man in the produce section what was his favorite way to grill corn on the barbecue. He said that he likes to either wrap it in foil or in the corn husk. I really liked the idea of shucking the corn and then re-wrapping it in its own husk... but that was going to take too much time for this particular occasion (In my last post I explained why we didn't have much time to spend prepping in the kitchen for this BBQ birthday party :) So, I decided to try the foil wrapping method. But I also wanted to try grilling the corn naked over the fire like we had enjoyed on our honeymoon. In Bali, the naked ear of corn went straight over the fire and then butter, salt, seasonings, and any other toppings were dressed after it was roasted. 

I decided to do a little experiment by trying it both ways! and I figured we'd vote on which one was best to share with you on the blog... but they were both so good that I just have to share both.

(Enjoying our grilled corn on the beach in Bali):

For the corn that was to be wrapped in foil, I lightly buttered it before it was wrapped so that the salty, creamy butter would cook into the sweet corn. 

For the corn that was to go straight onto the grill, I went with a healthier option. I painted them with a little extra virgin olive oil (that would also help protect them on the grill since these guys had no wrapping) and sprinkled them with a dash of salt and pepper. 

**Nutrition Noteworthy: Corn is actually a WHOLE GRAIN. Yes, many people don't realize this, but it is a part of the whole grain family along with bulgur wheat, barley, quinoa, buckwheat, brown rice, oats, etc. (just to name a few of the more common whole grains that you may have heard of :). This means that corn is, like the other whole grains, an important source of protein, fiber, vitamins and minerals!**

(buttered, foil-wrapped corn):


Peter preheated the BBQ and I painted the grills with some oil and then placed all the corn, foil and no foil, right onto the grill: 


We closed the lid on the BBQ and let them grill for at least 20 minutes or so, turning them once half way through (or quarter turns every 5 minutes for more grill marks :)  
These BOTH came out SO tasty that I couldn't pick just one to share with you.   

You know how people do baked potato bars? Well, you could do a summertime/BBQ twist on that idea, by serving a 'corn on the cob bar'. Then people could dress their corn with any toppings they desire. Some fun ideas are: 
  • Butter
  • Parmesan
  • Chile Powder
  • Salt & Pepper
  • Lawry's Seasoned Salt
  • Olive Oil
  • Roasted Garlic
  • Sweet Paprika
  • Cayenne Powder
  • Mayonnaise (I know this sounds... not healthy... but it's a popular option on roasted corn found on the beaches in Mexico) -if the idea of plain mayo doesn't sit well with you, you could always serve the mayo already flavored with any of the seasonings in this list. I imagine cayenne powder would be a good one :)