Friday, November 18, 2011

Roasted Garlic Hummus

Hummus is a super healthy snack. I don't have a lot of 'snacky' stuff in my house- I just keep a lot of ingredients stocked up in my kitchen, so if you get snacky you better be willing to wait for something to get made. I know, "poor Peter". But HUMMUS- now this is something I don't mind having on hand for snacking! Peter has loved having this homemade hummus in the house. It even helps me to get him to eat carrots and celery :)


Hummus is so healthy because it is high in iron, vitamins, & fiber... but most uniquely, it is a good source of a 'complete' protein. Our body uses over 20 amino acids to make protein and perform various functions in our body. Our bodies can actually make most of these amino acids on their own. However there are 9 that our body cannot make sufficiently for growth, so it is essential that we get them from the foods we eat. This is why they are called 'essential amino acids'. 
Certain foods compliment each other to create a complete protein. For example: 

  • Chickpeas have sufficient amounts of all the essential amino acids EXCEPT tryptophan and methionine. 
  • HOWEVER, seeds and grains happen to be rich in tryptophan and methionine, and low in some of the other ess. amino acids that the chickpeas do have. 
  • THEREFORE, when we combine the chickpeas with tahini (sesame seed paste) and serve it with grains (from the pita bread) you have sufficiently rich levels of ALL the essential amino acids.
i.e. you have a complete protein!


Recipe (makes about 2-3 cups):
1 can Chickpeas (aka garbanzo beans), drained
3 heaping Tablespoons of Tahini
Juice of one small Lemon (1/4 cup)
1/4-1/2 teaspoon Cumin (depending on your liking)
a few dashes of Paprika
1/8 teaspoon Cayenne Pepper
1/4 cup Water (as needed)
1 small head Roasted Garlic (about 12 cloves)
1/4 cup Extra Virgin Olive Oil


It is super easy to make your own roasted garlic. Just slice your head of garlic in half, cross wise, then drizzle with EVOO and sprinkle lightly with salt. Wrap each half in a square of foil and roast at 400 degrees F for about 40 minutes. 


Place all ingredients, except olive oil, in food processor and blend until it becomes a thick paste.

Then AS THE PROCESSOR IS RUNNING drizzle in the olive oil until you get the desired consistency, though it should be thick.


Serve with pita bread, carrots, bell pepper slices, and/or celery sticks.

Garnishing options:

Drizzle with olive oil
Sprinkle with Paprika
Sprinkle with Cayenne
Top with chopped Parsley

Friday, November 11, 2011

Lemon Squares


National Charity League (NCL) is a mother-daughter organization which teaches girls how to serve their community by volunteering for other non-profit philanthropic organizations. There are specific volunteer hours which are to be met, as well as meetings to attend and office positions to be held. It fosters responsibility, leadership, community & cultural awareness, as well as a strong mother-daughter relationship.

I got to participate in NCL with my mom when I was growing up. One more thing that NCL fostered in us was a killer recipe collection. Every quarter, the entire chapter- mother and daughter members of all age groups- would gather together for a formal meeting to discuss upcoming service events, philanthropy partners, updates on hours, etc. These meetings, would begin with a sort of potluck 'tea time' where we were all to bring finger foods or tea goodies to share. It was a breeding ground for recipe exchanges in addition to the informational updates that we received those evenings :) Women baking for other women... OF COURSE they're bringing their A-game recipes!

This particular lemon bar recipe comes from one of those NCL gatherings. It's a keeper. If you get to taste test a bunch of womens' best recipes, then pick your fave, and get the recipe straight from the cook, you know it's going in your keeper recipe file! I hope you enjoy this one and hold onto it too :)

Recipe (for a 9x13 pan):
  • Crust:
    • 2 sticks SOFTENED Butter (if not softened, your crust will come out too crumbly)
    • ½ cup Powdered Sugar
    • 2 cups Flour
  • Filling:
    • 4 Eggs beaten
    • 2 cups Sugar
    • ¼ cup Flour
    • Juice of 1 Lemon (recipe calls for ¼ cup fresh lemon juice; I usually use 1/3 cup because I usually get that much from a medium lemon for even more lemon-y flavor :)
    • Zest of 1 Lemon (about 2 Tbsp)
Preheat oven to 350 degrees F. Then mix together the crust ingredients and and press evenly into a 9x13 pyrex dish:

Pre-bake the crust at 350 degrees for no more than 15 minutes:


(See how it's barely starting to turn golden on the edges; that means it's done. Remember, it's going back into the oven again with the lemon filling, so you don't want it to get overcooked then.)


While the crust is pre-baking, mix together the filling ingredients. 


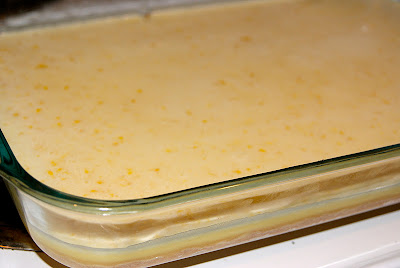
Pour the filling over the pre-baked crust:

Bake at 350 degrees for 20 minutes or until lemon filling has set. 
ALLOW IT TO COOL (it actually takes a while to really cool)
Then dust with a sprinkling of powdered sugar and cut into squares:

Look at this yummy shortbread crust:


And the soft, gooey, lemony filling! 


Makes 18 large square servings: 

Monday, November 7, 2011

Chicken Enchilada Casserole


THIS is the family favorite. My mom made this for our fam when we were growing up. It makes a large casserole, but there were hardly ever any leftovers. Even if there were a little bit of leftovers, they definitely didn't last past lunchtime the next day. To this day, this is the most requested birthday item from everyone in my family. 
In fact, this time that I made it, it was per request from my brother and sister-in-law when they came home from the hospital with their new baby boy. 


Rather than the traditional chicken enchilada which has individual rolled enchiladas, this one is a layered chicken enchilada casserole. I love casseroles because they are easy to assemble, all the flavor is trapped together in one dish, and they are great for feeding a crowd.  
This recipe makes a large 9x13 casserole, however I made two 8x8 casseroles this time; one for Peter and I, and one to take over to Cullen and Ashley's when they got home from the hospital.


For this enchilada, there are only 3 parts that get layered together: tortillas, chicken, and sauce:


The chicken is as easy as plain cooked chicken that is chopped or shredded. In a pinch, a rotisserie chicken works VERY well for this recipe. This time, I cooked a whole chicken and shredded all of its meat for this casserole.


Some enchiladas allow you to use corn or flour tortillas, but I would urge you NOT to use flour for this one. I've made it with flour tortillas once and I will never make that mistake again. It came out too soggy :( Besides, corn is healthier anyway :) For these enchiladas, just stick to corn tortillas.


Recipe (makes a large 9x13 casserole dish):

  • 1 can Cream of Chicken soup
  • 1 can Cream of Mushroom soup
  • one 24 oz jar Salsa, I use 'medium' spice (the 'La Victoria' style of salsa)
  • 16 oz Shredded Cheddar, plus 8 oz Shredded Cheddar; divided
  • 1/2 to 1 cup Milk (I use fat free)... not necessary for flavor, so if you don't have the milk, don't stress; it just helps to thin and stretch the sauce so that you have enough for the top (which is pretty important)
  • 24 Corn Tortillas
  • about 4 cups Chicken, cooked & shredded (4 large Chicken Breasts or the meat of one Whole Cooked Chicken)
  • For serving: Sour Cream, or a healthier option- Guacamole!


First, mix together the can of Cream of Chicken soup, the can of Cream of Mushroom soup, the jar of Salsa (reserve a few spoonfuls for the bottom of the baking dish), and 16 oz shredded cheddar, and the milk. 
(The cup of milk does not affect the cooking or flavor of this dish, but if you have a cup of milk it helps to make this sauce stretch a little further; it's important that you have enough of this sauce as you layer because this needs to be the top layer covering the casserole.) 
It makes a great looking pink sauce... Peter always sneaks over with a bag of tortilla chips at this point and starts dipping into this sauce- until I whack him with my spoon :)
  
Now slice your tortillas into 1 inch strips (they already have lines baked into them, so I just pile a handful at a time and slice the stacks all at once along the guide lines.)

I roasted a whole chicken and shredded it for this dish, so I used some of the chicken broth juices from the roasting pan to cover the bottom of the enchilada dish. If you do not have the cooked chicken broth, then you can use a few spoonfuls of salsa, or even spread a bit of your cheesy-pink enchilada sauce. 
(If you do not put something down there, the dry tortilla strips might bake hard onto the casserole dish)

Lay out your tortilla strips to cover the bottom of the pan:

Then layer 1/3 of your shredded chicken:

Then 1/3 of your sauce:

Repeat, ENDING WITH THE SAUCE. This is important. If you end with a layer of tortillas or chicken, it will bake all hard and dried out. No es bueno!
Then cover the top layer of sauce with 8 ounces or so of shredded cheddar (my favorite part- the ooey gooey cheesy crust :)

Bake at 350 degrees F until the cheese bakes golden brown and bubbly (about 45 minutes): 

Let is sit for about 10-15 minutes before you cut into it. This will allow it to cool slightly, and to firm up. Otherwise, you will cut a serving and it will ooze off the spatula and all over the plate. It will taste great, but it won't look as appetizing. So let it sit for a little!
Delicious served with a healthy side of yummy guacamole!

This is one meal that gets even better the day after because all the flavors marry together even better as they sit. Unfortunately, leftovers (if any) hardly last long enough. 

...A good solution to this could actually be even easier for you; make it ahead of time! When you are ready to bake it, pull it from the fridge, bring it to room temp, and then pop it in the oven at 350 for 45 minutes. A flavorful, filling meal that's ready when you are! That's why I love casseroles :)