Monday, January 23, 2012

Pastry Pinwheel Appetizers


So this post is going to be a 2-for-1 deal because I'm going to share TWO different versions of the same appetizer: Spinach Asiago pinwheels, AND Garlic Cheddar Pinwheels. Well, really it's like an infinite amount of different appetizers from one recipe since you can take this idea and recreate it a million different ways with all kinds of different ingredients and flavors rolled up inside of them (lots of ideas listed at the bottom of this post too).


This recipe uses puff pastry; I just use the frozen kind at the market, because it is so much easier than making it at home and doesn't taste any less than homemade. Plus you get TWO sheets of puff pastry in one box- so you can either double the recipe of your favorite flavor below, or you can make each one.


I made these for a New Year's Eve Party. Now, it's a great time to share them, though, because the Super Bowl is nearing and I think these will make a great super bowl party snack! This is one that both guys and girls like :)


Spinach-Cheese Pinwheels:
  • 1 sheet Puff Pastry, THAWED (buy the frozen kind at the supermarket. They usually come in a box with 2 puff pastry sheets. But BE SURE to let yours thaw before starting this)
  • 1 large Egg + 1 Tbsp Water
  • 1 package Spinach (again, just buy the frozen box at the supermarket), thawed and WELL DRAINED (really squeeze all the liquid out of it)
  • 3/4 cup shredded Cheese- you can use any type you like, but I used Asiago here! Some other yummy options are: Mozzarella, Gruyere, or Muenster.
  • 1/4 cup grated Parmesan Cheese
  • 1/8 tsp Garlic Powder
  • AP Flour for work surface
Garlic-Cheddar Pinwheels:
  • 1 sheet Puff Pastry, THAWED (buy the frozen kind at the supermarket. They usually come in a box with 2 puff pastry sheets. But BE SURE to let yours thaw before starting this)
  • 1 large Egg + 1 Tbsp Water
  • 2 Tablespoons minced Garlic
  • 1 cup shredded Cheddar Cheese
  • 1/4 cup grated Parmesan Cheese
  • AP Flour for work surface
Spinach-Cheese Pinwheels:
Preheat oven to 400 degrees Fahrenheit. 
Lay one sheet of pastry dough on a well-floured surface, and roll out using a rolling pin into a large rectangle. 

Beat together egg and water in one bowl or cup. Mix shredded cheese, grated parmesan, and garlic powder in a separate bowl. 
  1. Paint egg wash onto rolled out pastry sheet. (reserve a little for later use)
  2. Squeeze all liquid out of defrosted spinach. Spread evenly across the pastry sheet. 
  3. Sprinkle cheese mix evenly over top of spinach layer. 


Starting at a short side of the rectangle, roll up. Seal well (use a little egg wash if you need to, in order to seal up the seam.)

Slice into 1/2 inch pinwheels (makes about 22)
*HELPFUL HINT: when I make cinnamon rolls I like to use floss to slice through the dough-y roll. HOWEVER, that does NOT work with these because the floss doesn't slice through the spinach, so it grabs it and pulls out the spinach instead. Unfortunately you have to use a sharp serrated knife and saw gently for each pinwheel. Use more back and forth motion and less pressing down motion to preserve the best shape & swirl of your pinwheels.

Lay them out onto a baking sheet with parchment paper or a silicone baking mat. Brush tops lightly with remaining egg wash (this help them maintain a glossy appearance after they've cooked)

Bake at 400 degrees for 15 minutes, or until they turn golden brown. 

Transfer to wire rack and allow to cool slightly before serving.


Garlic-Cheddar Pinwheels:
Preheat oven to 400 degrees Fahrenheit. 
Lay one sheet of pastry dough on a well-floured surface, and roll out using a rolling pin into a large rectangle. 

Beat together egg and water in one bowl or cup. 
  1. Paint egg wash on rolled out pastry sheet. (reserve a little for later use)
  2. Spread minced garlic evenly across the pastry sheet. 
  3. Sprinkle cheddar & parmesan evenly over top of garlic layer. 

Starting at a short side of the rectangle, roll up. Seal well (use a little egg wash if you need to, in order to seal up the seam.)

Slice into 1/2 inch pinwheels (makes about 22)
*HELPFUL HINT: when I make cinnamon rolls I like to use floss to slice through the dough-y roll. That DOES work like magic with these too! It doesn't work with spinach (as stated earlier) but 
using floss to slice the pinwheels works GREAT here.

Lay them out onto a baking sheet with parchment paper or a silicone baking mat. Brush tops lightly with remaining egg wash (this help them maintain a glossy appearance after they've cooked)

Bake at 400 degrees for 15 minutes, or until they golden.

Transfer to wire rack and allow to cool slightly before serving.

Enjoy!

Other flavor ideas: 

Savory: 
-Pesto Sauce & Cheese
-Tomato sauce & Mozzarella
-Ham & Swiss
-Caramelized Onions and Gruyere
-Roasted Red Peppers & Fontina
-Sun dried Tomato, Basil, & Mozzarella

Sweet:
-Melted Chocolate
-Cinnamon & Sugar
-Honey & Walnuts
-Cream Cheese & Jam

Sweet & Savory: 
-Maple & Bacon

LEAVE A COMMENT WITH YOUR FUN IDEAS :)

Wednesday, January 18, 2012

Baked Spaghetti 'Pie'


This one was so much fun to make! It's like a facelift for spaghetti! It could also be a great way to use leftover noodles :)

Peter called me when he got off work and said that he had invited some friends over for dinner. This was a great quick dish to throw together. Luckily, I already had a batch of my homemade bolognese sauce, but if you're really in a rush for time you could make a quick marinara sauce, (or let's be honest- when in a real bind there is no shame in reaching for a good jar of red sauce from the market!)
In any form, this is a delicious and easy entree to whip up. Plus, isn't it so much more fun than plain old spaghetti?!!

Comments from the boys were: 
-"This is so much easier to eat than spaghetti, and it tastes better too!"; 
-"This is so good!...Megan, did I say yet how  good this is!?"; and finally- 
-"Best homemade meal I've had in a long time!"...but that was coming from the boy that just got back from a 'boys trip' in Mexico, so I don't think this one counts, Haha!

This night the three guys took down the whole thing, but I'd say it could normally serve 6 people comfortably- (not counting big hungry boys as normal people, of course)

Ingredients (makes 1 large pie; 8 slices)
  • 6-8 ounces Spaghetti noodles, cooked al dente
  • 2 Tablespoons Butter
  • 1/3 cup grated Parmesan Cheese, plus 1/4 cup for topping
  • 2 whole Eggs
  • 1 (16 oz) container of Fat Free Cottage Cheese (or you can use ricotta cheese. I opt for cottage cheese because it is healthier and tastes just as good when it's all cooked in; those who don't normally care for cottage cheese don't even know it's in here and they love it.)
  • 1 heaping cup of Shredded Mozzarella, plus 1/2 cup for topping
  • 1/2 batch Bolognese sauce, or Marinara Sauce, or your favorite jarred sauce.

Cook pasta 'al dente'; drain; While still hot, stir in 2 Tbsp Butter, 1/3 cup grated parmesan cheese and 2 eggs; Mix well.
The cheese and butter mixed into the noodles give lots of flavor to this bottom layer of the dish; the eggs  hold it all together as it bakes so that later you will be able to cut it into nice slices without the noodles flopping all over the place. 

Lightly spray or butter your baking dish, and press noodles firmly into bottom of oven safe dish. (I use this Le Creuset pan, but you could use a casserole dish, a large pie pan, ...any oven safe baking dish)

Mix cottage cheese with 1 cup shredded Mozzarella and press firmly on top of noodles.

Layer your sauce on top of the cheese mixture. I used my homemade bolognese sauce, but you could always use a simple marinara if you are looking for a meatless entree. 
If you want to make this 'spaghetti pie' look like a 'pizza pie', you could also use a simple marinara sauce, top with mozzarella, and then top it lastly with slices of Italian sausage (or any pizza toppings for that matter) to turn this spaghetti pie into a 'spaghetti-pizza pie'! 


Top with a final covering of 1/2 c. mozzarella and 1/4 c. parmesan:


Bake at 350 degrees Fahrenheit for about 45 minutes, or until your cheesey top becomes golden-brown and bubbly!!! Mmmmm...


Slice into wedges to serve. Mangia! 

Tuesday, January 17, 2012

Bolognese Sauce


I've posted a recipe for a quick marinara. But this is FAR different from marinara. Marinara is a simpler, thinner, tomato-based sauce (traditionally meatless, but can be optional); Bolognese is more complex, thick, chunky meat-based sauce... meat not optional. Sorry, without meat it's just not bolognese. If you don't want meat, by all means, you can always use this recipe as a tomato sauce without the meat (but then it's not bolognese), or you might opt just to make a simpler marinara.

Bolognese is most commonly served with tagliatelle noodles, which are long wide noodles- like lengths of ribbon. But this chunky meaty sauce is also good with rigatoni or any big noodle that the sauce can grab onto and be stabbed up with a fork :)
Recipe:

  • 1 medium Yellow Onion, finely diced (about 1 heaping cup)
  • 2-3 ribs of Celery, finely diced (about 1 cup)
  • 2 Carrots, finely diced (about 1 heaping cup)
  • 1 lb lean Ground Beef (at least 1 lb... bolognese is supposed to be a MEATY sauce- not a tomato sauce with a little meat in it.)
  • 3 cloves Garlic, minced (about 1 Tbsp)
  • 1/2 teaspoon Salt
  • 1 cup Dry Wine- I like to use red (either red or white would be fine; I've seen both used interchangeably in bolognese recipes)
  • 1 (28 oz) can Whole Plum Tomatoes
  • 1 (6 oz) can Tomato Paste
  • 1 teaspoon Sugar, either White Granulated or Brown Sugar would be fine
  • 1 1/2 teaspoons of your favorite Italian Seasoning blend 
  • 1/4 teaspoon Ground Black Pepper
  • A dash of Nutmeg
  • 1/2 cup Fat Free Half & Half (traditionally whole milk or cream, but I like to substitute the half & half)

Dice the onion, celery and carrots as small as you can. Then place them in a food processor for a few seconds to mince them even further: 

(I suppose you could try using a blender for this if you don't have a food processor? I would definitely put the carrots in the bottom if you do that though)


Heat 1 Tbsp olive oil in a large heavy-bottomed pan. Sauté all your diced veggies for about 10 minutes until soft and fragrant- about 8-10 minutes. 

Add ground beef, minced garlic and 1/2 tsp salt. Break up beef with wooden spoon and stir to brown until meat is all cooked. About 5 minutes.

Add the cup of wine and stir in, scraping the bottom of the pan. Let it come to a simmer, stirring occasionally for about 5 minutes. 
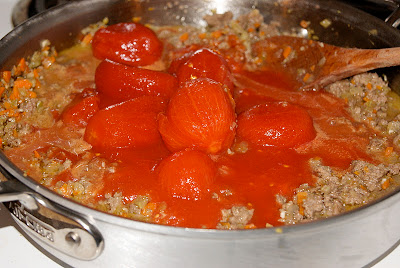
Then add the can of whole tomatoes, including all liquid. 

Break up the tomatoes with your wooden spoon, and stir in the tomato paste, sugar, pepper, Italian seasonings, and nutmeg. 
Stir together well, and let it come to a bubbling simmer.

Turn the heat down, and allow to simmer for about 1 1/2 to 2 hours with no lid. Stirring occassionally to make sure it doesn't scorch on the bottom. 
*(This is why a heavy bottomed pan is important. If the pan is a thin/light material, the sauce will scorch easily onto the bottom of the pan so you would need to stir more frequently)
See how nicely it has thickened and how meaty and chunky it is:

After it has simmered and all the flavors have condensed together, turn off the heat and stir in the 1/2 cup of FF half & half. This gives it some rich, creamy depth and makes it a little more sauce-y again :)

Some Alteration Options:
  • Tomato: If you want your sauce a little more tomatoey, you can add another can of whole tomatoes, either a 14.5 oz can or another 28 oz can -depending on your preference, with its liquid. This would, however, require some additional simmering time. Or you can add a can of crushed tomatoes with your whole tomatoes.
  • Cream: If you want your sauce a little more saucey and/or creamy without adding too much tomato (to keep with the traditional bolognese fashion of little tomato), you can stir in more half and half (or whole milk or cream) at the end instead of just 1/2 cup. 
  • Meat: Traditionally, Bolognese uses chunks of Skirt Steak and pancetta so you can always go that route. I use lean ground beef to make it slightly healthier (and easier). Or you could make it even healthier by using lean ground Turkey. So now you've got the whole spectrum of meats to choose from.
  • Consistency: If you would like to make it a little more loose and saucey without adding extra tomatoes or cream, you can add a cup or so of beef stock before it simmers. This will definitely give more depth to the sauce while lightening up the consistency, and without diluting or adulterating the traditional flavors.

Friday, January 13, 2012

Quick & Easy Weeknight Cheater Meal


Sourdough bread bowl filled with creamy tomato soup, and a grilled cheese sandwich on the side:


So this isn't exactly a 'recipe', but I still thought everyone would appreciate this quick meal idea. It's perfect for a night that you work late, or you'r just getting home from an out of town trip, or when you've been out doing errands all day, or when you find out at the last minute that your husband invited guests over when you didn't have anything planned yet ;) ... etc. 


There's no cooking, really, and it is actually quite gourmet looking and tasting!


Stop at the market on your way home and buy just three things, then assemble at home and voile- a very 'gourmet' dinner in no time at all!


Shopping List:


  • Individual-sized round loaves of Sourdough bread, 1 per person (they have them at Trader Joe's, they are also at the bakery of your supermarket)
  • Creamy Tomato soup, I LOVE the "Roasted Red Pepper & Tomato" soup that comes in a carton from Trader Joes (I've tried to home-make it, but it hasn't passed the taste test yet. Once I hit a version that's worthy I will share it with you... but for now- it still needs tweaking, so store-bought it is!)
  • Muenster Cheese, (or your favorite variety for grilled cheese sandwiches)
  • (If you don't have some salad makings at home, you can also grab a bag of spinach or a pre-made salad to serve on the side)
Visualize a circle on the top of your bread loaf, and cut out a cylinder from each bread loaf to create a bread bowl. 
*Helpful Hint: Don't point your knife straight down. Instead, hold your knife at an outward angle to slice along the outsides of the bread loaf... get it? I feel like that might be confusing... Basically, the bottom of the bread "cork" you pull out will be bigger than the top of it. 
Also, be cautious not to puncture through the bread.

Using your hands, pull the bread "cork" out carefully so as not to squish it too. much. Take this cylinder of bread and trim up the rough bottom, then slice it into round slices of bread for making the grilled cheese sandwich.

Toast the bread bowl in the oven. While the bowls are toasting, heat the soup in a pot on the stove, and lightly butter your sourdough bread slices and grill them in a frying pan on each side before adding the slice of Muenster to make a very 'gourmet' grilled cheese :)
Grate a little Asiago or Parmesan on top,
and in only about 5-10 minutes, you have a very simple yet impressive meal :)

Look at how yummy that is when the soup slowly soaks into the soft, warm insides of the bowl!

Serve with a spinach side salad for a well-rounded meal.

Monday, January 9, 2012

Chicken Tortilla Soup

*(Download the app "Tortilla Soup Surfer"...see story at bottom of this blog :)

When I made this big pot of soup, I served Peter a hot bowl and then ladled myself a bowl to photograph for this blog. I took my photo, but when I came back to sit with him he was already slurping up his last little bit! He headed over to the stove to fill his bowl again, and was quite excited to see that there was such a big pot for more servings. Needless to say, I think I scored points with him tonight :)

For the new year, Peter's work is offering a new company wellness campaign. Now Peter is actually going out of his way to count how many cups of fruits and veggies he is eating daily!!! I am so stoked- I have our produce bowls FULL of options for him :) In addition to being SO delicious, this tortilla soup has got a ton of good veggies for you too! It is definitely 'new year resolution approved' :)


I have been dying to make Chicken Tortilla Soup soup lately and this soup was absolutely what I was hoping it would be. It was so satisfying. This soup has it all; it's substantial yet light... it has got the hardy nutrition in all of it's ingredients yet it's all steeped in a light broth. Even though it's perfect to warm up with soup in the wintertime, this one would be appropriate no matter the season or the weather since it includes lots of refreshing elements as well. Lime juice, cilantro, and sweet corn inside the soup offer a light complement to the hardiness of the meat and beans, while the avocado, onion, and other toppings add additional coolness to contrast the warmth of the mexican flavors.


Ingredients (yields 5 big bowls):
  • 1 Onion, diced 
  • 1 Red Bell Pepper, diced
  • 1 Tablespoon minced Garlic (about 3 cloves)
  • 4 Chicken Breasts (or about 3 cups shredded from a whole chicken)
  • 6 cups low sodium Chicken Broth
  • 1 can Diced Tomatoes with Jalapenos, NOT drained
  • 4 Tablespoons Tomato Paste
  • 1 can low sodium whole kernel Corn, drained
  • 1 can low sodium Black Beans, rinsed and drained
  • 1 cup Cilantro, roughly chopped
  • 1/4 cup Lime Juice
  • 5 corn tortillas, cut into little strips
  • Olive Oil
  • 3 teaspoons Mexican Seasoning (you can use my seasoning blend *(see below), or a Taco Seasoning Packet, or just plain Chili Powder or WHATEVER Mexican seasoning you like) 
Topping Ideas: 
  • Chopped Cilantro, Diced Avocado, Diced Tomatoes, Shredded Cheddar Cheese, Shredded Monterey Jack Cheese, Queso Fresco, Sour Cream (or NF Plain Greek Yogurt), Lime Wedges, Diced Red Onion, Crumbled Tortilla Chips
*My Mexican Seasoning Blend: 1 Tbsp Chili Powder, 1/4 tsp McCormicks Seasoning Salt, 1 tsp Garlic Powder, 1 tsp Paprika, 1 tsp Cumin, 1/2 tsp Onion Powder, 1/8 tsp *Cayenne (*optional if you don't like spicy) 
...this will make enough for this recipe, plus some leftovers to use for tacos or for the next time you make this tortilla soup


(If you are using a whole cooked or rotisserie chicken, you can disregard this step and skip straight to sautéing the veggies).
Preheat oven to 400 degrees Fahrenheit. Place chicken breasts in a resealable plastic bag with a healthy drizzle of olive oil- seal bag and work with hands to coat chicken with oil. Use tongs to place chicken breasts out on a foil-covered baking pan. Sprinkle tops with 1 tsp seasoning. Bake 10 minutes, then flip chickens and sprinkle other side with 1 tsp seasoning- return to oven for another 10 minutes or until cooked through. Shred chicken with 2 forks- pulling with the grain of the chicken fibers.


Sauté Veggies: 
Heat some oil in a large pot over medium heat to sauté the onion, bell pepper and garlic until onion is translucent and slightly browned (about 5 minutes or so). Then add 1 tsp of seasoning, continue to sauté for another minute or so.


Add the seasoned shredded chicken breasts (or 1-2 tsps seasoning with shredded chicken from a whole cooked chicken). Stir together in pot.

Add 6 cups chicken broth, one can of tomatoes w/ jalapenos (plus all liquid from can), tomato paste, drained corn, and drained black beans. Stir and allow to simmer over medium heat for 10-15 minutes.

After your soup has simmered. Turn off heat, stir in the lime juice, cilantro, and tortilla strips.


Serve hot

And don't forget the toppings! 

The avocado adds a cool creaminess -both in texture and flavor- that is superb with the warmth of other flavors in this soup. A topping of cilantro adds a sharp freshness. A dollop of sour cream or Greek yogurt could also add some coolness to compliment this soup and could be stirred in with some cheese to make your bowl creamier and thicker if desired. Red onion would also add some fresh crispness, and crumbled crunchy tortilla chips are an absolute must!

'Tortilla Soup Surfer' story: 
I'm sure every boy who plays video games has dreamed up his own game. Well our friend, Trevor, actually got that dream to come to life. He works for a creative design & development company called 'JLoop'.  Recently, JLoop decided to develop their employee's dream into a real game. Trevor's game is called "Tortilla Soup Surfer". Search for it in the app store of your smartphone or iPad/tablet. The object of the game is for you to help the veggie 'surfers' in the bowl of tortilla soup to score as many points as possible before they have to escape from the bowl... or else they are slurped up for dinner!  :)