Saturday, February 26, 2011

Mama's Lasagna


This is my mama's lasagna. Our family grew up with this as one of our favorite dinners, and it continued to be one of my favorite comfort foods to cook when I went away to college. Now, it is one of Peter's favorites that I get to cook for him! I have only made a few minor alterations to the original version I was given. My mom and my dad are VERY different when it comes to their food preferences. My mom enjoys healthier foods, and my dad prefers the 'fully-leaded' versions. However, this lasagna is the PERFECT balance. Mom figured out how to make some easy, healthy substitutions that taste great, and Papa still gets his meaty, cheesy, delicious lasagna. 


Recipe: 

  • 1/2 lb (1/2 16 oz. box) Lasagna Noodles (you can use whole wheat pasta to make it even healthier), cooked & drained
  • 1 lb lean ground Turkey (instead of red meat)
  • 16 oz. shredded Mozzarella Cheese (low moisture- part skim for lower fat content)
  • 16 oz. fat free Cottage Cheese (instead of ricotta-- if you're not a cottage cheese fan, DON'T WORRY- this does not taste like cottage cheese and you won't even know it's there! For proof, Peter can't stand cottage cheese, but loves this lasagna.)
  • 2 eggs (remove one or both yolks to reduce cholesterol)
  • 1 jar of Red Sauce, or 1 batch of homemade pasta sauce
  • Parmesan Cheese for topping (about 3/4 cup)

**Nutrition Noteworthy: Among cheeses, part-skim mozzarella, nonfat cottage cheese and parmesan cheese rank as some of the best for being lowest in calories, fat, and cholesterol. Part-skim mozzarella and parmesan also rank fairly high for their calcium levels. However, all cheeses are generally high in sodium, so proceed with caution (especially if you have high blood pressure, heart conditions, or compromised kidney function.)


While your noodles are boiling, brown your ground turkey in some extra virgin olive oil.

When the meat is browned and cooked through, add the red sauce and let simmer. (optional: I also added 2 chopped zucchinis and a couple good handfuls of spinach leaves into the sauce as well. It may look like a LOT of spinach, but it will wilt down to nothing in the sauce. This is a great way to sneak in some veggies for your picky eaters.) Stir all together and let simmer over medium-low heat.
**Nutrition Noteworthy: Spinach is a nutritional powerhouse; it is a GREAT source of Iron, Calcium, Vitamins C & A, and Folic Acid... in addition to many other vitamins and health benefits. 


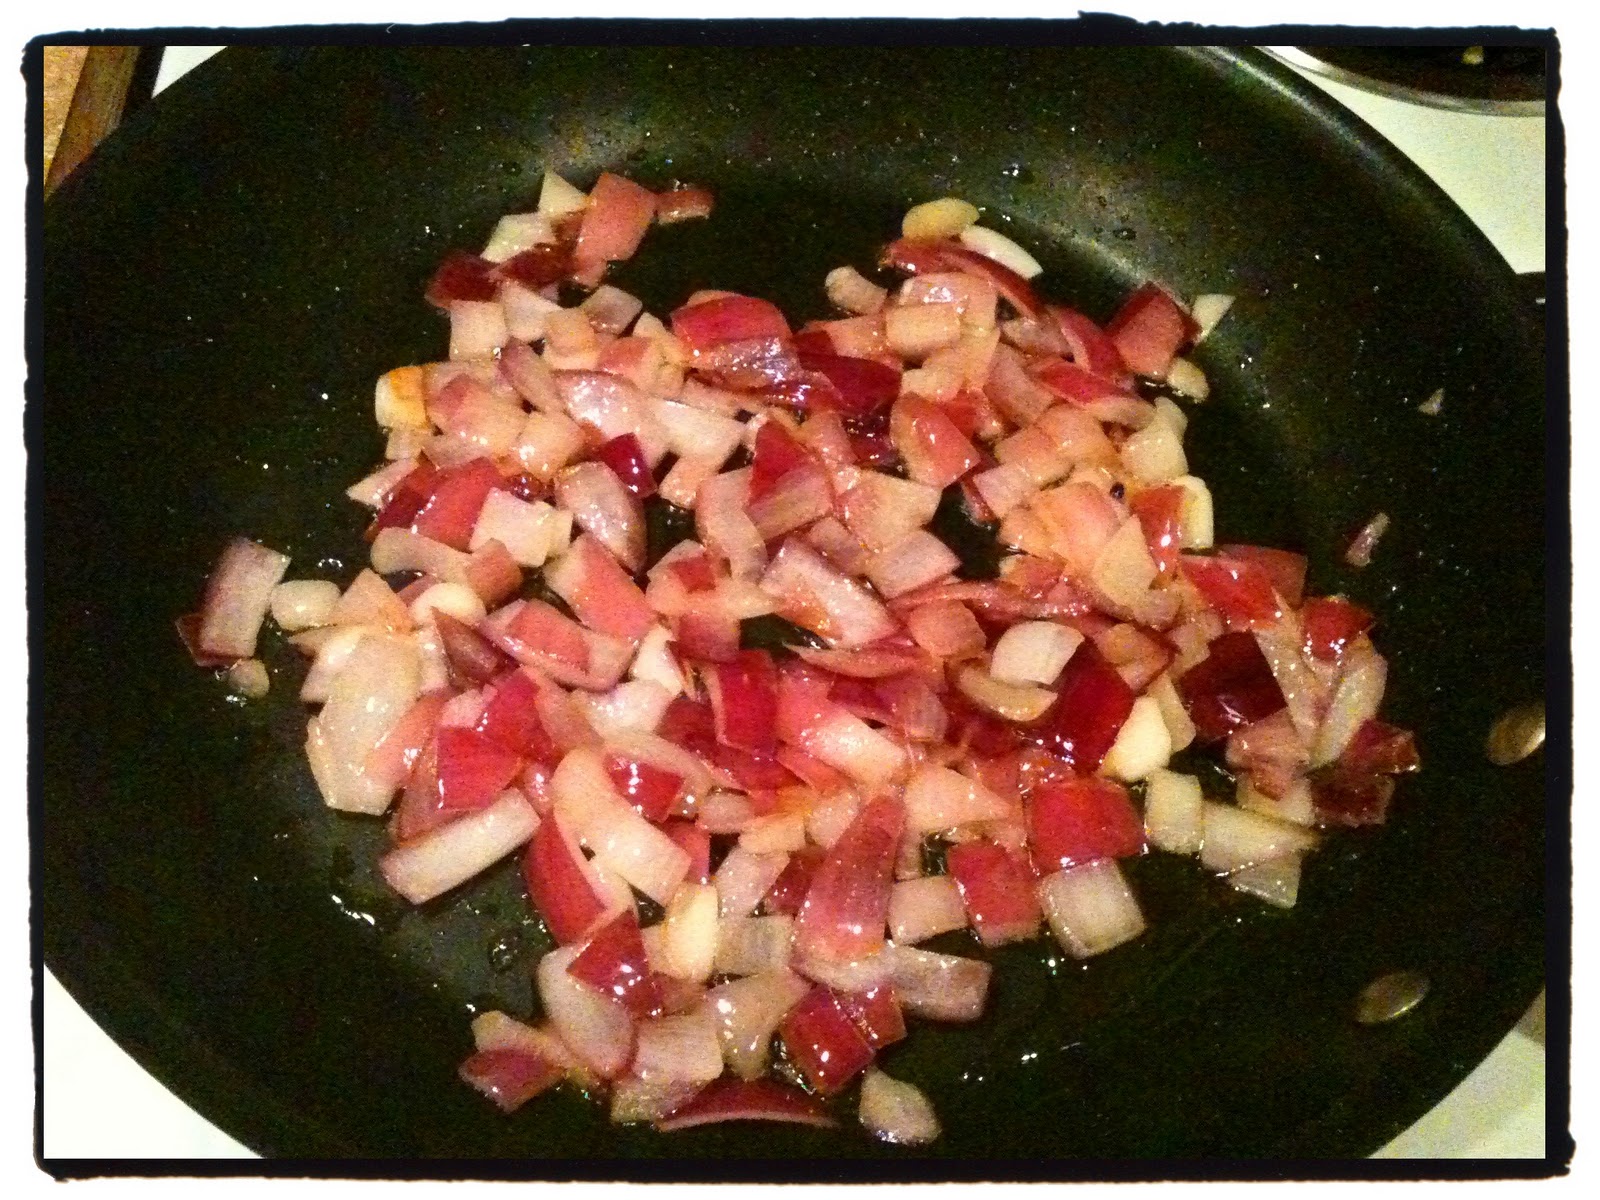
See how much the veggies have reduced!


 While your sauce is simmering, mix together the cheesy filling: Cottage cheese, mozzarella, and the 2 eggs.

Helpful Hint: Spread some of the red sauce and/or some extra oil on the bottom of the pan before you start layering, or else the noodles on the bottom will bake hard onto your pan, and it won't scoop out nicely.

Then drain your cooked noodles and start layering your ingredients as follows: 

  1. Noodles
  2. 1/2 of cheesy mixture
  3. Noodles
  4. 1/2 of red sauce
  5. other 1/2 of cheesy mixture
  6. Noodles
  7. other 1/2 of red sauce
  8. Top with parmesan


 Bake at 350 degrees F for about 45 minutes or until it is heated all the way through and the parmesan is golden and bubbly on top.
Also, let it sit for about 5-10 minutes before you try to cut in to it. This will let it firm and set up. Otherwise you will try to serve it onto a plate and it will run apart kind of soupy. Trust me, it will still be hot, but it will look much nicer for serving if you do wait a few minutes.

Leftovers pack easily, and reheat well in containers to take to the office for lunch.
It also freezes well; I like to cut leftovers into individual serving sizes and freeze the portions in ziplock baggies. Then, if Peter is home alone, or if I don't have time to make dinner, there is always some homemade lasagna ready to step up to the plate!

Wednesday, February 23, 2011

Mediterranean Pasta Salad


My niece, Kinley, had a picnic party at the park to celebrate her 2nd birthday this month. I was in charge of bringing a pasta salad side dish. This is somewhat of a difficult task in our family, only because my Aunt Diana Lu is the queen of awesome pasta salads. I played around with different ingredients until I found a combination that I was happy with. I think even Aunt Diana Lu would approve of this one :)


A lot of pasta salads use mayonnaise as the base of their creamy dressing, but because this was for an afternoon picnic and I wasn't sure how long it would be sitting outside before we ate it, I wanted to avoid any mayo in this one. Also, as an added bonus, the salad would be healthier without the addition of mayonnaise. The end result was a very flavorful but light dressing. The feta even mixed well with the dressing to create a little creamy texture in the absence of mayo :) I loved it and I hope you enjoy it too!


Recipe List:


Salad Dressing:


  • 1/2 cup Extra Virgin Olive Oil
  • 1/2 cup Red Wine Vinegar
  • 1 1/2 tsp minced Garlic
  • 1/2 tsp Black Pepper
  • 1/2 tsp Salt
  • 2 tsp Sugar
  • 1 tsp Lemon Juice
  • 1 1/2 tsp Honey


Salad Ingredients:


  • 2 lbs of Farfalle or 'Bow Tie' pasta, cooked and cooled (I like bow tie pasta for pasta salad, but you can use 1 lb of whichever pasta you prefer)
  • 1 cup Marinated Artichokes, roughly chopped
  • 1 Red Bell Pepper, diced
  • 1 small can (4 oz) of sliced Olives, drained
  • 1/2 small Red Onion, diced
  • 6 oz. Sundried Tomato & Basil Feta Cheese (regular Feta would be just fine too)
  • 1 pint (2 cups) Grape Tomatoes, halved


Mix together the salad dressing ingredients with a whisk.


Add all of your chopped/prepared salad ingredients with the cooled pasta in a large bowl, and toss together with the salad dressing:


 Transfer to your serving bowl and enjoy!
This is also a great dish because you can make it the night before. Just cover your bowl with plastic wrap and store in the fridge overnight. This will let the flavors marinade together even more, and give you more free time on the day of your event to make more dishes or set up for your guests.


During the birthday party, a very smart ice cream man circled his truck around the park with his luring music calling out to all the children. Kinley LOVES the ice cream man. In fact, sometimes she hears music, whether it's the ice cream truck or not, and she yells with excitement, "Ice Cream Man!" Of course, that was the drill at the park this day. On our way running over to the ice cream truck, she told me that she wanted 'pink ice cream'. I asked the man for his most pink ice cream, and he handed me a 'pink panther'.
 Isn't she SO cute eating her pink panther ice cream.


And while all the children played with their friends at the park... so did the men:

Thursday, February 17, 2011

Best Banana Bread


This is the all-time best banana bread recipe. A good family friend of ours made banana bread for my family when I was a little girl, and it was SO good that my mom asked her for the recipe; this is the only banana bread recipe that we have made since then, and that is the recipe that I am sharing with you today. And the kicker is- this friend doesn't even remember giving us the recipe... in fact, she doesn't even recall ever making banana bread! I have only made a few additions to the original recipe: Vanilla, an extra Banana, and the Cinnamon-Sugar crust...

Ingredients: 
2 cups Bisquick
1 cup Sugar
2 Eggs
2 Tbsp Butter, slightly melted
1 tsp Cinnamon
1/4 tsp Nutmeg
1 tsp Vanilla
Cinnamon-Sugar mixture for sprinkling
4 medium-large, over-ripe Bananas 
**the 'over-ripe' is key here; if you get squeemish at the thought of black bananas, please let me put your mind at ease; when bananas turn black, it is simply the carbohydrates ripening and converting to sugar. This makes the bananas sweeter for your bread. Carbohydrates in starchy produce ripens into sugars at colder temperatures. This is why bananas turn black when you keep them in the refrigerator. This is also why starchy produce (like potatoes and certain squashes) are in season in the winter. When the weather turns cold, the starches fully develop and ripen to sugars so that they are ready to eat.

This is the easiest recipe prep I could share; place everything in a bowl and mix with an electric hand mixer. You could also place it all in a blender and let it whirl until well mixed:

 Then spray a bread loaf dish and swirl a cinnamon-sugar mixture around until all the surfaces are well coated, like this: 

Pour the banana bread batter into the prepared loaf dish, and finish with another light sprinkling of cinnamon-sugar over the top:

Cook at 350 degrees F for 45-50 minutes, or until a knife is inserted a few inches into the middle of the loaf and it comes out without any wet batter. It is a dense bread, so be sure to check the middle to be certain that it is cooked all the way through before you take it out of the oven.

 I have found that if your oven tends to cook very quickly (like mine) and the bread consistently comes out too doughy in the middle, then lower the temperature to 325 degrees F and lengthen the cooking time to about 65-75 minutes. You just have to know your oven :)

 Beautiful! Warm and soft inside, with a sweet crunchy outside!

If you are someone who does not prefer the 'butt' of breads... this bread will change that. The delicious crust created by the cinnamon-sugar coating is irresistable! The first end slice, fresh out of the oven, is the most desirable:

If it lasts beyond the first day, I like mine toasted with a light spread of butter, like in the picture below. (You can also see Peter in the background enjoying his breakfast slice of banana bread along with his regular morning routine: ESPN top 10).


Additional Options:
This bread is great with some golden raisins or chocolate chips mixed into the batter before it is poured into it's baking dish.

Tuesday, February 15, 2011

Monkey Pull-Apart Bread


For Valentine's day, Peter made dinner for me! He made a beautiful meal! So I got that extra time to come up with a fun treat to make for him... Monkey bread! It was perfect for Valentines because I could make it in a heart-shaped bundt pan, instead of the normal circle bundt pan. Also, it was fun because you can just eat it with your fingers, so we could sit on the couch and watch a movie together while we had fun pulling it apart. AND, any leftovers become a breakfast treat the next morning... what, it's the same as a cinnamon roll for breakfast!


I would love to make this with a homemade dough, but that will have to wait for another post; this night I wasn't really allowed in the kitchen because Peter wanted dinner to be a surprise. Thus, this version will be with a pre-made dough. So this one is quick and easy. 


Ingredients: 

  • 2 loaves of Bridgford 'Ready-Dough', defrosted (sold in 3 packs, in the freezer section of the supermarket) ...you can use all 3 loaves of bread if you want more, but be sure to bump up the amount of butter to 1 1/2 sticks if you do so.
  • ½ cup butter (1 stick), melted
  • Cinnamon sugar mixture (4 tsp cinnamon mixed with 3/4 cup sugar)

*Chopped pecans or walnuts (optional)
*Glaze (optional): (1 Tbsp melted butter, 1/2 C powdered sugar, 1 Tbsp milk, 1 tsp. vanilla extract) 

Preheat your oven to 100 degrees F, then set up a little assembly line:
1. Roll the defrosted dough into little balls (smaller than a golf ball, but bigger than a large marble)
2. Dip the balls into the melted butter. 
3. Roll them in the cinnamon sugar mixture.
4. Place each ball in a sprayed bundt pan as you go. No need to pack them in- just layer them gently, as little spaces are necessary to give them room to rise and pull apart later. 
**(Optional: if you like nuts or the added crunch, try sprinkling in chopped pecans or walnuts into the pan before you start filling with dough balls. And/Or mix some pecans/walnuts throughout the layers of dough balls ). 
(here is my assembly station)

After you are done, turn OFF the oven, pour any extra melted butter over the dough balls and sprinkle with a little leftover cinnamon-sugar mixture. 
 (Don't worry if it looks like there is not enough dough; it WILL fill up more later while it rises, and again even more when it cooks)

Place pan in the warm and OFF oven and let them rise about 30 minutes or so. (perfect for while you are eating dinner). 

Then take the pan out, and let it sit somewhere warm or on top of the stove while you preheat the oven to 350. 
(See how much it has grown and puffed up already!)

Then cook it for about 20-25 minutes, until it looks golden and puffy like this:


Then invert on a plate and have fun pulling apart this sweet, sticky treat! 
**Caution: hot sugar BURNS, so maybe let it cool just a minute or so before you start pulling at it :)


ALSO, If you would like, you can drizzle a little glaze over the top and add a sprinkle of powdered sugar to dress it up even more (as if it needs more dressing up... or more calories :)

Because Peter brought home these gorgeous flowers:

and made this delicious meal:

and set this beautiful table: 

...I figured he deserved the extra glaze ...I'll just blame it on that- not that I wanted it myself or anything :)

Sunday, February 13, 2011

Vodka Pasta- a perfect pink sauce for Valentines!


Okay, vodka sauce is my favorite pasta sauce. I fell in love with it the very first time I tasted it at a little Italian ristorante in Dana Point, 'Mario's By The Sea'. With Valentine's Day just around the corner, maybe you will fall in love too... with the sauce I mean. It is so pink, and pretty, and perfect for the occasion! It is a great alternative to the usual red sauce for a special treat once in a while. This vodka sauce is  somewhat sweet with its sauteed onion, sweet basil, creamy background, and a good dose of cheesy parmesan... all very complimentary counterparts to the typical tomato sauce.


Recipe List:
  • 1/2 Onion, diced
  • 2 cloves Garlic, minced
  • 1/4 tsp Red Pepper Flakes
  • 1/2 cup Vodka
  • 1 (28-oz) can of Crushed Tomatoes, OR 3 cups or so of your own homemade red sauce
  • 1 cup of Half & Half (or a little more as preferred to achieve your desired pinkness :) -In a normal Vodka sauce recipe, this would be heavy cream, but I have substituted it for the (how do I say this nicely) less unhealthy half & half, haha.)
  • 1/2 cup of grated Parmesan Cheese, plus extra for serving
  • 1 lb of pasta (I like to use Penne Rigate, but any pasta you like will do)


Start by sauteing the onion in some extra virgin olive oil over medium-low heat for a few minutes (while you mince your garlic, and start boiling your pasta):


Then add the minced garlic and the red pepper flakes, continue to saute over medium-low heat for another minute:


Stir in the Vodka and let that simmer for about 2 minutes before you add in the crushed tomatoes and basil. Let this all simmer together for a minute:


Now, stir in your half-n-half and watch the pan turn to a beautiful pink color! :) Bring it to a slight boil, then turn the heat to low and let this sauce simmer together until your pasta is done cooking.


When the pasta is al dente, drain the noodles, then stir the parmesan cheese into the sauce


Then combine the sauce with the hot pasta and.... mangia! (or 'eat', in Italian!)
 Here are two different ways you can plate up this pink sauce :)


Don't forget to top it with a little extra sprinkle of parmesan cheese :) (If you're serving this for Valentine's Day, you can use a little heart-shaped cookie cutter and just sprinkle parmesan inside the heart so that you have a sweet design for your special night. I tried to do it tonight, but I couldn't find my cookie cutters. -Also, I think this would work only if you ladle the sauce on top of noodles (like picture #1 above) before you stir it all together (like picture #2 above)).


Also, I would have garnished with a few leaves of fresh basil, but my basil plant passed away. Therefore, I had to use another herb to garnish here that is commonly in the red sauce; thyme! But, if you have some fresh Basil, that would make a great garnish here! Garnish should give a little hint as to the flavors and herbs actually used in the dish.
I also think that it's important to garnish, because people eat with their eyes first. Plus, it's so fun to dress up your dishes, especially if it's a meal for entertaining guests or a special event, like say... Valentine's day! :)


Alterations:
  • I love, love, love sliced zucchini in this sauce. Unfortunately for me, I married a zucchini-disliker. Cut a zucchini in half lengthwise, and then slice them so that you end up with a bunch of little half-moon cuts; steam them for 30 seconds and stir them into the sauce to let it simmer after you have added the cream. 
  • You can also add little broccoli florets too. I have done both zucchini and broccoli together and it is great!
  • Serve with some diagonally cut grilled chicken, so you can keep the elegance while providing some protein
  • Accompany with warm, toasty bread... mmm!

Friday, February 11, 2011

Stuffed Bell Peppers


This night, I had every intention of making something completely different for dinner. I had a whole menu planned, but plans changed after I browsed through the grocery fliers that had come in the mail. When I saw all the beautiful produce items featured in the mailer, I decided that I would make a recipe to  use those ingredients instead. These beautiful and SUPER HEALTHY stuffed bell peppers were the result.


Recipe List (for 2 large servings):
  • 1 large Red Bell Pepper (or 2 medium Bell Peppers)- Our bell peppers weren't that big, so it needed the extra half of our second medium bell pepper... Peter didn't complain :)
  • 1/2 medium Yellow Onion, diced
  • 1/2 lb lean Ground Turkey
  • 1 clove Garlic, minced
  • 2 tsp Paprika
  • 1 tsp Lemon Pepper
  • 1 cup Rice, precooked
  • 4 tbsp (or 1/4 cup) of either tomato sauce or tomato paste
  • 1 large Roma Tomato, diced

First, preheat your oven to 350 degress F. Then, saute your diced onion in extra virgin olive oil:


Then add the ground turkey, minced garlic, and seasonings:


When the turkey has browned and cooked through, add the rice and tomato sauce/paste and mix well:

Then gently mix in the diced tomato:


Now grab the bell peppers that you have cut in half and deseeded:

Stuff them with your rice mixture:


Top with some parmesan cheese:


Fill a shallow oven-safe dish or a jelly-roll pan with water until it is about 1/4 inch thick. Stand your stuffed peppers in the shallow water. 


Bake in a 350 degree F preheated oven for 25 minutes or so, until the bell pepper looks soft and sweet and the parmesan is golden on top:


Plate it up with a side that will compliment these tasty and nutritious stuffed peppers


Alterations: 
  • I have seen some other versions where the bell pepper halves are blanched before they are stuffed. This will give them a little head start on the cooking process and will result in even softer and sweeter peppers. I might recommend this for those who aren't big bell pepper fans (I used to not be a bell pepper fan at all... a seemingly cardinal sin as a Nutritionist; when I was in college, all the nutrition majors would show up to class with water bottles and baggies of home-packed snacks: celery sticks, carrots, and bell pepper slices... I wanted to fit in, but I wasn't a bell pepper fan yet). 
  • You can also follow this same recipe, but use it to make stuffed zucchini or stuffed tomatoes!
  • You can make this healthy recipe even healthier by substituting brown rice for white rice :)