Saturday, January 29, 2011

Someone's Mama's Best Belgian Waffles


I never really cared much for the cafeteria my freshman year of college. Instead, since my roommate and I were both Nutrition majors, we would go together to use our meal plans to buy healthier items at the campus market and stock up our mini fridge. However, if I ever did go to the cafeteria, it was usually for an irrational late night splurge- either Mac n cheese, Belgian waffles, or Ben & Jerry's ice cream. I loved the waffles because you could pour the batter yourself into the Belgian waffle flipper and cook it just to your liking. This is how I fell in love with Belgian waffles.


But what makes them different from regular old 'waffles' that I would like them so much more? Well, Belgian waffles have a much lighter and fluffier batter, traditionally from yeast, but could also be from baking soda or other leaveners. This creates the contrast of a super soft and light inside with the sweet and crispy outside. There are few things worse than a soggy, flimsy waffle. Also the fluffy volume of the Belgian batter allows it to fill out the deeper pockets of the Belgian waffle iron. No wonder I loved them so much, lightly crispy with a tender middle AND I could fit more syrup, strawberries, and whipped cream in its deep pockets! So this is their trick to the freshmen fifteen!


After researching numerous recipes online, this one stood out to me because it was a very successful recipe from the writer's mom's kitchen. I've learned that any recipe that begins with some variation of, 'This was my mom's recipe...' is usually a winner. Plus, she calls the waffles 'delectable delights'!! It was meant to be! I have made these several times now, and trust me- these 'delectable delights' do not disappoint!


Ingredient List (This makes 4 on my very big waffle iron, but maybe 6 on a regular sized one?):
2 1/4 tsp dry Yeast (or 1 pkg)
2 cups warmed Milk
4 Eggs, separated
1 tsp Vanilla
2 1/2 cups Flour
1/2 tsp Salt
1 Tbsp Sugar
1/2 cup melted Butter (or 1 stick)


1. In a glass measuring cup/bowl, warm your milk in the microwave and stir in the yeast.
**Normally, when I am baking with yeast, I sprinkle some sugar in warm water because the yeast needs warmth and nutrition to grow. But, since this recipe uses milk, milk already has natural sugars, galactose and lactose. In fact, the galactose is a more simple form (monosaccharide) for the yeast to utilize than the white sugar (sucrose, a disaccharide) that I would normally add.


2. In a big bowl (because it will rise later) Beat egg YOLKS only, then add and mix in the milk/yeast mixture along with the vanilla:


3. In a separate bowl, combine the flour, salt, and sugar, and add-n-mix that into the wet mixture:


4. Now add the melted butter (can melt it in the microwave in the same glass dish you used earlier)


5. In a separate bowl, beat the egg WHITES only until they are firm peaks. Firm peaks should stand up on their own like this one in my bowl:


6. Then gently fold them into the other mixture until it is well incorporated but not overworked. Can you just see how fluffy it is!

7. Now, just let it sit in a a warm place and rise for about 45 minutes or so (I like to preheat my oven to 100 degrees F, then turn it off and let my batter rise in there).
**This makes it another great Saturday morning recipe... while it rises, you have the perfect opportunity to take a walk to the coffee shop and go for a morning stroll.
What a beautiful morning it was today; and what a pleasant stroll it made.

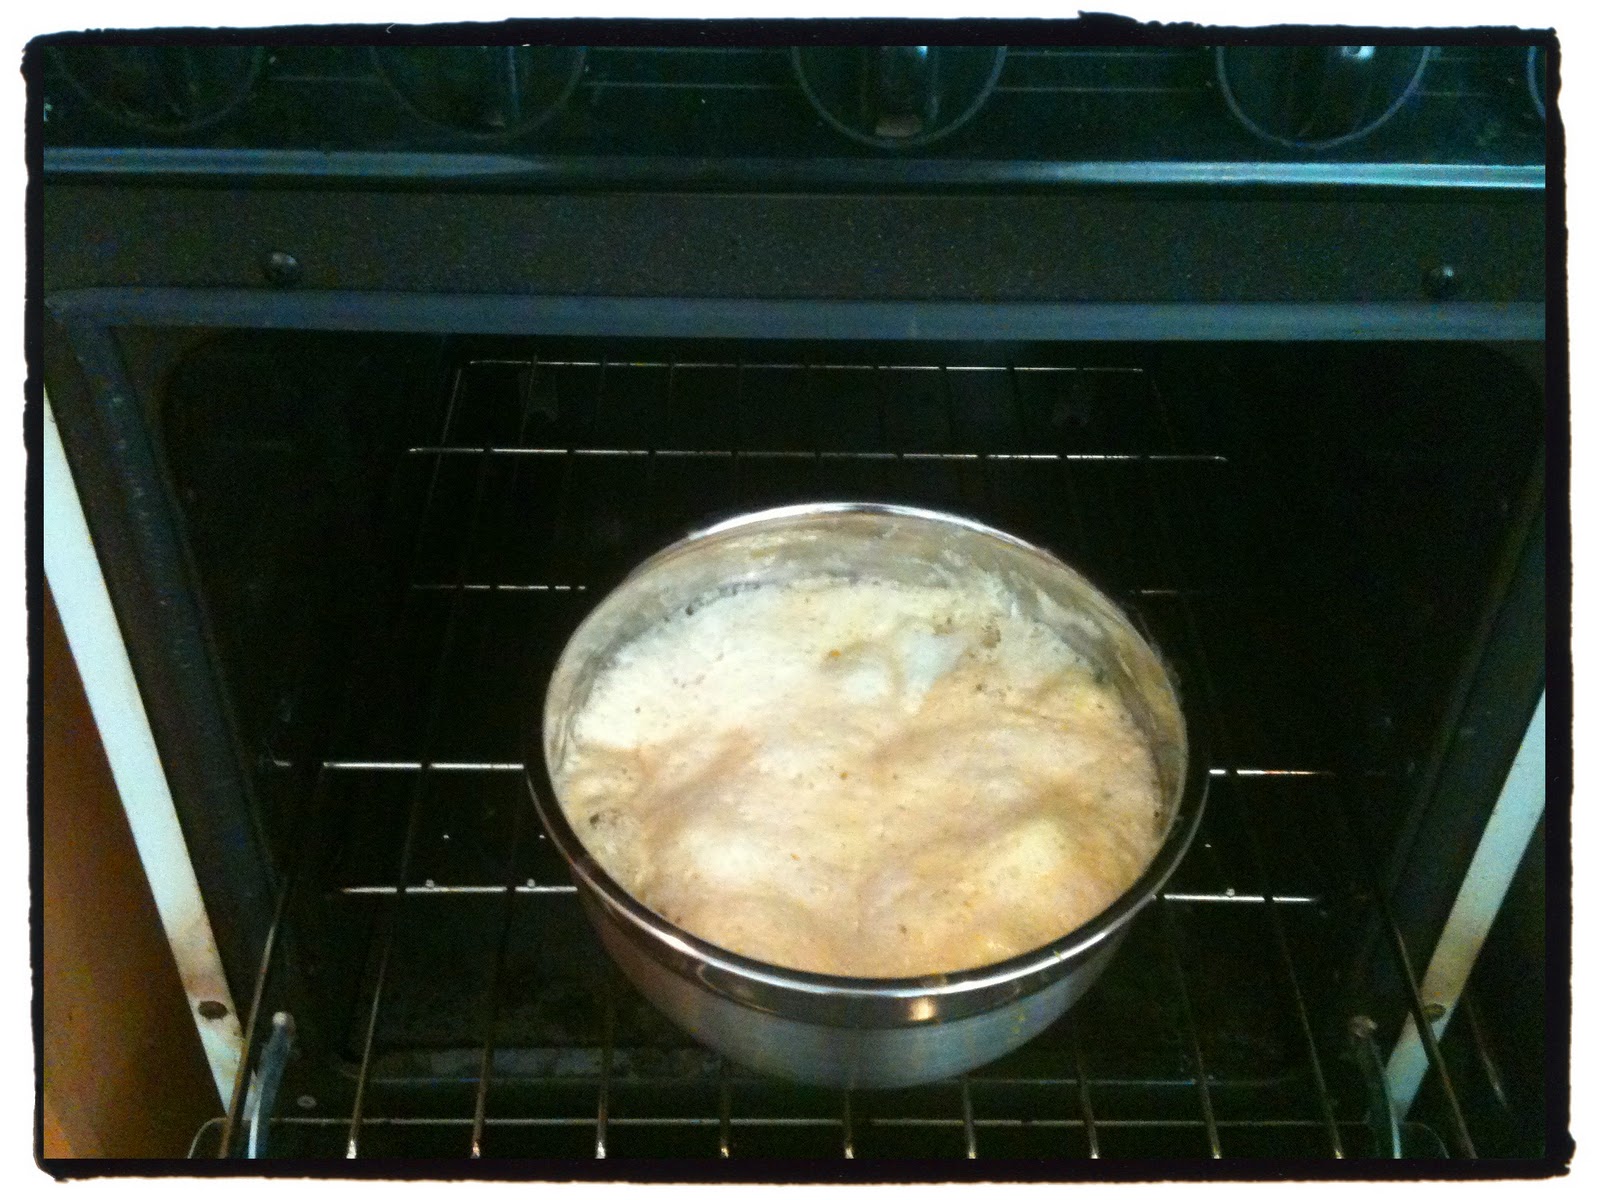
45 minutes later, look how it has risen almost to the brim of the bowl!

Now you are ready to waffle! Set your waffle iron to your desired doneness... See how I have mine set to '4' out of '5'- that's because I like mine very crispy on the outside, but don't worry it still stays very soft and light on the inside :) 
Pour in your batter, and close the lid. See that little red light? Do NOT lift the lid until the green light comes on... waiting here might be the hardest part of making waffles. 

it's GREEN!...

Plate it up with your favorite toppings and enjoy! I love mine with just syrup, strawberries, and whipped cream... mmmmm. 
These strawberries were from Farmers Market back when they were in season. If you are like me, and you buy a whole flat because you get so excited about them, but then can't eat them all in time- just wash and cut them up and freeze them in a tupperware container. Then you can defrost fresh strawberries whenever you want them, even when they're not in season :)
Oooooh, those deep pockets hold that dark, buttery, maple-y syrup!


If you have any survivors, you can freeze them in ziplock baggies; They toast up very nicely on work mornings for a delicious breakfast in no time at all.

Friday, January 28, 2011

Oatmeal Chocolate Chip Pizookie to Celebrate!


I've been blogging for just 2 and a half weeks, but today marks a very special day; Today we reached my first milestone goal of 1,000 page views. Thank you everybody! Tonight, Peter and I celebrated this special occasion with 'pizookies'! Normally I make regular chocolate chip cookie dough for pizookies, but tonight Peter requested oatmeal chocolate chip, and since he's my number 1 supporter, oats it was!


For oatmeal chocolate chip cookies, I simply use the recipe that's under the lid on the Quaker Oats canister. Last year, I tried a bunch of different oatmeal chocolate chip recipes, but I came right back to this one (if you have a killer oatmeal chocolate chip recipe, please do share! :). However, there are a few details that aren't specified in this recipe that I would like to clarify:


1. For any cookie dough requiring brown sugar, I always use dark brown sugar. This is because molasses is what puts the 'brown' in 'brown sugar', and the more molasses, the darker the brown. This translates into cookie chemistry because molasses is what makes the cookies nice and chewy. Now, if you are one of those people who like big, cakey, fluffy cookies, you can disregard the dark brown recommendation--- but if you prefer big, flat, chewy cookies then give the dark brown a whirl.


2. Their original recipe says that the salt is optional... not in my cookie bowl! I think that any sweet recipe needs a little salt to bring out the sweetness. The sweet-n-salty duo compliment each other so well. It is like the symbiotic relationship between chocolate and coffee. Just like a little hint of coffee brings out chocolate flavor, a little pinch of salt makes the cookie so much more flavorful. If you're worried about  making the dough too salty, don't worry, just a half of a little teaspoon won't overpower 4 dozen cookies, especially if you use unsalted butter. If you're using salted butter, like I always do, try starting with 1/2 the salt (just 1/4 teaspoon for this recipe).


3. The original Quaker recipe uses 1 cup of raisins; I have changed it to 1 cup of chocolate chips. It is funny how one little tweak can change a cookie that I don't care much for, into one of my favorites! I also think that 1/2 cup of chopped walnuts would be another great addition if you consider yourself a fellow nut appreciator. Since I am one, I like them in my cookies. (Literally, freshman year of college everyone's dorm door stated their name, their abbreviated major, and their home town. Since I was a Nutrition Major, I was introduced as "Megan, the NUT., from Dana Point"... but so was my roommate, Serena. At least we could both be nuts together!) 


Of course, you can choose whichever fixin's you prefer.


Okay, here's the recipe (yields about 4 dozen moderate sized cookies):
1 1/2 sticks Butter, softened
3/4 cups Dark Brown Sugar, firmly packed
1/2 cup Granulated Sugar
2 Eggs
1 teaspoon Vanilla
1 1/2 cups Flour
1 teaspoon Baking Soda
1 teaspoon Ground Cinnamon
1/2 teaspoon Salt
3 cups Oats (quick cook, or old fashioned), uncooked
1 cup chocolate chips or raisins (optional)
1/2 cup Walnuts (optional)

Preheat oven to 350 degrees F. Mix together the softened butter, sugar, eggs, and vanilla:

Whisk together all dry ingredients, and add them into your bowl to mix with the wet ingredients:

Then, stir in the oats and chocolate chips: 

Now just drop a few spoonfuls of this dough into a pie tin. I like to use this tin that came from 'the Apple Farm' -a cute little bakery and hotel in small central coast town of San Luis Obispo, somewhere so dear to my heart. This tin is probably from one of the many boysenberry pies I was required to bring home to my dad everytime I came home from college. You can also see that it's seen its fair share of pizookie nights, hehe.
You don't need to smother dough all over, just a few little spoonfuls will bake out and fill the pan nicely.

Set your timer to 10 minutes (I have a little old fashioned oven that doesn't have a timer, and cookies bake so quickly that I forget to take them out while I'm cleaning up... good thing Rose got me this cute retro timer to match my kitchen- Thanks Rose! No more burnt cookies! Peter is thankful too :)
10 minutes later... it's ready to be topped off with a generous serving of vanilla ice cream! No need to wait for the cookie to cool, the best bites are where the ice cream melts into the warm, chewy cookie. mmm...
(that ice creamer scooper was a gift from one of Peter's little brothers, one of 4 boys, who wants Peter to know that he's got his big brother's back. Don't worry James, I got it loud and clear- I will try my best to see that Peter won't go deprived of ice cream)

So delectable that you can even read the Apple Farm logo again :)

You might be wondering what happened to the rest of the cookie dough... No, we didn't eat it all. I learned a little trick from my sister in law, and now I do this every time that I make cookies. It's genius!

Scoop out the rest of the dough into individual cookie portions, and let them firm up for a few minutes on a tray in the fridge:
Then load them into a ziplock baggie and into the freezer. Next time you have unexpected guests, or run out of time to make a dessert, (or when your husband can't wait for dinner, sheesh!), you'll have a few batches of artillery ready to go! No need to buy grocery store cookie dough.

Thursday, January 27, 2011

Sweet n Sour Chinese Chicken Stir Fry


The Chinese New Year is just a week away, and this recipe will be a great way to celebrate. This stir fry makes for an easy Chinese 'take-out' dinner... but at home! It was so fun to bust out the wok and create chinese food in my own kitchen. For this dish, I used a batch of a slightly hot 'sweet n sour' sauce, but you could use any sauce you desire. No matter what the sauce, this chicken and broccoli stir fry is quick, healthy, and chop-stick-lickin' good!


Ingredients (for 3 generous servings): 
2 Chicken Breasts (I used 2 large chicken breasts worth of chicken cutlets because they were easier to cut into uniform pieces)
1 Large Head of Broccoli (or 2 small heads)
1/2 Medium Onion, diced
1/2 Red Bell Pepper, diced
2 Tbsp vegetable oil, divided
1 batch of Stir Fry Sauce

1. In your wok, heat 1 Tbsp vegetable oil and saute the diced onion and bell pepper:

2. While your onions and peppers are sauteing, lightly steam your broccoli. If you bring your pot of water to a roaring boil and then add the broccoli, it will really only take 1 or 2 minutes to steam them. Seriously, you don't want to over do it here because they will get cooked a little bit more later when added into the wok to stir fry. 
 If they're steamed right, they should get brighter green. If they start to look limp or any shade close to gray or brown... it's a bummer. They're so good when they're bright green and tender but still have that fresh and light crunch to them.  

 3. When your onions and peppers are done, remove from wok. Then heat 1 Tbsp vegetable oil, and stir fry your chicken:
When they have browned on one side, give them a flip and let them cook to browned on the other sides: 

4. When the chicken has cooked all the way through (won't take long since they are little pieces), add all the other ingredients into the wok with the chicken, including the sauce. Stir fry all together for less than minute. 
 

Serve up with some fried rice and enjoy your homemade Chinese 'take-out' 
So colorful and healthy!

Chinese Fried Rice


I have had such a hankering for Chinese food lately! So, I decided that I'd figure out how to make it at home. It was so much fun! And I was surprised at how easy it was to recreate Chinese-restaurant quality fried rice! Also, it didn't use any exotic ingredients, just items that you likely have in your kitchen already. You really should try this at home. 


I think this would be a fun dish to make when you are entertaining, because it is so fun to prepare in the wok and everyone would have a blast watching. Also, the rice is best if you make it the night before and let it cool. HELLO- anything you can make ahead is ideal for entertaining! AND, it is ready so fast that this way you can serve it to your guests right away when it's sure to be fresh and hot! :) Fun to make, fun to watch, fun to eat.  


Ingredient List: 
2 cups precooked, cold rice
2 eggs, beaten
2 Tbsp Soy Sauce
1/2 medium onion, diced
1 cup frozen peas & carrots
1 Tbsp pineapple juice
1/3 cup diced pineapple
3 Tbsp vegetable oil, divided
(**you could add chicken and make this a main course, but I decided to leave my fried rice as a side dish because I served it with a chicken and vegetable stir fry)


In your wok, scramble your eggs and then remove from pan:

Heat 2 Tbsp of the vegetable oil in your wok 
(test to see if it's ready by throwing in a single grain of the rice- if it hisses a little then it's ready). 
Then, add in all the rice and stir fry for a few minutes before adding in 2 Tbsp soy sauce and continuing to stir until it is all mixed in. Again, remove rice from the wok:


Heat 1 Tbsp of the vegetable oil in your wok, and saute your diced onion:

When your onion has become translucent and sweet, add in the cup of frozen peas and carrots: 

When the peas and carrots have heated thru, add in the diced pineapple and 1 tbsp pineapple juice: 

Then invite the rice and scrambled eggs back into the wok:

And stir fry for a couple minutes until everything is mixed well and hot:

Then simply transfer to a serving dish and enjoy while it is hot!

Ni Hao!

Chinese Sweet N Sour Sauce


This is a super easy sauce that provides a little sweetness, a little sourness, and just a hint of spicy hotness. However, you can adjust any of those levels up or down to your liking: 


Here are the ingredients I used: 

  • 2 Tbsp Soy Sauce
  • 1 Tbsp Rice Vinegar
  • 1 Tbsp Brown Sugar
  • 1 Tbsp Honey
  • 1/2 Tbsp Orange Juice
  • 1/2 Tbsp Pineapple Juice
  • 2 Tbsp Chile-Garlic Sauce (This the same as Sriracha sauce but with garlic too, so if you have Sriracha just use that and then also add a clove or two of minced garlic to this recipe)
  • *Optional*: Cornstarch- to thicken sauce to a more glaze-like consistency, if desired.


Just mix all of the ingredients together in a measuring cup so that it's ready to pour into your stir fry :)


Isn't it so pretty! You can see all the fun pepper flakes and its beautiful, deep pomegranate color
**If you want a little extra to serve in a dish on the side, or if you would like it a little thicker in the stir fry, like a glaze, stir in a couple teaspoons of corn starch to let it thicken up.