Showing posts with label Yeast. Show all posts

Friday, August 5, 2011

Oatmeal Bread


I grew up babysitting for the Dean family. The 4 kids were like my little siblings that I never had but always wanted; and Todd & Becky were like another set of parents to me :) I still consider them 'family'. Becky and I were hiking in Laguna Beach a few months back, and we were talking about recipes and baking bread and so on. Soon after, she told me about this wonderful oatmeal bread that was one of her family's recipes. It is sweet and wholesome tasting at the same time. The oats give it that light, nutty, wholesome taste, and the molasses lends to its  dense sweetness :) Mmmmmm! 

On the afternoon that Becky was teaching me how to bake this special bread, I got so excited when I saw there was molasses in it; I LOVE the rich flavor of molasses. Becky laughed and shared a great story...
Becky grew up in Bolivia, and as a kid- molasses was such a treat for her down there. When she was little, she used to go over to a friend's house and they would get spoonfuls out of her friend's mom's molasses jar for a special treat. One day, driving on the narrow Bolivian roads, a large truck overturned and TONS of molasses was spilling out. The driver told everyone to gather molasses if they wished, as it was all spilling to waste! There happened to be a large tupperware container in the back of their car, so little becky got to fill it with molasses. She had died and gone to heaven! ...until she ate herself so sick on molasses that she still has a hard time even smelling it to this day! Luckily though, she still enjoys this oatmeal bread :)


*Nutrition Noteworthy: Molasses is a great source of Iron commonly recommended for those who are anemic.

Recipe (makes 2 LARGE loafs, or 1 Large loaf + 1 Large tray of rolls): 

  • 2 packages (4 1/2 teaspoons) Yeast 
  • 1/2 cup Warm Water (for rising yeast)
  • 1/2 teaspoon Sugar (for rising yeast)


  • 1 1/2 cup Quick Oats
  • 1/4 cup Butter
  • 1/2 cup Molasses
  • 1 Tablespoon Salt
  • 1/4 cup Brown Sugar
  • 1 2/3 cups Boiling Water

  • 2 Eggs
  • 6 cups Flour

In a glass container, dissolve the 1/2 tsp sugar in the 1/2 c. warm water and stir in the yeast. Allow to rise while you mix your next ingredients...


...while your yeast is proofing, combine the Oats, Butter, Molasses, Salt, and Brown Sugar: 
Then pour the boiling water over it, and stir until the butter is melted and all the ingredients are combined: 

 Then crack in the 2 eggs and stir well into the oat mixture. THEN you can finally add in the proofed yeast and stir well: 

 Add the flour in 1 cup increments, kneading until you get a warm, supple, dough ball- almost the same smooth, stiffness as play dough.  
It did not require any more than 6 cups flour.

Here is Amy, the youngest of the 4 Dean kids, buttering all of the baking dishes:

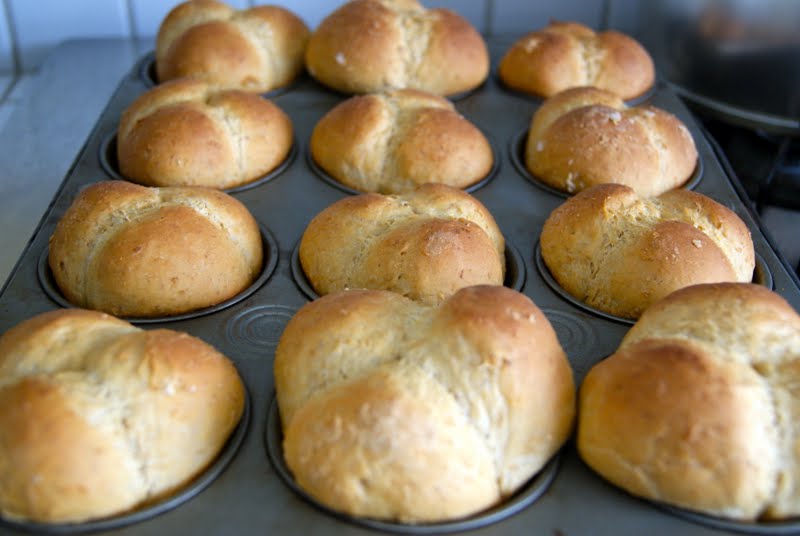
We doubled the recipe, and it made this much PLUS another loaf that didn't make it in this picture:
(the large loaf was exactly 1/2 of one recipe yield, and the dinner rolls were made by rolling the other 1/2 of the dough into either large balls in the glass casserole, or 3 small balls into each cupcake tin to make the clover rolls.)

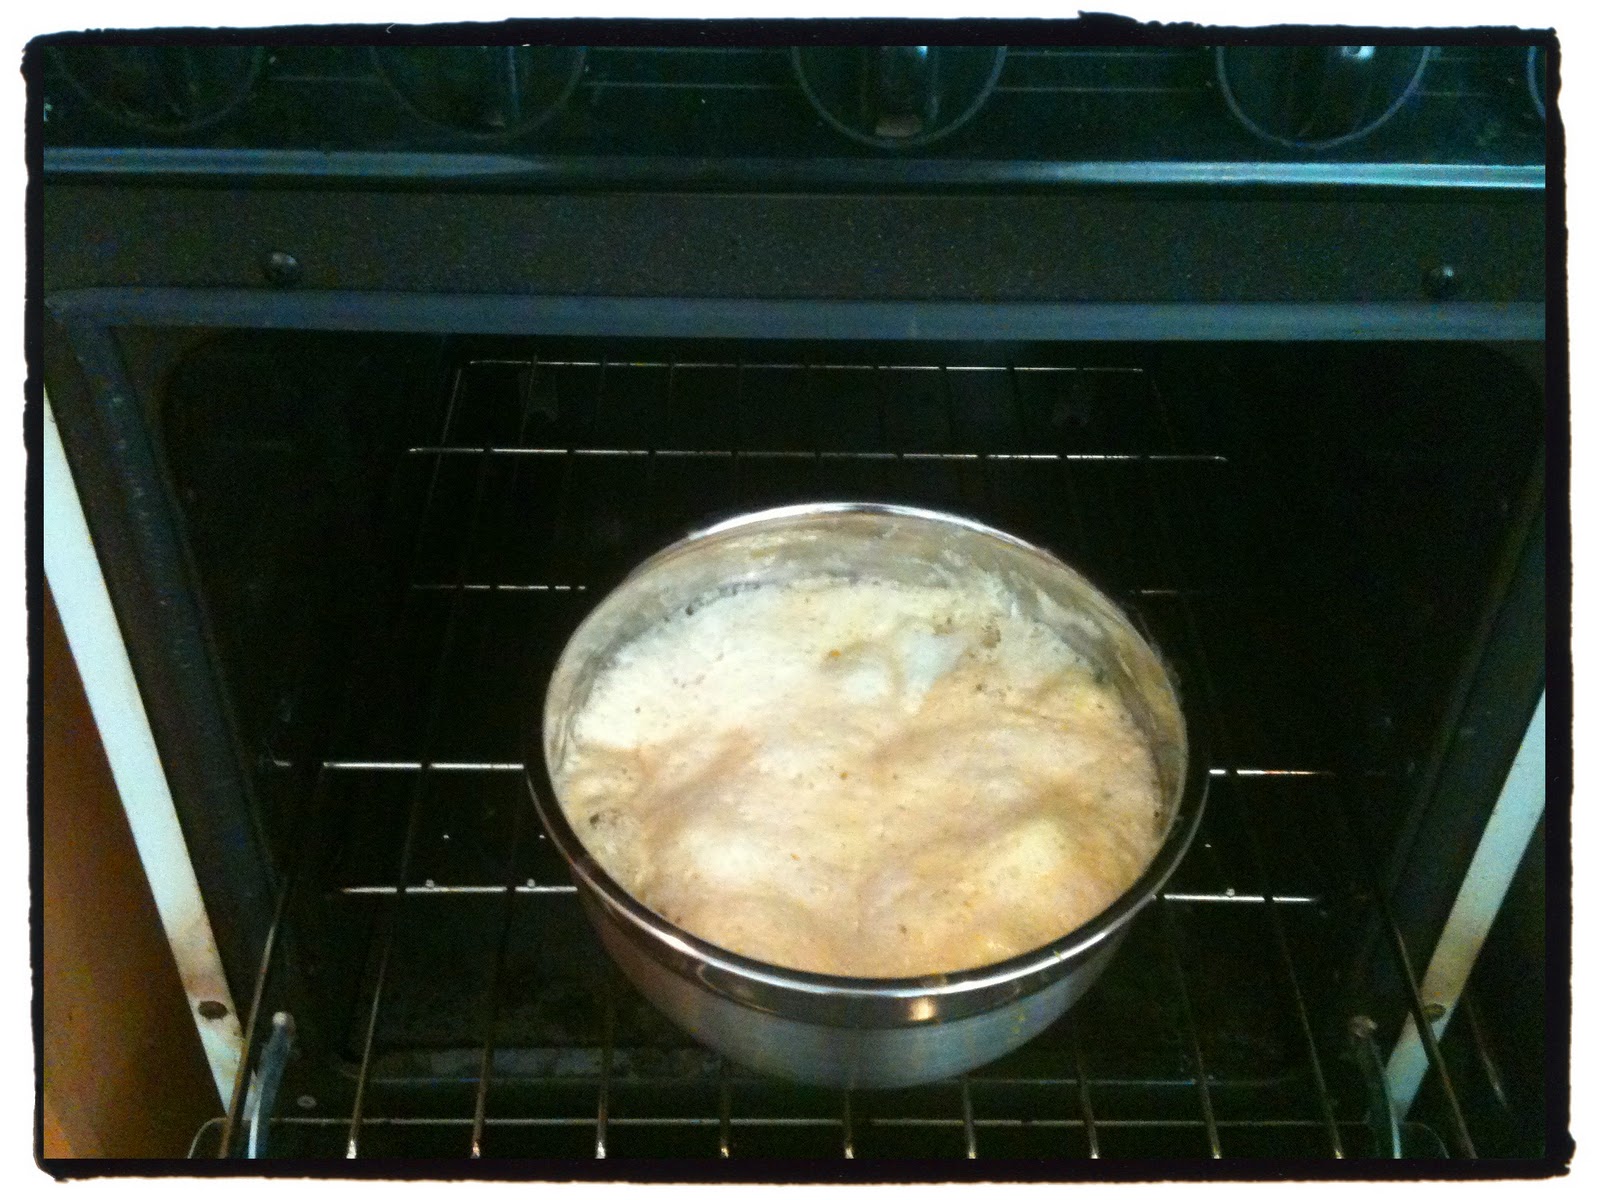
We covered the dough with a large tea towel and let it rise (about 30-40 minutes): 

Look at how beautifully all of the dough rose!

These baked goodies went for 30 minutes at 325 degrees F, and out came warm, delicious rolls and loaves! 
While they were still warm out of the oven, Becky rubbed the tops lightly with a little spread of butter (something that I used to watch Nana do when she made rolls also!)

We had to eat some right away while they were warm :D 
Some of these clover rolls were pulled apart and enjoyed with a little butter and some with jam, and some with both!

 Oh my goodness- this is a beautiful sight! 
Peter and I enjoyed this loaf ALL WEEK. Every morning we would toast another slice and sit together while we savored every warm bite :)


Thank you Becky!!!

Saturday, January 29, 2011

Someone's Mama's Best Belgian Waffles


I never really cared much for the cafeteria my freshman year of college. Instead, since my roommate and I were both Nutrition majors, we would go together to use our meal plans to buy healthier items at the campus market and stock up our mini fridge. However, if I ever did go to the cafeteria, it was usually for an irrational late night splurge- either Mac n cheese, Belgian waffles, or Ben & Jerry's ice cream. I loved the waffles because you could pour the batter yourself into the Belgian waffle flipper and cook it just to your liking. This is how I fell in love with Belgian waffles.


But what makes them different from regular old 'waffles' that I would like them so much more? Well, Belgian waffles have a much lighter and fluffier batter, traditionally from yeast, but could also be from baking soda or other leaveners. This creates the contrast of a super soft and light inside with the sweet and crispy outside. There are few things worse than a soggy, flimsy waffle. Also the fluffy volume of the Belgian batter allows it to fill out the deeper pockets of the Belgian waffle iron. No wonder I loved them so much, lightly crispy with a tender middle AND I could fit more syrup, strawberries, and whipped cream in its deep pockets! So this is their trick to the freshmen fifteen!


After researching numerous recipes online, this one stood out to me because it was a very successful recipe from the writer's mom's kitchen. I've learned that any recipe that begins with some variation of, 'This was my mom's recipe...' is usually a winner. Plus, she calls the waffles 'delectable delights'!! It was meant to be! I have made these several times now, and trust me- these 'delectable delights' do not disappoint!


Ingredient List (This makes 4 on my very big waffle iron, but maybe 6 on a regular sized one?):
2 1/4 tsp dry Yeast (or 1 pkg)
2 cups warmed Milk
4 Eggs, separated
1 tsp Vanilla
2 1/2 cups Flour
1/2 tsp Salt
1 Tbsp Sugar
1/2 cup melted Butter (or 1 stick)


1. In a glass measuring cup/bowl, warm your milk in the microwave and stir in the yeast.
**Normally, when I am baking with yeast, I sprinkle some sugar in warm water because the yeast needs warmth and nutrition to grow. But, since this recipe uses milk, milk already has natural sugars, galactose and lactose. In fact, the galactose is a more simple form (monosaccharide) for the yeast to utilize than the white sugar (sucrose, a disaccharide) that I would normally add.


2. In a big bowl (because it will rise later) Beat egg YOLKS only, then add and mix in the milk/yeast mixture along with the vanilla:


3. In a separate bowl, combine the flour, salt, and sugar, and add-n-mix that into the wet mixture:


4. Now add the melted butter (can melt it in the microwave in the same glass dish you used earlier)


5. In a separate bowl, beat the egg WHITES only until they are firm peaks. Firm peaks should stand up on their own like this one in my bowl:


6. Then gently fold them into the other mixture until it is well incorporated but not overworked. Can you just see how fluffy it is!

7. Now, just let it sit in a a warm place and rise for about 45 minutes or so (I like to preheat my oven to 100 degrees F, then turn it off and let my batter rise in there).
**This makes it another great Saturday morning recipe... while it rises, you have the perfect opportunity to take a walk to the coffee shop and go for a morning stroll.
What a beautiful morning it was today; and what a pleasant stroll it made.

45 minutes later, look how it has risen almost to the brim of the bowl!

Now you are ready to waffle! Set your waffle iron to your desired doneness... See how I have mine set to '4' out of '5'- that's because I like mine very crispy on the outside, but don't worry it still stays very soft and light on the inside :) 
Pour in your batter, and close the lid. See that little red light? Do NOT lift the lid until the green light comes on... waiting here might be the hardest part of making waffles. 

it's GREEN!...

Plate it up with your favorite toppings and enjoy! I love mine with just syrup, strawberries, and whipped cream... mmmmm. 
These strawberries were from Farmers Market back when they were in season. If you are like me, and you buy a whole flat because you get so excited about them, but then can't eat them all in time- just wash and cut them up and freeze them in a tupperware container. Then you can defrost fresh strawberries whenever you want them, even when they're not in season :)
Oooooh, those deep pockets hold that dark, buttery, maple-y syrup!


If you have any survivors, you can freeze them in ziplock baggies; They toast up very nicely on work mornings for a delicious breakfast in no time at all.

Monday, January 17, 2011

Challah Bread!!!


Challah ("Hall-uh"). This bread is so near and dear to my heart; We have quite the history. Here's a little background...
During college, my roommate, Serena, minored in religious studies. One of her course requirements was to attend services of different religions. During her visit to a jewish temple in town, she heard their announcement for a cooking class available to the Jewish women to come learn how to make traditional foods. Serena came home and asked us all if we wanted to go. Just $4 and a whole lotta' fun! Four of us girls joined the women at the temple that morning to learn how to make their delicious challah bread! They were quite surprised to meet 4 young Christian college girls showing up for their Jewish cooking class, but we hit it off and had great conversations with them in their kitchen that morning. It was a BLAST- in fact, we all had so much fun, that the women decided to go to their temple's office and make it an official club; They invited us to return for future cooking classes, and we didn't hesitate! We learned tons of fun traditional Jewish foods... but Challah bread was our favorite, and the one that I just can't seem to stop baking! That was $4 that changed my life :)


(Here is an old picture of us from that morning baking challah with the women in their temple kitchen)


Here is your ingredient list:
1 cup WARM water
2 packets of dry yeast (or 4 1/2 tsp yeast)
4 eggs
1/2 cup oil
1/2 cup honey (or sugar if you don't have honey, but I like to use honey)
1 1/2 tsp salt
5-7 cups flour
plus, 1 extra egg and a dab of honey to brush on top of the bread before it bakes

Before you start anything else, preheat the oven to 100 degrees F (this will create a warm environment in which the dough can rise later). Now, start by proofing your yeast. To do this, heat one cup of water (I use a glass measuring cup so I can put it in the microwave for about 25 seconds or so until it's pretty warm). Yeast is a living organism and we are trying to activate it and allow it to grow, because this is what is going to make our dough rise later. This type of yeast grows best at temperatures around 100 degrees F. So, when you heat up your water, make sure it feels like a jacuzzi. If it is too hot, then it will kill the yeast and your bread will not rise. So don't be afraid to stick your finger in the water to make sure it's just like a warm jacuzzi, and not like a scorching cup of tea. Once you've heated your water to an optimal temperature, you need to give the yeast a source of nutrition to grow; Just sprinkle in a little sugar or honey and dissolve it into the hot water. Now you have a yeast friendly environment, and you can dissolve your active dry yeast into the cup. Let it rise about 5 to 10 minutes until it bubbles and roughly doubles in volume- like this: 

During the time that the yeast is rising, mix the next few ingredients in a large bowl (I like to use a large metal bowl because I like the way it warms later and encourages the dough to rise). Start with beating the 4 eggs. Then add the 1/2 cup of oil, then the 1/2 cup honey. It is important to do it in that order because the oil coats the measuring cup so that the honey will pour right out and not stick to all the sides of the measuring cup. See how smoothly is releases from the measuring cup: 


Then add in the 1 1/2 tsp salt, and mix everything really well. Then add in the proofed yeast and give it another good stir. 


The mixture should eventually look like this:


Now, start adding in the flour. I usually dump in about 4 cups to start with and mix it in well with my fork. Then, I add more flour in 1/2 cup increments as necessary until I end up with the consistency I like (usually about 5 to 5 1/2 cups). Only add small increments at a time because you don't want to add too much flour- too much flour leads to a dry, not tasty bread... trust me. By the way, I only use one fork to do all of this. It is so simple, all you need is a bowl and a fork.  It should end up like a soft formable playdough, but much stickier. Like this: 

Now, TURN OFF THE OVEN, cover the dough bowl in plastic wrap, and let it rise in the warm, but OFF, oven. Let it rise looooong and slow. I usually let mine rise about 3 hours or more. The women in the Jewish temple said the longer the better, and that they would make their dough in the morning and let it rise all day and cook it when they got home from work. I tried this... I don't recommend it. Two things happened to me: 1) it rose over the top of my bowl and made a mess of my oven, and 2) the yeast multiplied too much and it ended up tasty way too yeasty. I think 5ish hours is my limit. 
Covered, and into the warm, OFF oven:
3 hours later: 

Now dump in out onto a clean, lightly floured work surface (I love 2 tools here: 1)my nonstick silicone baking mat that is WAY too big to fit in any oven, so it makes a great large nonstick work surface that always use when I work with any dough, and 2) a dough scraper- This is another best friend every time I'm working with dough. It helps get the sticky dough out of the bowl cleanly and also helps to cut and divide dough when you're working with it). 
Again, be careful not to work in too much flour here; Keep it moist and tacky if possible. Divide your dough into two equal pieces and then gently squeeze those into long 'ropes'. Now, cross your ropes to make a plus sign (+) (because I don't have a large island or counter top workspace, I had to cross mine a little crooked, like an (x) instead of a (+) so that it could fit on my small counter top. This is fine too as long as you can designate and visualize a 'top', 'bottom', 'left', and 'right' because this is how you need to view it in order to braid it. 
Braiding code: 'right' across, 'left' across, 'bottom' up, 'top' down, and so on...
(plus sign):
('Right' arm across):
 ('Left' arm across):
 ('Bottom' arm goes up):
 ('Top' arm goes down):
 And so on, until it starts to look like a braid!!!:
And eventually you get to the end and you just tuck loose ends under so that it looks the same as the other end: 

Now I transfer this to a silpat (or parchment) lined baking sheet, cover it loosely with plastic wrap, and let it rise again in the warm, OFF oven for about 30 minutes. This is important, because we just handled the dough quite a bit and worked out some of the nice little airbubbles in the dough that make it so nice and fluffy. Letting the dough rise again here, allows it to regain a little of the volume and fluff. So, back in the oven!

After just about 30 minutes, it should look like it has puffed up again nicely. Take the bread out of the oven and throw away the plastic wrap. Preheat the oven to 350 degrees F. Now you are going to whip together 1 egg and a tablespoon of honey. Then paint it gently onto the bread. After the bread is cooked, this egg wash gives the loaf a beautiful glossy appearance, a subtle sweetness, and little protection from drying out.


Cook it for about 25 minutes at 350 degrees F. It should be golden brown, and have a hollow thump to it if you flick it with the back of your finger. 


 Look at how soft and sweet it is inside!!!! Enjoy it while it's warm with butter, or honey, or both! mmmm....


Because these are such LARGE loafs of bread, I found that a dry cleaning bag, tied off at each end like a piece of candy, works very well for keeping this bread fresh. 

**Some fun additions: 
- Sprinkle poppy seeds or sesame seeds on top of the egg wash before the bread goes into the oven
- Mix raisins into the dough when you add in the flour
- Add 2 Tablespoons of brandy into the egg, oil, honey mix
-Challah bread easily transforms into the BEST french toast... (recipe post to follow:)

**Nutrition noteworthy: If you choose to use honey, this bread has NO white refined sugar :) 
(But this does not mean it is sugar free. Honey provides natural sugars, which may mean it's free from white refined sugars, but it is still sugar nonetheless).