Wednesday, September 28, 2011

A+ Crust Recipe


This crust can be used for main dishes OR desserts; once you get a good crust recipe, you can use it for everything... fruit pie, pot pie, quiche, anything


In dishes which require a crust, it is the crust itself that can make or break the dish. However, the crust can be the most unhealthy part of those yummy dishes. A traditional crust is made with either butter, lard, shortening, or any combination thereof. 
But this crust recipe (though not a 'health' food) is much healthier than a traditional crust because it uses canola oil and nonfat milk instead. Plus, it is just as golden, flakey, and flavorful! 


I am sharing this recipe in time for all of your fall baking in hopes to help ease some of the calorie load that comes with the holiday season. 


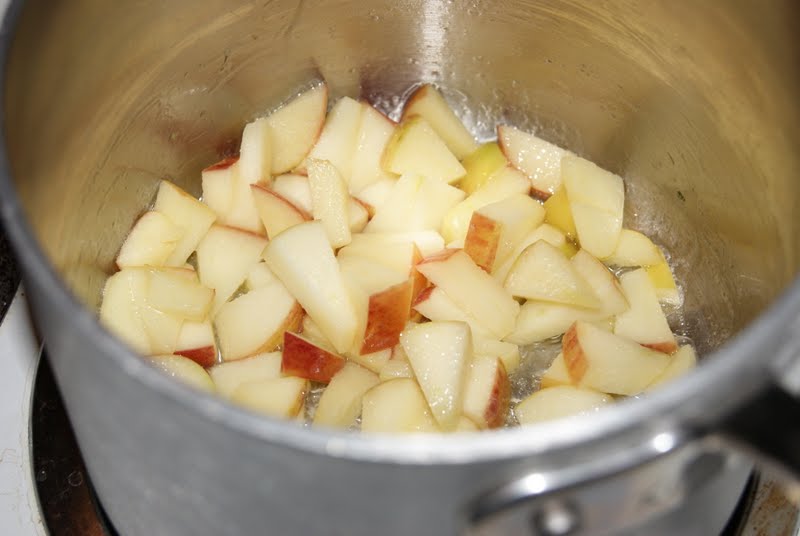
Over the weekend, Peter and I went apple picking with our friends, Trevor and Laurie. Somehow we came home with A LOT more apples then expected, so Laurie and I turned my kitchen into an apple pie factory on Sunday afternoon. We were cranking out loads of pie dough and peeled apples. This recipe earned an A+ across the board from all the taste testers... and no one knew that there was not even a dot of butter in the crust nor in the pie filling! For this reason, this crust earns in A+ from the 'taste' category AND for the 'healthy makeover' category! What a fun way to enter another season of fall baking!

Recipe (for one 'double crust' pie, or two bottom crust shells):
  •  2 1/3 cups AP Flour
  • 1 tsp Salt
  • 2/3 cup Canola Oil
  • 6 Tablespoons cold, nonfat Milk

Mix together the flour and salt, then add in the oil, then the cold milk:

Continue until combined and it starts to clump and stick together. Try not to overmix. 
When it is ready, a portion of the dough should stick together almost like play-dough (but slightly stiffer) when squeezed in hand.
If it isn't quite moist enough, 
add a little more oil until it gets to the right pie dough consistency. Do NOT add extra milk. 

Divide dough into 2 equal portions. 
Roll out the first half of the dough between 2 sheets of wax paper:
(Because this dough is made with oil, it is easiest to roll it between 2 sheets of wax paper. Even with my handy dandy nonstick roller, this dough tends to stick and pull apart when I tried rolling it out without wax paper. So I really encourage you to use the wax paper method.) 

After you roll out the first half of the dough, transfer it to your pie pan. Leaving 1 inch of extra dough around the perimeter, trim excess dough and use your fingers to roll the 1 inch border under the edges to create the thick crust edge.

Cover with plastic wrap and refrigerate while you make your crust filling.

Repeat with the next half of dough if you are making quiches or single crust pies.
OR wrap the second half with plastic wrap and refrigerate the second half before rolling out the top crust of your double crust pie...
OR wrap with plastic wrap and refrigerate to save for later baking.

Now you have options again: 
  1. If your recipe requires a pre-baked pie shell: remove pie pan with uncooked crust shell from refrigerator and bake for 13-15 minutes at 450 degrees F. Then fill with pie filling and continue to bake according to that recipe's instructions. 
  2. If you are making a single crust pie: remove crust shell from refrigerator, and do NOT prebake pie shell unless your recipe calls for it. Fill with pie filling, top with crumble topping (or whatever topping you are using instead of the top crust) and bake according to pie instructions. 
  3. If you are making a double crust pie: Remove second half of refrigerated dough and roll out to make top crust. Remove crust shell from refrigerator, fill with desired pie filling, cover with top crust, and bake according to recipe instructions. 
We made a double crust apple pie. Boy was it DELICIOUS! Look at that golden, flakey, crust and all those layers of apples! Thank you Laurie for peeling all the apples!

*Apple Pie Recipe to follow

Monday, September 26, 2011

Snickerdoodles


These cookies are wonderful all year round, but especially great during the fall since they have a hint of cinnamon. The first time I had ever heard of a 'snickerdoodle' was at one of my soccer games when I was a little girl. This is the recipe from the team mom who brought those snickerdoodles to that soccer game. Her daughter and I played on the same soccer team, and she brought these homemade cookies for an after game treat for all of us little soccer players. The cookies were so soft and chewy and delicious, that my mom and I asked her for the recipe. She didn't know the recipe off the top of her head, but set up a time to bring it over to our house. I remember sitting in the front swing, WAITING for her station wagon to pull up. When she finally arrived, she delivered her handwritten recipe on a little kitchen index card. We have been making these cookies from her handwritten index card ever since then! Years later, we mentioned something to her about how we still love making her snickerdoodles but she had no idea what we were talking about... she never remembered making them, having a recipe, anything! It's like a mythical cookie or something! I can only imagine that we must have made a copy for her at that time, and given it to her again. It would be a such a shame to lose such a treasure. Now I get to share it with you! Bake these cinnamon-sugary treats, and pass it on :)


Recipe: 
1 cup (2 sticks) Butter, salted
1 1/2 cups Sugar, white granulated
1 tsp Vanilla
2 Eggs
2 teaspoons Cream of Tartar
1 teaspoon Baking Soda
1/4 teaspoon Salt
2 3/4 to 3 cups Flour


4 teaspoons white granulated Sugar mixed with 2 teaspoons ground Cinnamon


I use an electric hand mixer to beat together the butter, sugar, and vanilla. Then add in the cream of tartar, baking soda, salt, & flour and continue with electric mixer until combined. (I know dumping all the dry ingredients without mixing those together first is a big baker's no-no, but they've always turned out great, so I just keep on making them the way I've made them since I was little)

Take enough dough to roll it into a silver dollar sized ball. Roll it lightly between your hands, and then roll in the cinnamon sugar mixture: 

Place cinnamon-sugared dough balls onto cookie sheet, about 2 inches apart:

Bake at 350 degrees F for 8-10 minutes. 
Do NOT overbake; you do not have to wait for them to turn golden-brown, or else they will be overcooked. After 8 minutes or so, remove them immediately from the oven and let them cool slightly, for just a minute or so, before enjoying these warm chewy treats. 

Monday, September 19, 2011

Sweet Cornbread


OH MY GOODNESS! This is my favorite cornbread I've ever had! I always made boxed cornbread, but I have really, really, really been wanting to try making it from scratch. However, I have pretty high demands for cornbread; it has to be sweet, moist, it can't fall apart into dry crumbles in my hand, and it absolutely must have actual bits of corn IN it. I figured I'd have to make it a few times before I could piece together a recipe that I would approve of, but this time I got so lucky! This is my first scratch recipe of cornbread and it hit ALL the points on my checklist, and it exceeded my expectations for taste. I could eat the entire dish by myself! It tasted  kind of like that sweet corn cake that is commonly served with mexican food, but in bread form. This cornbread tastes as if that moist & buttery corn cake married sweet & soft corn bread. 


We've kind of had a couple cooler days down here in Laguna that already feel like the beginning of Fall. That always gets me so excited for cozy nights and fall baking! So I jumped on the opportunity to made a big pot of my sweet chili when Peter said that this cooler weather made him feel like chili and cornbread. This was also my big opportunity to try cornbread from scratch. If you're into sweet, moist, flavorful, perfect cornbread... this is something you might be interested in  (hehe, okay- maybe I'm biased :)


Recipe (one 8x8 baking dish): 
1 cup Flour
1 cup Cornmeal
1/2 cup Sugar
1/2 teaspoon Baking Powder
1/2 teaspoon Baking Soda
1/2 teaspoon Salt
1/2 stick Butter, melted
1/4 cup Milk (sometimes I'll use Fat Free Half & Half if I have it around -not like this is a healthy recipe or anything, but anytime you can swap in healthier ingredients- even the smallest choices- make a positive difference :) lots of small changes add up to make a big change.)
1 large Egg
1 can Cream Style Corn


Preheat the oven to 400 degrees F. Mix the 6 dry ingredients in one bowl, and the four wet ingredients in another bowl. 
Dry Ingredients:
Wet Ingredients:

After your dry and wet ingredients are each mixed well, add the dry mix into the wet bowl just until combined. Do not over mix (supposedly overmixing can result in tough, dry, hardened bread). 

Pour Batter into a buttered or well oiled 8x8 baking dish: 

Bake at 400 degrees F for about 30 minutes. 

Enjoy with some meaty, sweet 'n spicy chili:

 Just look at how moist it is, and with those sweet little juicy bits of corn in it too! Mmm!

You can even make this recipe into corn muffins if you would like, but lessen the cooking time to about 18 minutes.

Saturday, September 17, 2011

Fresh Strawberry Fro-Yo & Healthy Popsicles!

 
Last weekend, Peter and I celebrated our 1 year anniversary in the charming little town of San Luis Obispo. That is where we both went to college, and also where we met :)


One of my very first posts on this blog was on roasted brussel sprouts that I got from the San Luis Obispo farmer's market during a visit to S.L.O. last winter. They have a KILLER farmer's market! The entire downtown is transformed into a giant farmer's market every Thursday night and EVERYONE in town is there, young and old. They have everything... jewelry, produce, restaurants, live music, unicyclers juggling fire... literally everything! It really brings the community together :)


In college, I would go to farmer's market every Thursday night and buy a flat of strawberries for a huge pancake brunch that our house would host every Sunday. When Peter and I went up to SLO for our anniversary last week, we got there just in time for the farmers market. I went to my old trusty strawberry distributor at farmers and he remembered me! Anyway, moral of the story... buy up all the strawberries you can find right now before the season is over, and make frozen yogurt and popsicles so that you can continue to enjoy them long after this season is gone :)


Every time Peter and I go out for frozen yogurt, he gets strawberry fro-yo... every time- even if it's just a little bit. Well, with all the strawberries during the summer, I figured that strawberry fro-yo could be a perfect treat I could make for him to enjoy! Now, at the end of summer, it is a great way to preserve the last of these sweet berries so you can continue to enjoy them even as we exit their harvest season. Make extra strawberry-yogurt blend or use leftover fro-yo to make GREAT, healthy, creamy-strawberry popsicles!


Ice cream is pretty easy to make, it just takes quite a bit of time.... but this frozen yogurt is even easier and takes basically no time at all! It really couldn't be any more effortless, quick, or delicious. AND it only requires a couple ingredients:  fresh strawberries, and Greek yogurt :) A little bit of sugar can be used if the strawberries are too tart, but it is definitely not required.

Recipe: 
  • 1 lb Fresh Strawberries
  • 1 1/2 cups Plain, Nonfat Greek Yogurt (you could also use vanilla or another flavored Greek yogurt, but that greatly increases the sugar content)
  • **Optional: 1/8 to 1/4 cup granulated Sugar, if strawberries are too tart**
Wash all your strawberries and cut them up into quarters. Then stir them well. Cover with plastic wrap and let it sit and release its juices for 2 hours or over night (I chose to let mine 'juice' over night :) You want all that sweet juice to mix into the yogurt.

**Depending on how ripe and sweet your strawberries are, you might not need any sugar at all- it can be 'no sugar added'! :) However, if your strawberries are tart or getting to the tail end of the season, you  might chose to use a little bit of sugar (no more than 1/4 cup) to toss with the cut strawberries. This will sweeten them, AND help pull out the juices; the sugar granules cause the strawberry cells to burst (by osmosis) which releases the juices out of the berries. Again, you want all that sweet juice to mix into the yogurt. 

After your strawberries have 'juiced' over night, transfer them to a blender, a food processor, or use a hand blender (like I did) to puree the berries... but not too much; it's nice to get a few fresh strawberry pieces in some of your spoonfuls.

Stir the Greek Yogurt into the strawberry puree until it is well combined.

And churn it in the ice cream machine for about 20-30 minutes. Done. Couldn't be any easier.

Enjoy it immediately in 'soft serve' form,

Enjoy leftovers by pouring it into popsicle molds and freezing it for later! These make a delicious healthy snack. You can also freeze leftovers in an ice cube tray to use for smoothies!

You can also store leftovers in a tupperware tub to eat later, but it will not retain that 'soft-serve' consistency.
If you do eat some later (like we did), just set it out for about 30 or 40 minutes to let it soften to a good consistency again. 

** Helpful Hint: If you freeze some in tupperware, press some plastic wrap onto the top of you yogurt and then snapped the lid on to prevent any freezer burn. When we wanted to eat it, we simply pulled it out of the freezer and removed the plastic wrap, walked down to the beach to catch a little sun, and then we came back and enjoyed our fresh strawberry frozen yogurt when it got to the right consistency!

Thursday, September 8, 2011

All American Apple Crisp


This is a great dessert to make when entertaining... it's fun, warm, yummy, everyone gets their own, it can easily be made for 2 or 20, AND you can make it ahead


Recipe (serves 4):

  • 2 Large Apples
  • 1 Pinch Granulated Sugar for each serving
  • A dash a cinnamon for each serving
  • Juice from 1/2 fresh Lemon

Crumble topping (same as topping used for Cran-Nectarine Crumble):

  • 1/2 cup Quick Oats
  • 1/3 cup Flour
  • 1/4 cup Granulated Sugar
  • 1/4 cup Brown Sugar
  • 4 Tablespoons COLD Butter
This is a VERY nifty little kitchen toy that slices, cores, and peels your apple all at once! I grew up with one from an actual an apple farm that we got when my parents took us apple picking. I always thought it was the coolest contraption, but now I see them everywhere! If you don't have one, you can find them at Target, Bed Bath & Beyond, WalMart, Amazon, ...really almost anywhere.


I just quickly diced my apple rings and dropped the diced pieces into individual ramekins. Then, into each ramekin, sprinkle a pinch of sugar, a dash of cinnamon, and a few squeezes of lemon juice over it all:


Top each dish with your crumble topping: 


Bake at 350 degrees F for no more than 25 or 30 minutes: 

Mmmmm... you know what I think this needs now...

Just a tiny little mountain of vanilla ice cream ;)

Love it when the cold, creamy ice cream mixes with the warm, crispy topping

More fun options to mix into the apple filling: 
  • dried cranberries, 
  • raisins, 
  • walnuts, 
  • other fresh berries (I think blueberries, raspberries, or boysenberries would be great with apples)
  • leave a comment to share some of your ideas :)

Tuesday, September 6, 2011

Apple & Maple Glazed Pork Chops


It seems like everyone is always looking for a new way to serve chicken for dinner. This time, I just decided to try something altogether new instead of chicken. Though it isn't the official slogan anymore, pork is still 'the other white meat'. When using fatty cuts and poor cooking methods, pork can be unhealthy, but if you start with a lean cut and use healthy seasoning & cooking methods, pork can also be a great, healthy, lean protein. I tried making a few different versions of these pork chops, but this one was finally the one that Peter and I voted as the winner to share with you. 

Recipe (serves 2, but easily multiplies to serve 4,6,8,etc):
  • 1/2 large apple, diced
  • 1 tsp Butter
  • 2 Tablespoons chopped Walnuts
  • 3 Tablespoons Maple Syrup
  • 2 teaspoons Cider Vinegar
  • 1/4 teaspoon fresh Lemon Zest
  • 1/4 cup fat free, low sodium Chicken Broth
  • 2 Pork Chops, approximately 1 1/2  inches thick
  • 1 Tablespoon Canola Oil
Start by heating 1 tsp butter in a sauce pot and add the diced apple:
 Saute the apples over medium heat for about 10 minutes:


Then reduce heat to low, add 2 Tbsps of chopped walnuts, 3 Tbsps maple syrup, 2 tsps cider vinegar, and 1/4 tsp lemon zest. Stir and simmer for about 2 minutes then stir in 1/4 cup chicken broth and let it all simmer for a few minutes until it thickens slightly. 

Pat pork chops dry and season both sides with any seasoning blend (I used a salt free seasoning). Heat 1 Tbsp canola oil in your pan, and sear the pork chops for about 3 minutes on each side to allow a nice golden crust to form:

Top with the apple-maple glaze...

...cover, and bake in a 350 degree F oven for about 20 minutes. (cooking time will vary depending on thickness of your pork chops- mine were about 1 1/4 inches in thickness)
I think covering your pork chops are important to keep your meat tender and protect it from drying out.

 Serve your beautiful pork chops with a side of wild rice and a mixed green salad tossed with some of the same ingredients as those in your glaze to tie the flavors together. 

I diced the other half of my apple to toss in the salad along with feta cheese, dried cranberries, candied walnuts, and a drizzle of balsamic vinegar.

Look at how tender and juicy the pork chops are inside 
and how warming and yummy that glaze is!