In the fall, I visited my friend, Rose, who had recently moved to Washington DC. While I was there, I was tempted by LOTS of delicious cinnamon rolls at bakeries, cafes, and farmers markets. I felt like they were calling my name everywhere we went! I've never had a thing for cinnamon rolls before, but that's all it took. However, I didn't give in to those calling to me on my visit; instead, it made me want to come home and create a perfect cinnamon roll. This is the one.
I found this killer recipe on another blog and I'll never have to try another recipe again. Seriously, this one is killer. I've only had this magic recipe in my hands for 4 months now, but I've made them at least half a dozen times already (not sure if I should admit that). I even made a double batch on Christmas morning for our families. Having so much practice in such a short period of time, I have built in as many shortcuts as I could. You can even start them in the evening so that you don't have to wake up super early for fresh rolls at breakfast time! I will include the timeline that I like to follow, in bold and underlined print (like this), to make this as easy as possible for you to follow and make at home. I think this is the final cut. Easy. Delicous. Done. I hope you enjoy :)
Shopping List:
- 1 Tbsp active dry yeast
- 1/2 C warm water (think jacuzzi temp, not boiling.)
- 4 C all-purpose flour
- 1 tsp salt
- 4 large eggs
- 1/4 C sugar
- 2 sticks butter, (plus an optional 2 Tbsp butter): 1/2 C (1 stick) real butter at room temp (for dough) + 6 Tbsp (3/4 stick) real butter at room temp (for filling) + 2 Tbsp (1/4 stick) melted butter (for glaze) (+ *optional* 2 Tbsp butter, for tops of rolls before cooking)
- 3/4 C packed brown sugar
- 1 Tbsp cinnamon
- 1 C powdered sugar
- 2 Tbsp milk
- 1 tsp vanilla extract
(This part I start before dinner):
In a small glass bowl or measuring cup, warm 1/2 C water in microwave (approx 30 seconds), dissolve maybe 2 tsp to 1 Tbsp sugar in warm/hot water, and sprinkle in 1 Tbsp. active dry yeast. Let stand in a warm spot for about 30 minutes.
(it should foam up pretty tall- if not, then the yeast is either no longer active, or the water was too hot and killed the yeast bacteria).
**Helpful Hint: Just like I mentioned in my Challah Bread post, a great warm incubator for proofing yeast is an oven that was heated to 100 degrees F, and then turned off. If you have a stand mixer, dump in your yeast mixture at this time, and proceed to add the following ingredients and use the dough hook attachment (no higher than speed 2) to mix for about 10 minutes or so.
(If you do not have a stand mixer, add the following ingredients into a large -preferably metal- bowl with the yeast mixture and combine with a fork):
Add the 4 large eggs, 1/4 cup sugar, 1 stick of room temp butter, 1 tsp salt, and 4 cups flour to the yeast mixture.
Dough should pull away from sides of bowl. Add a bit more flour to reduce stickiness if needed, but don't add too much otherwise the finished cinnamon rolls will taste dry. It should be dense, moist, and pliable JUST like playdough, except shinier. It should not be too wet or sticky.
Now rub a little vegetable oil all over the dough ball and place back into the large metal bowl. Cover top of bowl with plastic wrap, set in a warm spot (again, I preheat oven to 100 degrees and then turn it OFF and put my bowl in the oven and close the door). Let rise until at least doubled, about 2 hours.
While dough is rising, prepare filling. Beat 6 Tbsp butter, 3/4 C. brown sugar, and 1 Tbsp cinnamon together (takes only about 1 minute). It will be rather thick.
(Now prepare/eat/go out for dinner while the dough rises for a couple hours, then after dinner/dessert...):
Transfer the dough to a floured work surface. Roll out into a LARGE rectangle about 1/4 inch thick or less... look how big it is! You can even see through the dough that it rolled out way beyond the size of my large silicon dough mat surface!
Spread filling onto dough. Use a spoon (or your fingers) to spread it out evenly.
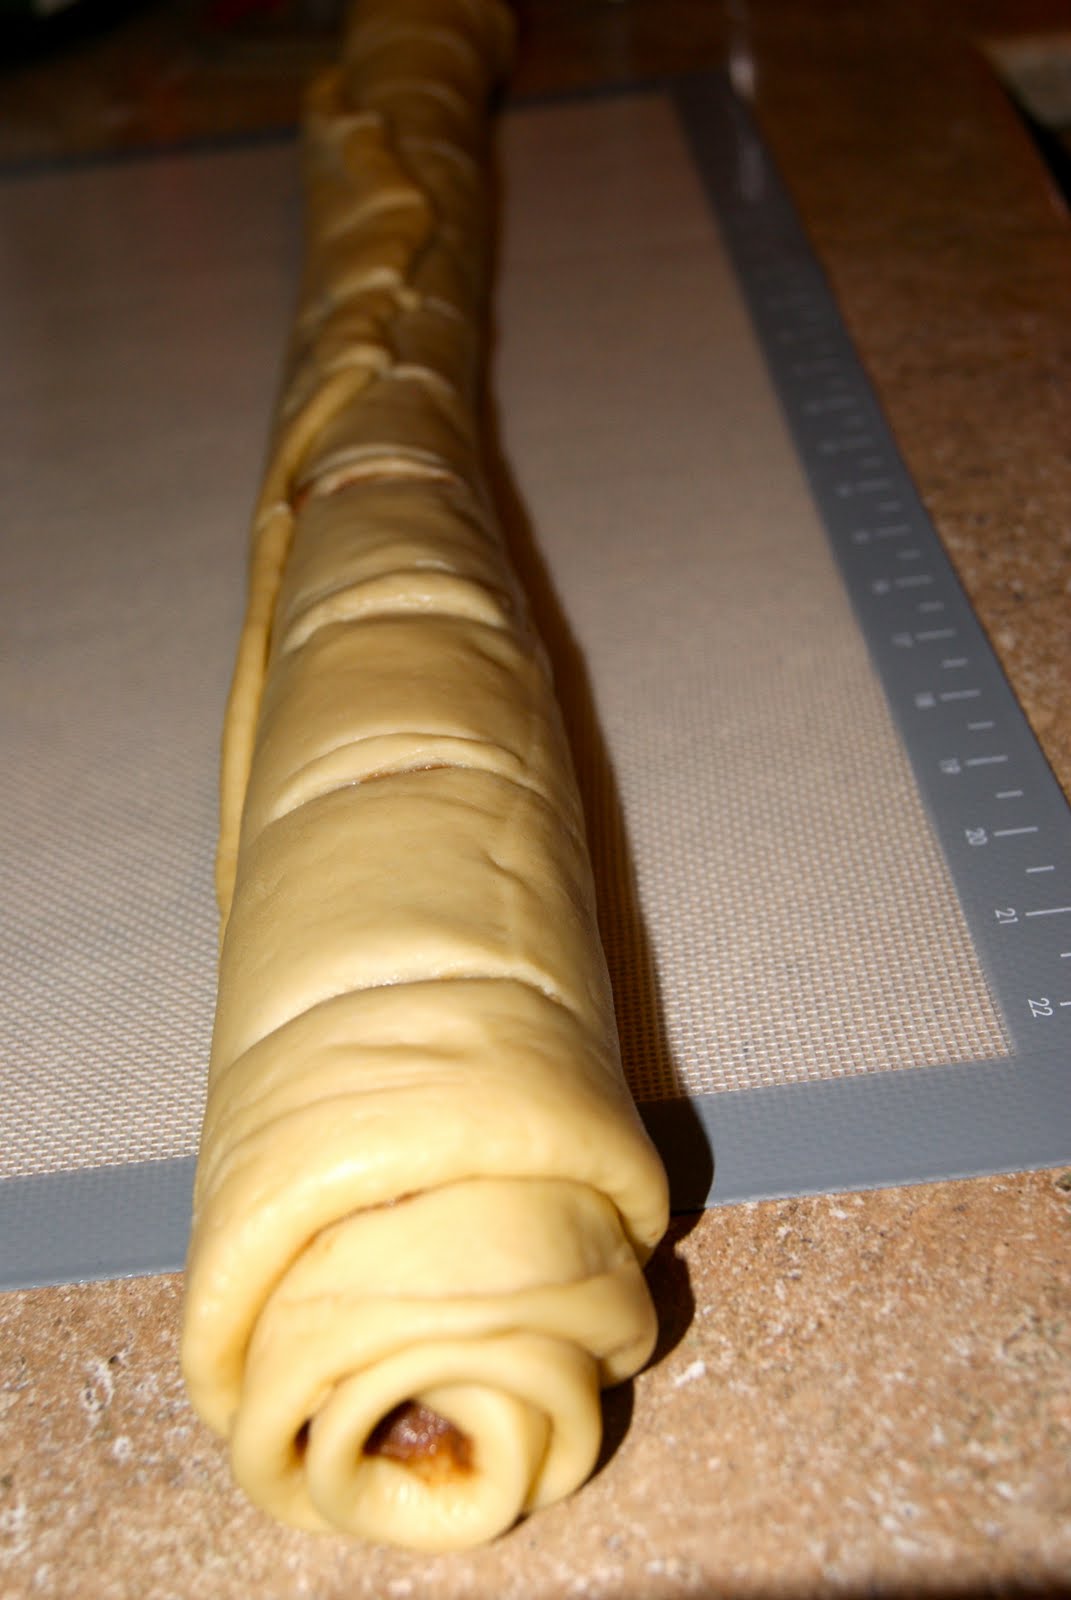
Then roll up length-wise, and score the rolls so you know you're going to cut them into even sizes (about 2.5 or 3 inches each to yield 12 rolls).
** OR you could roll it from the short end and you would get less rolls, but they would be HUGE fatties!
Either way, be sure to score the rolls before you slice them: I'm the daughter of a contractor, trust me- I know how important it is to measure twice and cut once. The other way around just doesn't work. Here, you can end up with one little runt if you don't measure them out first. Then slide dental floss underneath the rolls, cross over the top where it is scored, and pull. You'll get razor sharp cuts without smashing your rolls. This preserves the pretty spiral design. If you cut with a knife, it kind of tends to smoosh the spiral... not as pretty.
BUTTER or spray your dish before placing rolls in it! Place rolls in baking dish. Cover tightly with plastic wrap and you can either, place in the fridge overnight. Or I've had best luck bypassing the fridge and just letting them rise in that oven until I wake up in the morning around 6:30 or 7 am. This makes them very big and fluffy!
This is what they looked like when I went to bed:
This is what they looked like when I woke up:
**(If you placed them in the fridge overnight, remove them in the morning and let warm and rise in that preheated/OFF oven spot until half again as high, at least an hour or so... so you'll have to set your alarm for really early (like 4 am) if you want them ready in time for breakfast. -this is why I prefer to make them late at night and just let them rise in the oven until the morning.)
(30 to 40 minutes before you want them ready on the table):
Preheat the oven to 350. **Optional: paint 2 tbsp melted butter over the tops of the rolls. Bake until golden brown, about 20-30 minutes.
While rolls are baking, mix the glaze. 1 C. powdered sugar, 2 Tbsp melted butter, 2 Tbsp milk, 1 t vanilla extract. (Or you can make a cream cheese frosting instead. Cream cheese frostings are super yummy on cinnamon rolls as well... that's what Cinnabon uses)
Let cool in the pan for 5-10 minutes. WAIT the full time necessary to cool before you glaze, otherwise it will instantly melt and fall into the crevices between the rolls, and you won't see the pretty white glaze.
Enjoy while warm :)
And you can never go wrong with a cup of coffee to accompany this roll :)