Friday, December 30, 2011

Chocolate Caramel Turtles


These are such a HANDY DANDY little 'recipe' to know. It's not quite a real recipe, because you don't need any measurements to follow, and it doesn't even really require any cooking!


Typically, candy turtles have pecans, but you can use whatever you want- or whatever you have on hand: cashews, peanuts, peanut m&m's, etc.  My favorites are cashews and pecans, but I like to use the peanut m&m's because the pop of color is so fun. Also, m&m's allow you to use whichever colors you want for the occassion: colors of the holiday, school colors, team colors, etc.


These are the perfect treat for gifting, for a party finger-food, for a potluck dessert, or just for the non-baker :) They're quick, easy, decadent, and you can't mess them up!


Shopping List:
  • Mini Pretzels
  • Rolo candies
  • Your choice of Peanut m&m's, Cashews, Pecans, or whatever else you like
Preheat oven to 350 degrees Fahrenheit (or use a microwave safe plate, if not using an oven).
On a cookie sheet lined with parchment paper or a silicone baking mat, lay out as many mini pretzels as you wish. Top them each with a Rolo candy.

Place in 350 degree preheated oven for 3 1/2 minutes, or until soft and shiny but NOT melted.
(or microwave until softening and shiny but NOT melted)

Press the nut topping of choice into the soft oozey Rolo :)


Let cool completely. 5 minutes in the refrigerator works well.

I this picture, I used Christmas colored m&m's because I made this batch for Christmas. But you can change the colors to coordinate for any occassion. 

Friday, December 23, 2011

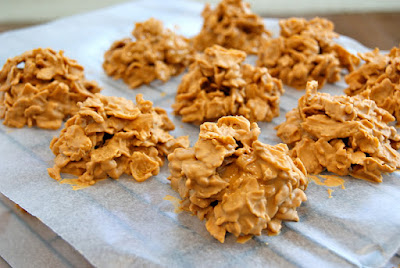
Nana's Peanut-Butterscotch Clusters


This is another one of Nana's recipes. She made them EVERY Christmas. I bet she made 10 batches at a time- there always seemed to be peanut butter clusters to go around for everyone at her Christmas party every year. Everybody loves these- they are a little sweet from the butterscotch, a little savory from the peanut butter and a whole 'lotta crunchy from the corn flakes and peanuts :)

These are also great because they freeze very well. You can make them ahead of time and store them in ziplock bags in the freezer so that you have more time for last minute preparations as your event gets closer. Nana always made these little guys ahead of time- she was such an organized hostess.

They couldn't be easier: 4 ingredients, 4 steps, and no oven required:

Recipe (makes about 21 cookie clusters):
  • 2 packages Butterscotch Chips
  • 1 cup Peanut Butter (smooth or crunchy; either is fine, but I would suggest crunchy especially if you are not going to add the optional peanuts)
  • 5 cups or so of Corn Flakes Cereal (4 cups or so, if you are going to add the optional peanuts)
  • *OPTIONAL: 1 cup Peanuts (Nana ALWAYS added peanuts)
Before you start anything else, prepare 2 baking sheets by covering with wax paper, and make room for them in your fridge (or at least room to refrigerate one at a time). The stacking cookie cooling racks maximize space in the fridge and allow you to chill 2 racks (or even more) at a time without having to clear out a ton of shelves :)

  1. In a medium-large microwave safe bowl, dump 2 bags Butterscotch Chips, and 1 cup crunchy Peanut Butter. Microwave about 45 seconds- then stir, another 45 seconds- stir again, another 30 seconds if needed, until well melted together: 
  2. Dump in 5 cups Corn Flakes and 1 cup peanuts, if using. Gently fold/stir together until all is well coated and combined. (gently as to not break down the corn flakes too much).
  3. Using a spoon, or your two hands :) make little mounds of these on the cookie sheets. 
  4. Refrigerate about 10 minutes.
(My refrigerator is going to thank me when I put this 4 tiered tower of Peanut-Butterscotch Clusters into its tummy!)

*Don't forget, THESE FREEZE WELL, so they are good ones to make ahead for parties and holidays before you get too busy with last minute prep and shopping :)

Thursday, December 22, 2011

Muddy Buddies!!!


I get so excited about Muddy Buddies because it means it's Christmas time!!! The first time I had these little treats was when my mom was teaching jr. high. I was in third grade at the time, and my mom came home from her classroom with tons of fun teacher gifts from her 7th grade students before Christmas break.... one of them was a big mason jar full of these muddy buddies! They were gone almost as soon as we cracked the jar open! My brother and sister and I all begged my mom to get the recipe from her student when she got back to school after break. 
13 years later, I still make these every Christmas and give them as gifts :) Sometimes I fill mason jars and tie them with a big Christmas ribbon, but this year I found some super cute ziplock bags that look like stockings! Whichever way you choose to wrap them up, make sure that it is sealed in an airtight package so that they keep their crunchy deliciousness.


These are easy, delicious, and addictive (beware!)


Recipe:

  • 1 cup choc chips
  • 1 cup peanut butter
  • 1/4 cup butter
  • 9 cups Chex cereal
  • 1 1/2 cups Powdered Sugar
Melt the chocolate chips, peanut butter, and butter in a large microwave safe bowl:

Once well melted, gently fold in the chex cereal until completely coated: 

Toss the coated chex with powdered sugar in a large (2 gallon) ziplock back and shake well. 

**Helpful hint #1: fold down the top of the baggie (as seen in picture) when filling it so that the ziplock remains clean. Otherwise, chocolate and sugar cover the ziplock and it is difficult to seal closed. 

**Helpful hint #2: put 1/2 the powdered sugar in the bag, then the chex, then the other half of powdered sugar and shake well until all the little chex get a white winter coat.

Spread 'snowy' muddy buddies out onto wax paper:

Mmmmmmm... these sweet, salty, crunchy goodies are SO addictive:

 Store or package in airtight baggies/jars/containers. 
Look at these perfect little stocking ziplock baggies for gifting Christmas goodies!

Baked-goodie boxes full of assorted homemade cookies, and stockings full of muddy buddies:

Thursday, December 15, 2011

Slow Cooker Pot Roast


This is a hearty, warming, winter meal. It just doesn't get any better than that... actually, it does- because you don't even have to cook it! Just dump it all in the crock pot and it cooks itself!  You can be at work all day, or be out Christmas shopping all day, and walk into an inviting & delicious smelling house at the end of the day. All you have to do is turn it on and walk out the door :)


This is a one pot meal, unless you decide to make the extra gravy... which is SO worth it. Just one extra pan and 5 extra minutes for that extra special homemade taste.


This roast tastes just like the pot roast Nana used to make in her pressure cooker. I used to LOVE it when she made her pot roast with tender roast veggies :) So comforting and warming. 


Recipe (serves 4-5): 
3-4 whole Carrots, chopped (or about 2 cups baby carrots)
1 medium white, yellow, or brown Onion, chopped
2-3 cups Baby Potatoes, or chopped Russet Potatoes
2-3 stalks Celery, chopped
3 lbs Beef (any "chuck" or "round" cut)
1 envelope of Dry Onion Soup mix
1 cup Boiling Water
1 cup Red Wine

*optional for Gravy: 1 Tbsp Butter, 1 Tbsp flour


Place all chopped veggies in bottom of slow cooker. 

Lay meat on top of veggies. 
Mix dry soup mix into 1 cup boiling water, pour over meat along with 1 cup red wine. 

*Just like with Beef Bourguignon, tougher (less fatty) cuts of meat are cheaper, healthier, and PERFECT for long, slow cooking. As the meat cooks for hours in the liquid, the tough collagen is converted to a gelatin and the meat becomes tender and soft. 
Don't waste your money on expensive fatty cuts of beef; opt for 'chuck roasts' or 'round roasts'. If you have any questions, ask the butcher in the supermarket- they are super friendly. 

Fit lid on top, and turn on low for 8 hrs (or high for 4 hours)

When you are ready to eat, whip up a quick gravy to go with it and everyone will think that you spent all day in the kitchen making this roast. 

Start the gravy by making a roux: Using equal parts butter and flour, melt one Tablespoon or so of butter in a pan, add 1 Tablespoon or so of flour; Cook for no more than a minute, whisking constantly: 

Add liquid from the crock pot (about 2-3 cups). Let simmer, whisking frequently: 
(no need to season it, all of the juices from the pot are seasoned and flavorful already)

When the gravy has thickened to your liking (don't forget, it will thicken even more after it has been removed from the heat, so it's probably done after about 5 minutes- don't sit forever waiting for it to thicken)

Plate the roast and veggies...
(look at that TENDER meat falling apart!)

 and pour gravy over the top...
VOILA!!! It's almost like a shortcut for beef bourguignon!

OPTIONAL: If you want to get a little extra special, just invest a couple minutes on the meat before it goes in the crock pot:
  • Sear the outside of the meat on all sides until dark brown.
  • Then continue all other steps exactly the same, and use that searing pan again later when you make the gravy to get all the extra yummy browned bits into your gravy :)

Wednesday, December 7, 2011

Pecan-Coconut-Crusted Sweet Potato Casserole


I love sweet potatoes every which way: baked, canned, mashed, plain, french-fried.... but this is my favorite version of sweet potatoes! It started with a similar recipe that I found on a blog a few years ago. I made it for my family's thanksgiving table and it was a hit! Ever since then I've been making the sweet potatoes for Thanksgiving. I've slowly adapted the recipe over the years to make it even yummier :)


Well, I'm posting this too late for you to make it for your Thanksgiving this year, but you can still make it for your Christmas feast, or even just for a fancy fall meal for some special guests :) Sweet potatoes are a great healthy side dish that can be enjoyed all year, but especially at this time of year.


If you have any picky eaters who don't like sweet potatoes, you just might convert them with this one. With its smooth interior and sweet crumbly topping, this is practically a dessert! How can you not love that?!?


Let's talk about sweet potatoes really quickly;
Sweet potatoes and yams are NOT the same thing, in fact, they are not even related. Sweet potatoes are a 'root' vegetable, and yams are 'tubers'. Most likely you've never even seen a yam before. Yams are indigenous to Africa, the Caribbean, and South America. This is why the confusion started; when visitors from those tropical lands came to America and then ate the sweet potatoes common to the U.S., they called them Yams since the sweet potatoes resembled the look and flavor to the tropical variety that they were accustomed to in their tropical homelands.
Sweet potatoes, however, provide slightly more nutritional benefits. Sweet potatoes are an excellent source of fiber and Vitamin A as well as a good source of Vitamin C and Vitamin B6. In addition to fiber and vitamins, the sweet potato also provides the minerals Potassium & Manganese. In comparison, Yams do not equal the Sweet potato in ANY of these nutrients. One thing to note, though, is that both yams and sweet potatoes have a high sugar content (not like that's a surprise... they taste SWEET for a reason! Even though it's natural sugar, it's still sugar.)


Recipe (for a large 9x13 casserole):


Filling:

  • 2 large cans Sweet Potatoes (40 oz each), drained; OR about 5-6 cups cooked fresh Sweet Potatoes, peeled & chopped.
  • 1 can Sweetened Condensed Milk
  • 2 large Eggs
Topping:
  • 1 cup Brown Sugar
  • 1 cup chopped Pecans
  • 1 cup shredded Coconut
  • 1/3 cup Salted Butter, melted
Preheat oven to 350 degrees Fahreneheit.

 Combine the sweet potatoes, condensed milk, and eggs in a bowl and mix until smooth and well combined.  
**If you want to leave some more texture, just use half of the sweet potatoes to mix with the other ingredients until smooth, then stir in the other half- leaving chunks as desired. 
Spread evenly into a 9x13 casserole dish. 

 To make the topping, combine all ingredients together:

After mixed, spread evenly over top of sweet potatoes in casserole dish:


Bake at 350 degrees for 45 minutes. The top should be browned and crispy! Mmmmmm! 

Friday, November 18, 2011

Roasted Garlic Hummus

Hummus is a super healthy snack. I don't have a lot of 'snacky' stuff in my house- I just keep a lot of ingredients stocked up in my kitchen, so if you get snacky you better be willing to wait for something to get made. I know, "poor Peter". But HUMMUS- now this is something I don't mind having on hand for snacking! Peter has loved having this homemade hummus in the house. It even helps me to get him to eat carrots and celery :)


Hummus is so healthy because it is high in iron, vitamins, & fiber... but most uniquely, it is a good source of a 'complete' protein. Our body uses over 20 amino acids to make protein and perform various functions in our body. Our bodies can actually make most of these amino acids on their own. However there are 9 that our body cannot make sufficiently for growth, so it is essential that we get them from the foods we eat. This is why they are called 'essential amino acids'. 
Certain foods compliment each other to create a complete protein. For example: 

  • Chickpeas have sufficient amounts of all the essential amino acids EXCEPT tryptophan and methionine. 
  • HOWEVER, seeds and grains happen to be rich in tryptophan and methionine, and low in some of the other ess. amino acids that the chickpeas do have. 
  • THEREFORE, when we combine the chickpeas with tahini (sesame seed paste) and serve it with grains (from the pita bread) you have sufficiently rich levels of ALL the essential amino acids.
i.e. you have a complete protein!


Recipe (makes about 2-3 cups):
1 can Chickpeas (aka garbanzo beans), drained
3 heaping Tablespoons of Tahini
Juice of one small Lemon (1/4 cup)
1/4-1/2 teaspoon Cumin (depending on your liking)
a few dashes of Paprika
1/8 teaspoon Cayenne Pepper
1/4 cup Water (as needed)
1 small head Roasted Garlic (about 12 cloves)
1/4 cup Extra Virgin Olive Oil


It is super easy to make your own roasted garlic. Just slice your head of garlic in half, cross wise, then drizzle with EVOO and sprinkle lightly with salt. Wrap each half in a square of foil and roast at 400 degrees F for about 40 minutes. 


Place all ingredients, except olive oil, in food processor and blend until it becomes a thick paste.

Then AS THE PROCESSOR IS RUNNING drizzle in the olive oil until you get the desired consistency, though it should be thick.


Serve with pita bread, carrots, bell pepper slices, and/or celery sticks.

Garnishing options:

Drizzle with olive oil
Sprinkle with Paprika
Sprinkle with Cayenne
Top with chopped Parsley

Friday, November 11, 2011

Lemon Squares


National Charity League (NCL) is a mother-daughter organization which teaches girls how to serve their community by volunteering for other non-profit philanthropic organizations. There are specific volunteer hours which are to be met, as well as meetings to attend and office positions to be held. It fosters responsibility, leadership, community & cultural awareness, as well as a strong mother-daughter relationship.

I got to participate in NCL with my mom when I was growing up. One more thing that NCL fostered in us was a killer recipe collection. Every quarter, the entire chapter- mother and daughter members of all age groups- would gather together for a formal meeting to discuss upcoming service events, philanthropy partners, updates on hours, etc. These meetings, would begin with a sort of potluck 'tea time' where we were all to bring finger foods or tea goodies to share. It was a breeding ground for recipe exchanges in addition to the informational updates that we received those evenings :) Women baking for other women... OF COURSE they're bringing their A-game recipes!

This particular lemon bar recipe comes from one of those NCL gatherings. It's a keeper. If you get to taste test a bunch of womens' best recipes, then pick your fave, and get the recipe straight from the cook, you know it's going in your keeper recipe file! I hope you enjoy this one and hold onto it too :)

Recipe (for a 9x13 pan):
  • Crust:
    • 2 sticks SOFTENED Butter (if not softened, your crust will come out too crumbly)
    • ½ cup Powdered Sugar
    • 2 cups Flour
  • Filling:
    • 4 Eggs beaten
    • 2 cups Sugar
    • ¼ cup Flour
    • Juice of 1 Lemon (recipe calls for ¼ cup fresh lemon juice; I usually use 1/3 cup because I usually get that much from a medium lemon for even more lemon-y flavor :)
    • Zest of 1 Lemon (about 2 Tbsp)
Preheat oven to 350 degrees F. Then mix together the crust ingredients and and press evenly into a 9x13 pyrex dish:

Pre-bake the crust at 350 degrees for no more than 15 minutes:


(See how it's barely starting to turn golden on the edges; that means it's done. Remember, it's going back into the oven again with the lemon filling, so you don't want it to get overcooked then.)


While the crust is pre-baking, mix together the filling ingredients. 


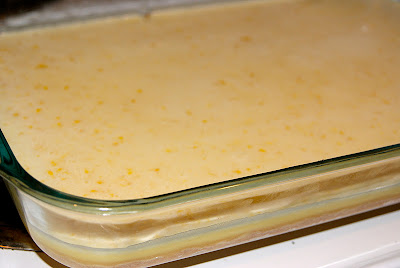
Pour the filling over the pre-baked crust:

Bake at 350 degrees for 20 minutes or until lemon filling has set. 
ALLOW IT TO COOL (it actually takes a while to really cool)
Then dust with a sprinkling of powdered sugar and cut into squares:

Look at this yummy shortbread crust:


And the soft, gooey, lemony filling! 


Makes 18 large square servings: