Showing posts with label Casserole. Show all posts

Wednesday, January 18, 2012

Baked Spaghetti 'Pie'


This one was so much fun to make! It's like a facelift for spaghetti! It could also be a great way to use leftover noodles :)

Peter called me when he got off work and said that he had invited some friends over for dinner. This was a great quick dish to throw together. Luckily, I already had a batch of my homemade bolognese sauce, but if you're really in a rush for time you could make a quick marinara sauce, (or let's be honest- when in a real bind there is no shame in reaching for a good jar of red sauce from the market!)
In any form, this is a delicious and easy entree to whip up. Plus, isn't it so much more fun than plain old spaghetti?!!

Comments from the boys were: 
-"This is so much easier to eat than spaghetti, and it tastes better too!"; 
-"This is so good!...Megan, did I say yet how  good this is!?"; and finally- 
-"Best homemade meal I've had in a long time!"...but that was coming from the boy that just got back from a 'boys trip' in Mexico, so I don't think this one counts, Haha!

This night the three guys took down the whole thing, but I'd say it could normally serve 6 people comfortably- (not counting big hungry boys as normal people, of course)

Ingredients (makes 1 large pie; 8 slices)
  • 6-8 ounces Spaghetti noodles, cooked al dente
  • 2 Tablespoons Butter
  • 1/3 cup grated Parmesan Cheese, plus 1/4 cup for topping
  • 2 whole Eggs
  • 1 (16 oz) container of Fat Free Cottage Cheese (or you can use ricotta cheese. I opt for cottage cheese because it is healthier and tastes just as good when it's all cooked in; those who don't normally care for cottage cheese don't even know it's in here and they love it.)
  • 1 heaping cup of Shredded Mozzarella, plus 1/2 cup for topping
  • 1/2 batch Bolognese sauce, or Marinara Sauce, or your favorite jarred sauce.

Cook pasta 'al dente'; drain; While still hot, stir in 2 Tbsp Butter, 1/3 cup grated parmesan cheese and 2 eggs; Mix well.
The cheese and butter mixed into the noodles give lots of flavor to this bottom layer of the dish; the eggs  hold it all together as it bakes so that later you will be able to cut it into nice slices without the noodles flopping all over the place. 
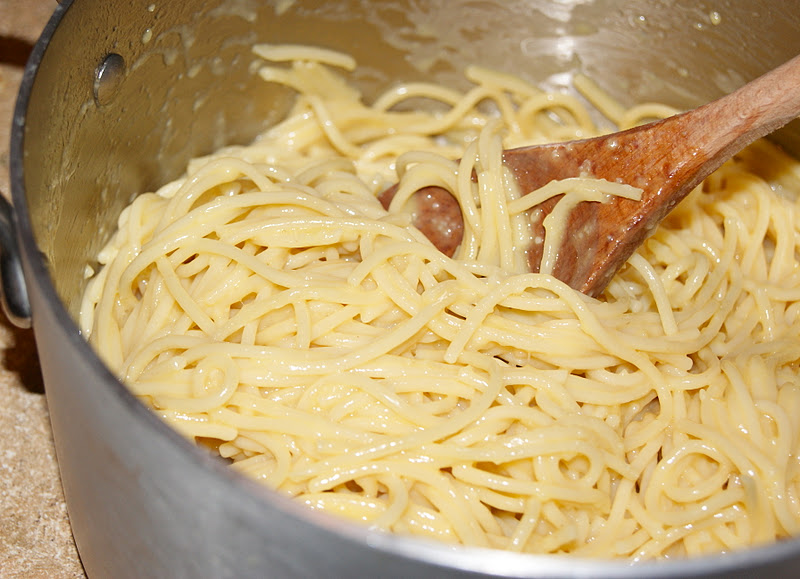
Lightly spray or butter your baking dish, and press noodles firmly into bottom of oven safe dish. (I use this Le Creuset pan, but you could use a casserole dish, a large pie pan, ...any oven safe baking dish)

Mix cottage cheese with 1 cup shredded Mozzarella and press firmly on top of noodles.

Layer your sauce on top of the cheese mixture. I used my homemade bolognese sauce, but you could always use a simple marinara if you are looking for a meatless entree. 
If you want to make this 'spaghetti pie' look like a 'pizza pie', you could also use a simple marinara sauce, top with mozzarella, and then top it lastly with slices of Italian sausage (or any pizza toppings for that matter) to turn this spaghetti pie into a 'spaghetti-pizza pie'! 


Top with a final covering of 1/2 c. mozzarella and 1/4 c. parmesan:


Bake at 350 degrees Fahrenheit for about 45 minutes, or until your cheesey top becomes golden-brown and bubbly!!! Mmmmm...


Slice into wedges to serve. Mangia! 

Wednesday, December 7, 2011

Pecan-Coconut-Crusted Sweet Potato Casserole


I love sweet potatoes every which way: baked, canned, mashed, plain, french-fried.... but this is my favorite version of sweet potatoes! It started with a similar recipe that I found on a blog a few years ago. I made it for my family's thanksgiving table and it was a hit! Ever since then I've been making the sweet potatoes for Thanksgiving. I've slowly adapted the recipe over the years to make it even yummier :)


Well, I'm posting this too late for you to make it for your Thanksgiving this year, but you can still make it for your Christmas feast, or even just for a fancy fall meal for some special guests :) Sweet potatoes are a great healthy side dish that can be enjoyed all year, but especially at this time of year.


If you have any picky eaters who don't like sweet potatoes, you just might convert them with this one. With its smooth interior and sweet crumbly topping, this is practically a dessert! How can you not love that?!?


Let's talk about sweet potatoes really quickly;
Sweet potatoes and yams are NOT the same thing, in fact, they are not even related. Sweet potatoes are a 'root' vegetable, and yams are 'tubers'. Most likely you've never even seen a yam before. Yams are indigenous to Africa, the Caribbean, and South America. This is why the confusion started; when visitors from those tropical lands came to America and then ate the sweet potatoes common to the U.S., they called them Yams since the sweet potatoes resembled the look and flavor to the tropical variety that they were accustomed to in their tropical homelands.
Sweet potatoes, however, provide slightly more nutritional benefits. Sweet potatoes are an excellent source of fiber and Vitamin A as well as a good source of Vitamin C and Vitamin B6. In addition to fiber and vitamins, the sweet potato also provides the minerals Potassium & Manganese. In comparison, Yams do not equal the Sweet potato in ANY of these nutrients. One thing to note, though, is that both yams and sweet potatoes have a high sugar content (not like that's a surprise... they taste SWEET for a reason! Even though it's natural sugar, it's still sugar.)


Recipe (for a large 9x13 casserole):


Filling:

  • 2 large cans Sweet Potatoes (40 oz each), drained; OR about 5-6 cups cooked fresh Sweet Potatoes, peeled & chopped.
  • 1 can Sweetened Condensed Milk
  • 2 large Eggs
Topping:
  • 1 cup Brown Sugar
  • 1 cup chopped Pecans
  • 1 cup shredded Coconut
  • 1/3 cup Salted Butter, melted
Preheat oven to 350 degrees Fahreneheit.

 Combine the sweet potatoes, condensed milk, and eggs in a bowl and mix until smooth and well combined.  
**If you want to leave some more texture, just use half of the sweet potatoes to mix with the other ingredients until smooth, then stir in the other half- leaving chunks as desired. 
Spread evenly into a 9x13 casserole dish. 

 To make the topping, combine all ingredients together:

After mixed, spread evenly over top of sweet potatoes in casserole dish:


Bake at 350 degrees for 45 minutes. The top should be browned and crispy! Mmmmmm! 

Monday, November 7, 2011

Chicken Enchilada Casserole


THIS is the family favorite. My mom made this for our fam when we were growing up. It makes a large casserole, but there were hardly ever any leftovers. Even if there were a little bit of leftovers, they definitely didn't last past lunchtime the next day. To this day, this is the most requested birthday item from everyone in my family. 
In fact, this time that I made it, it was per request from my brother and sister-in-law when they came home from the hospital with their new baby boy. 


Rather than the traditional chicken enchilada which has individual rolled enchiladas, this one is a layered chicken enchilada casserole. I love casseroles because they are easy to assemble, all the flavor is trapped together in one dish, and they are great for feeding a crowd.  
This recipe makes a large 9x13 casserole, however I made two 8x8 casseroles this time; one for Peter and I, and one to take over to Cullen and Ashley's when they got home from the hospital.


For this enchilada, there are only 3 parts that get layered together: tortillas, chicken, and sauce:


The chicken is as easy as plain cooked chicken that is chopped or shredded. In a pinch, a rotisserie chicken works VERY well for this recipe. This time, I cooked a whole chicken and shredded all of its meat for this casserole.


Some enchiladas allow you to use corn or flour tortillas, but I would urge you NOT to use flour for this one. I've made it with flour tortillas once and I will never make that mistake again. It came out too soggy :( Besides, corn is healthier anyway :) For these enchiladas, just stick to corn tortillas.


Recipe (makes a large 9x13 casserole dish):

  • 1 can Cream of Chicken soup
  • 1 can Cream of Mushroom soup
  • one 24 oz jar Salsa, I use 'medium' spice (the 'La Victoria' style of salsa)
  • 16 oz Shredded Cheddar, plus 8 oz Shredded Cheddar; divided
  • 1/2 to 1 cup Milk (I use fat free)... not necessary for flavor, so if you don't have the milk, don't stress; it just helps to thin and stretch the sauce so that you have enough for the top (which is pretty important)
  • 24 Corn Tortillas
  • about 4 cups Chicken, cooked & shredded (4 large Chicken Breasts or the meat of one Whole Cooked Chicken)
  • For serving: Sour Cream, or a healthier option- Guacamole!


First, mix together the can of Cream of Chicken soup, the can of Cream of Mushroom soup, the jar of Salsa (reserve a few spoonfuls for the bottom of the baking dish), and 16 oz shredded cheddar, and the milk. 
(The cup of milk does not affect the cooking or flavor of this dish, but if you have a cup of milk it helps to make this sauce stretch a little further; it's important that you have enough of this sauce as you layer because this needs to be the top layer covering the casserole.) 
It makes a great looking pink sauce... Peter always sneaks over with a bag of tortilla chips at this point and starts dipping into this sauce- until I whack him with my spoon :)
  
Now slice your tortillas into 1 inch strips (they already have lines baked into them, so I just pile a handful at a time and slice the stacks all at once along the guide lines.)

I roasted a whole chicken and shredded it for this dish, so I used some of the chicken broth juices from the roasting pan to cover the bottom of the enchilada dish. If you do not have the cooked chicken broth, then you can use a few spoonfuls of salsa, or even spread a bit of your cheesy-pink enchilada sauce. 
(If you do not put something down there, the dry tortilla strips might bake hard onto the casserole dish)

Lay out your tortilla strips to cover the bottom of the pan:

Then layer 1/3 of your shredded chicken:

Then 1/3 of your sauce:

Repeat, ENDING WITH THE SAUCE. This is important. If you end with a layer of tortillas or chicken, it will bake all hard and dried out. No es bueno!
Then cover the top layer of sauce with 8 ounces or so of shredded cheddar (my favorite part- the ooey gooey cheesy crust :)

Bake at 350 degrees F until the cheese bakes golden brown and bubbly (about 45 minutes): 

Let is sit for about 10-15 minutes before you cut into it. This will allow it to cool slightly, and to firm up. Otherwise, you will cut a serving and it will ooze off the spatula and all over the plate. It will taste great, but it won't look as appetizing. So let it sit for a little!
Delicious served with a healthy side of yummy guacamole!

This is one meal that gets even better the day after because all the flavors marry together even better as they sit. Unfortunately, leftovers (if any) hardly last long enough. 

...A good solution to this could actually be even easier for you; make it ahead of time! When you are ready to bake it, pull it from the fridge, bring it to room temp, and then pop it in the oven at 350 for 45 minutes. A flavorful, filling meal that's ready when you are! That's why I love casseroles :)

Wednesday, October 19, 2011

Creamy Chicken Enchiladas


This is a quick and easy version of chicken enchiladas that packs a lot of flavor punch. I've seen recipes for 'creamy chicken enchiladas' that use either cream cheese or sour cream in the filling. To lower the calories and fat, I used nonfat plain greek yogurt instead of the other creamy ingredients that are higher in calories and fat. You still get all the cool, creamy refreshing flavor of the sour cream, but without the calories and fat. 
The nonfat, plain greek yogurt is one item that seems to always be on my grocery list nowadays. It substitutes SO WELL in place of sour cream in any recipe... it's unreal.

This recipe was a weeknight inspiration when I got home late from work and needed to whip up a quick dinner... before heading out again to see our new baby nephew that had just been born! Usually when these rushed evenings happen, I get a flood of 'oh crud' feelings and my adrenaline pumps, but some of my most creative and successful recipes come from those moments on the fly. On this particular night, I opened the fridge and saw a big bundle of cilantro. "That's it" I thought, "I'm going to use that cilantro and I'm going to use the greek yogurt to make quick, creamy, healthy mexican enchiladas". The rest of the ingredients I needed to make the enchiladas are just staples that I almost always have on hand (so you likely will too). It was a no brainer; boil the chicken. assemble enchiladas. bake. done. out the door. We even got to pack some up and take it to the hospital to share with the new parents!

Ingredients (makes one 9x13 casserole dish):
  • 3 cups cooked Chicken, shredded or cubed
  • 12 oz. plain, nonfat Greek Yogurt 
  • 1/2 cup chopped Cilantro
  • One 4-oz. can of diced Ortega Chiles, drained
  • 2 cups shredded Cheese, divided (I used a 4 cheese mexican blend, but you can use mozzarella, pepperjack, anything you like)
  • 1/2 cup diced Tomato, (or 1/4 cup Salsa)
  • 8 medium sized Flour Tortillas, OR 10 small Corn Tortillas
  • One 28-oz. can of Green Enchilada Sauce


Mix your 3 cups chicken, 12 oz. yogurt, 1/2 cup cilantro, ortega chiles, 1 cup cheese, and 1/2 cup tomatoes all together in a bowl.


In the bottom of your 9x13 baking dish, spread 1 large spoonful of the green sauce. This will keep the tortillas from baking onto to the dish.


Warm tortillas by wrapping them in a damp paper towel and steaming them in the microwave for a few minutes. This will make them pliable, so that they won't crack when you try to roll them up.


Stuff the warmed tortillas with as much of the creamy chicken filling mix as you can inside each tortilla. 

Roll them up and place seam side down in your sauced baking dish.


Once all your tortillas are rolled and nestled into the baking dish, pour the remainder of the green sauce over your little enchilada rolls.


Top with the other cup of shredded cheese (or more if you like) and bake, uncovered, at 350 degrees F for about 30 minutes, or until heated through and cheese is golden brown and bubbly on top. 


You can add or omit any ingredients you please. You really can't mess these up. It can even be as simple as just a little cheese and the chicken inside the tortillas and it will still be delicious and filling! Cover anything with sauce and cheese and you can't go wrong :)

Monday, August 8, 2011

Chicken Divine


Chicken Divine (pronounced Chicken 'Divan'), is a casserole made with chicken and brocoli, and it is a great and super easy weeknight meal! In fact, this time that I made it, I worked a 9 hour day, then picked up my car from the mechanic shop, and STILL had time to make this easy and delicious dinner.

This time, I tried something new-- I actually replaced some of the original ingredients with healthier options and the end result tasted EXACTLY THE SAME as the original recipe!! Though it sounds healthy, being a chicken and broccoli dinner, some of the ingredients in the sauce could be made healthier. I was nervous because it makes a large casserole dish worth of food and if this healthy makeover didn't turn out well.... it would have been a loooong week of forcing leftovers :) But you would never know that some of the original calorie and fat laden ingredients had been omitted! Peter wanted it again for dinner the next night AND he wanted me to pack it for lunch to take to work with him! This was a successful healthy makeover. 


I have underlined just a couple of the BIG changes in the recipes below so you can have both the original recipe as well as the healthier version so that you can be able see where some of the ingredients were altered:

Serves 6-8:

Healthy-Makeover Recipe:
2 lbs Boneless Skinless Chicken Breast, cooked & cubed
2 lbs fresh Broccoli, chopped (or 2 bags frozen broccoli)
1 cup shredded Swiss Cheese
1 cup shredded Longhorn Cheese (or a mild white cheddar)
1/4 tsp Curry Powder
One 8oz. container of Nonfat Plain Greek Yogurt
2/3 cup light Mayonnaise
1 can low sodium Cream of Celery Soup
1 1/2 cups bread crumbs
2 Tbsps Butter, melted (I know this part isn't healthy, but it is optional... necessary in my opinion though :)

Original Recipe:
2 lbs Chicken, cooked & cubed
2 packages frozen Broccoli
1 cup shredded Swiss Cheese
1 cup shredded Longhorn Cheese
1/4 tsp Curry Powder
One 8oz. container of Sour Cream
2/3 cup Mayonnaise
1 can Cream of Celery Soup
2-3 cups bread crumbs
4 Tbsps Butter 


Just by switching...
  1. sour cream to nonfat plain greek yogurt you will save: 334 calories, 45 g fat, & 26 g saturated fat
  2. regular mayo to light mayo you will save: 534 calories, 64 g. fat, & 6 g. saturated fat
  3. 2 tbsps of butter less for the crumb topping, you will save: 200 calories, 22 g. fat, & 14 g. sat. fat


...Cutting a grand total of 1,068 calories, 131 grams of fat, & 46 grams of saturated fat


Okay, now down to business... Start by making the sauce; mix the cheeses, cream of celery soup, greek yogurt, light mayo, and curry powder. 

 In a large casserole dish lightly sprayed with a nonstick spray, layer the chopped broccoli...
 ...then the cooked/chopped chicken...
 ...then top with the sauce mixture.

 Bake at 350 degrees F for about 30 minutes until the top just starts to turn golden...
While the casserole is baking in the oven, make the bread crumb mixing the bread crumbs (I pulsed together some seasoned bread cubes and panko) and the melted butter.

After the casserole has been cooking for about 25-30 minutes and the top just starts to turn golden...
 Pull it out of the oven, top it with the buttered bread crumbs, and return it to the oven for just enough time to allow the bread crumbs to turn golden brown (about 10 minutes)

After about 10 minutes: 

It is HOT, so let it sit for a few minutes to cool down, and also to let it set up or else it will run all over your plate if you try to serve it before it has set.

It doesn't exactly serve in a typical, perfect, casserole-like square serving size... In fact it is easier to scoop servings with a large serving spoon rather than a spatula.

Saturday, February 26, 2011

Mama's Lasagna


This is my mama's lasagna. Our family grew up with this as one of our favorite dinners, and it continued to be one of my favorite comfort foods to cook when I went away to college. Now, it is one of Peter's favorites that I get to cook for him! I have only made a few minor alterations to the original version I was given. My mom and my dad are VERY different when it comes to their food preferences. My mom enjoys healthier foods, and my dad prefers the 'fully-leaded' versions. However, this lasagna is the PERFECT balance. Mom figured out how to make some easy, healthy substitutions that taste great, and Papa still gets his meaty, cheesy, delicious lasagna. 


Recipe: 

  • 1/2 lb (1/2 16 oz. box) Lasagna Noodles (you can use whole wheat pasta to make it even healthier), cooked & drained
  • 1 lb lean ground Turkey (instead of red meat)
  • 16 oz. shredded Mozzarella Cheese (low moisture- part skim for lower fat content)
  • 16 oz. fat free Cottage Cheese (instead of ricotta-- if you're not a cottage cheese fan, DON'T WORRY- this does not taste like cottage cheese and you won't even know it's there! For proof, Peter can't stand cottage cheese, but loves this lasagna.)
  • 2 eggs (remove one or both yolks to reduce cholesterol)
  • 1 jar of Red Sauce, or 1 batch of homemade pasta sauce
  • Parmesan Cheese for topping (about 3/4 cup)

**Nutrition Noteworthy: Among cheeses, part-skim mozzarella, nonfat cottage cheese and parmesan cheese rank as some of the best for being lowest in calories, fat, and cholesterol. Part-skim mozzarella and parmesan also rank fairly high for their calcium levels. However, all cheeses are generally high in sodium, so proceed with caution (especially if you have high blood pressure, heart conditions, or compromised kidney function.)


While your noodles are boiling, brown your ground turkey in some extra virgin olive oil.

When the meat is browned and cooked through, add the red sauce and let simmer. (optional: I also added 2 chopped zucchinis and a couple good handfuls of spinach leaves into the sauce as well. It may look like a LOT of spinach, but it will wilt down to nothing in the sauce. This is a great way to sneak in some veggies for your picky eaters.) Stir all together and let simmer over medium-low heat.
**Nutrition Noteworthy: Spinach is a nutritional powerhouse; it is a GREAT source of Iron, Calcium, Vitamins C & A, and Folic Acid... in addition to many other vitamins and health benefits. 


See how much the veggies have reduced!


 While your sauce is simmering, mix together the cheesy filling: Cottage cheese, mozzarella, and the 2 eggs.

Helpful Hint: Spread some of the red sauce and/or some extra oil on the bottom of the pan before you start layering, or else the noodles on the bottom will bake hard onto your pan, and it won't scoop out nicely.

Then drain your cooked noodles and start layering your ingredients as follows: 

  1. Noodles
  2. 1/2 of cheesy mixture
  3. Noodles
  4. 1/2 of red sauce
  5. other 1/2 of cheesy mixture
  6. Noodles
  7. other 1/2 of red sauce
  8. Top with parmesan


 Bake at 350 degrees F for about 45 minutes or until it is heated all the way through and the parmesan is golden and bubbly on top.
Also, let it sit for about 5-10 minutes before you try to cut in to it. This will let it firm and set up. Otherwise you will try to serve it onto a plate and it will run apart kind of soupy. Trust me, it will still be hot, but it will look much nicer for serving if you do wait a few minutes.

Leftovers pack easily, and reheat well in containers to take to the office for lunch.
It also freezes well; I like to cut leftovers into individual serving sizes and freeze the portions in ziplock baggies. Then, if Peter is home alone, or if I don't have time to make dinner, there is always some homemade lasagna ready to step up to the plate!