Showing posts with label Healthy. Show all posts

Saturday, December 15, 2012

All Natural Homemade Granola


This granola is SO YUMMY AND SO EASY TO MAKE! It has become an absolute staple in our house. Pete just dominates a bowl of greek yogurt if I top it with some of this crunchy granola. In fact, I don't think I could ever even get him to eat a plain bowl of nonfat, unsweetened, greek yogurt at all if it weren't for this granola.
This recipe makes enough to fill 3 large mason jars. The first time I made it, I thought 'Oh my this is way too much, I need to give away a jar or two. We will never finish all of this.' But we wound up going through all 3 of them in just a month!
It is super nutritious- packed full of fiber, vitamins, and protein ...and flavor! Flavor is an important part of nutritious food too -if it doesn't taste good, people won't eat it; if people won't eat it, what good is it! This granola shows that nuts, seeds, and whole grains are not just bird food anymore :) They're definitely nutrition worth eating.

I originally got this recipe from one of my dear friends- and college roommate- Dana. She got the recipe from her neighbor, but Dana tweaked it a bit to make it her own. Now that I've been making it for awhile, I've tweaked it a bit. That's the best kind of recipe; one that's been passed around and versatile enough to be tweaked to your own liking. Feel free to make changes to this granola to make it your own. Share any changes with me...I would have fun with your ideas to mix it up a bit next time I make it :)

This is ironic timing to share the recipe because I first tried this granola when Dana gave me a big mason jar full of this yummy granola for Christmas a few years ago. I think I just might fill a few jars to give away this Christmas as well. Tie a ribbon around the lid with a little handwritten tag and it makes a great gift for teachers, neighbors, co-workers, acquaintances, ...even a possible stocking stuffer?

RECIPE (about 12 cups or fills 3 Large Mason Jars plus a little extra) :


  • 5 cups Rolled Oats
  • 1 1/2 cups Shredded Coconut
  • 1 cup Ground Flaxseed (or Wheat Germ)
  • 1 cup Sunflower Seeds, shelled
  • 2 cups Cashews, halved
  • 1/2 cup Canola Oil
  • 1/2 cup Honey
  • 1/3 cup Water (or 1/3 cup Maple Syrup)
  • 1 1/2 teaspoon Salt
  • 2 teaspoons Vanilla
  • 1 cup dried fruit (I like to use craisins. Dana used orange scented golden raisins from Sprouts Market and they were super awesome in this granola)
This makes A LOT, so before you start making this, make sure you have two jelly roll pans, OR a HUGE baking dish with like 5 inch tall walls like the one I have pictured here. I actually think two pans would be better because it will toast more evenly. I have to stir my granola often in the deep dish pan that I use. 
Then preheat the oven to 350 degrees Fahrenheit.

In a bowl, mix together the oil, honey, water, salt, and vanilla. (The original recipe from Dana's neighbor gave the option of 1/3 cup water OR 1/3 cup maple syrup. I opt for the water in order to cut down on the sugar, but you can try it either way and see which you like best)
**Helpful tip: warm the honey slightly and it will combine easier with the other ingredients. 

Then, into your honey mixture dump the: oats, coconut, flaxseed (or wheat germ), sunflower seeds, and cashews. Stir well and make sure it is all mixed together and coated completely with the liquid/honey mixture. 

Spread your raw granola mixture evenly in your baking pan/pans, and bake for about 40 minutes or so (stirring every 10 minutes) until it is all golden brown. It will not be all crisp and crunchy until you pull it out of the oven and let it cool for a few minutes. So don't worry if it's golden brown but feels slightly soft -you can continue to bake it longer if you want, but as soon as it turns toasty brown colored just pull it and let it cool to a crisp.
However, BEFORE it cools, add in the one cup of dried fruit. Stir into the hot granola.

Allow to cool, and store in an airtight container. I love using the old fashioned mason jars.

We enjoy this granola in a yummy yogurt parfait with fresh strawberries during the summer. I use plain, nonfat Greek yogurt, with NO sweetener. All you need is the natural sweetness from the fruit and the granola and you'd never know that it's plain yogurt!
Good strawberries are hard to find at this time of year, so you can use any fruit that's in season, OR don't forget about frozen fruit! Just because it's frozen doesn't mean it's any less good for you... just make sure you choose frozen fruit with no sugar added.

Wednesday, August 29, 2012

Oven-Roasted Parmesan Tomatoes


I needed a veggie side to go with our parmesan tilapia dinner, and I had some extra tomatoes in the fridge, so these delicious little treats were born :)

They are roast-y on the outside and juicy on the inside. They have a delicious golden parmesan crust and a little sprinkle of basil adds a big complimentary punch of flavor. Absolutely beautiful.

Tomatoes are even better for you when they are cooked anyway! A lot of people are worried about losing nutrients when they cook their fruits and veggies, but tomatoes are actually more powerful for you when they are cooked. That's why it's commonly recommended to include red pasta sauce into your weekly menu rotation, or canned tomatoes, tomato soup, ...any form of cooked tomatoe... like these warm little roasted tomatoes! :)
One of the great nutritional components of tomatoes is 'lycopene', and it is lycopene that is activated when heated/processed/cooked. In fact, the lycopene in a tomato is roughly 4 times more bioavailable when it is cooked (i.e. pasta sauce) rather than when eaten raw (i.e. in a salad). Lycopene is a powerful antioxidant and is believed to possibly help prevent cancer -especially prostate cancer. It is found in several fruits and veggies (mostly red-orange colored ones) but is most well known in tomatoes since they contain such high levels of lycopene. Lycopene is also fat-soluble, which means the more olive oil you eat with it, the better it is absorbed into your body :)
So let's start oilin' and cookin' our tomatoes!...

Ingredient List:
  • Tomatoes (I used Romas, but I suppose you can use any firm ones that you like or that you already have on hand)
  • Olive Oil
  • Basil (I used crushed dried Basil, but you could use fresh as well)
  • Parmesan Cheese
  • Black Pepper
Preheat the oven to 400 degrees Fahrenheit. 

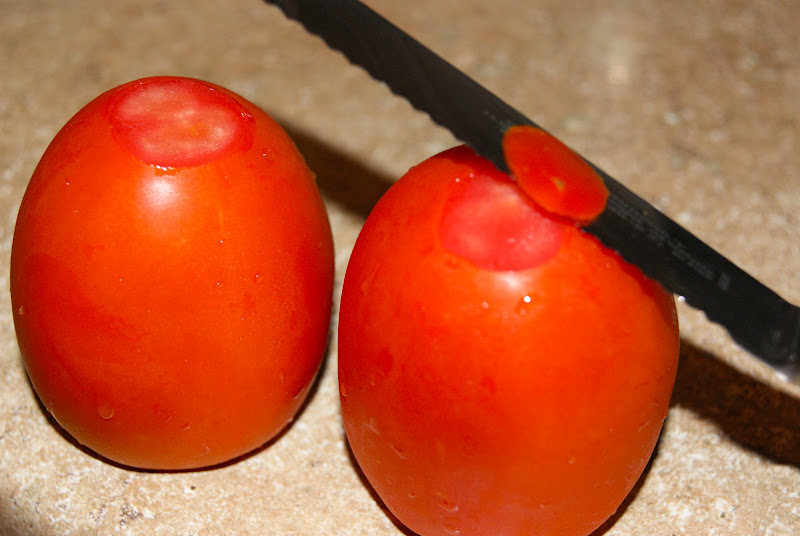
Slice the tomatoes into about 1 inch slices. (To use the ends, slice just a tiny tip off each end of the tomato to give them a footprint to stand on and the open slice on top; see picture below)

Line a baking sheet with foil and drizzle with olive oil. Lay the tomato slices on the olive oil, and drizzle the tops of the tomato slices with olive oil as well, and a good sprinkling of basil.

Now top each tomato slice with a hearty pinch of Parmesan, and a little dash of black pepper.

Roast the tomatoes at 400 degrees for about 15 minutes so that the tomatoes get roasty and heated through, and the cheese melts on top. Then finish them off under the broiler for just a few minutes to give the cheese a golden, bubbly crust on top.


They are so simple yet so divine! Look at that beautiful roasted skin, the warm juicy inside, and the bubbly basily cheese :)


I served mine alongside parmesan tilapia and creamy risotto:

Thursday, August 23, 2012

Parmesan-Crusted Tilapia


Tilapia is a great fish if you're cooking for a mixed group; it is tender and flakey enough for fish-lovers, yet mild enough that non-fish-lovers definitely enjoy it too. Tilapia is a very mild white fish and doesn't taste 'fishy' at all. It is usually a great one for beginners. 

Parmesan cheese has a strong sharp flavor that is perfect for flavoring this mild filet of fish. The paprika and parsley are more for color and visual appeal than for flavor. Interestingly enough though, dried parsley is a surprising nutritious source of lycopene- the antioxidant most well known as one of the great health components of tomatoes. (Which reminds me that I also served these tasty filets with roasted tomatoes -another post where I discuss lycopene in more detail).

I accompanied this tilapia with creamy risotto and roasted tomatoes. If you have all your ingredients ready to go, you can make this entire meal in 30 minutes start to finish. We'll start with the fish...

Recipe (makes 4 tilapia filets):

  • Four 4 oz. Tilapia filets
  • 1/2 cup grated Parmesan Cheese
  • 1 1/2 teaspoons ground Paprika
  • 1 1/2 teaspoons dried Parsley
  • a couple shakes of ground Black Pepper
  • Olive Oil

Preheat the oven to 400 degrees Fahrenheit. Cover a rimmed baking sheet with foil, and drizzle a little olive oil on the foil so that it's ready for the fish.

Mix the parmesan, paprika, parsley, and pepper in a dish.


Gently pat the fish filets dry with a paper towel, and drizzle with some olive oil.


Sprinkle the parm-mixture evenly over each of the filets, gently pressing it into the olive oil on each side -especially on the top :)
Lay the filets on the olive-oiled-foil ...trust me, do not skip the olive oil here! Fish is tender and flakey and it would be terrible if your beautiful filets fell to pieces because they stuck to the foil while trying to get them off.

Bake at 400 F for 15 minutes or until the parmesan topping is golden and the fish is cooked through.

They are GORGEOUS, HEALTHY and DELICIOUS. And SO easy! Who knew!? 


That is a delicious crust on the fish, and see how beautifully the paprika colored it!
Just look at how wonderfully flakey it is! No mushy fish here :)

I served my tilapia filets with creamy risotto and roasted tomatoes. You can have this entire healthy, fancy meal on the table in just 30 minutes!

Monday, June 11, 2012

Honey-Ginger Salmon


Hot weather makes you want to BBQ,  be outside, eat lighter meals, and start dreaming about days on the beach!

Not only have Peter and I officially started beach season with our first volleyball match here at main beach, but we have been heating up our BBQ more often, and we even started running together! Man I love these long, summer days! 
I *cough* used to be a runner, and Peter... well, let's just say swimming has always been his strong suit (no pun intended).  So, we are taking advantage of this beautiful weather -and the opportunity to motivate each other- by going on runs together. After a run, the last thing we want is to eat something heavy, so we have started eating more fish! 
You've probably noticed that I don't cook seafood very often ever. This isn't because I don't like fish, but rather because I simply never think of it. I grew up in a meat & potatoes kind of family, so fish recipes have not been handed down in family cookbooks or served at our tables. This is funny, though, because my family is full of fishermen! We all love fishing! Most kids grew up watching Saturday morning cartoons, but my big brother made my sister and I watch 'Bill Dance' bass fishing in leu of cartoon time. Even family vacations always included fishing- whether it was in a river, lake, or an ocean. ...All of this, and we still weren't big fish eaters!?!? What was wrong with us!? Fish is such a great food! It is a wonderful source of lean protein and it is packed full of healthy omega-3 fats. I wish I ate more fish. Fish should definitely find its place in a healthy diet and lifestyle. This is why Peter and I are heating up our BBQ (and lacing up our running shoes) and making a conscious effort to eat more fish this summer. 

Recipe: 
1 lb Salmon Fillet, skin on (cut into 4 serving portions)
4 Tablespoons low sodium Soy Sauce
2 Tablespoons Rice Vinegar
2 Tablespoons Honey
2 teaspooons minced Ginger
Sesame seeds for garnish

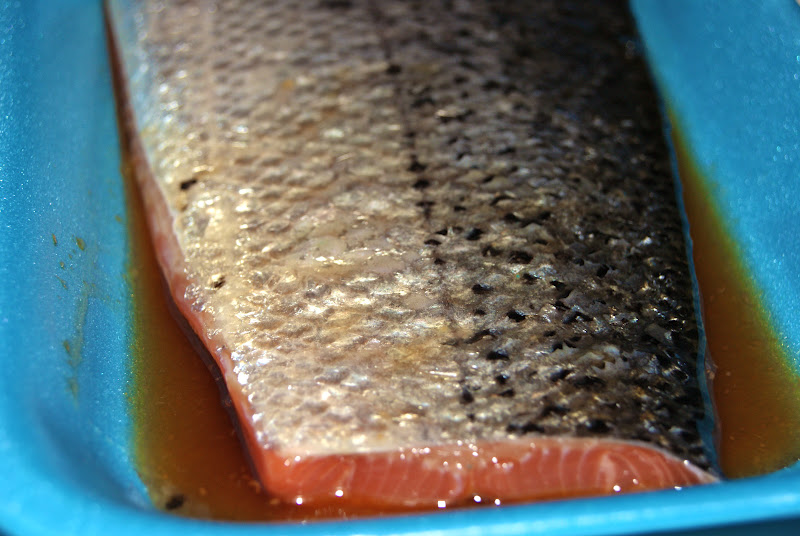
In a small saucepan, whisk to combine the soy sauce, vinegar, honey, and ginger. Pour half of this sauce in a shallow dish or a plastic ziplock bag and leave the other half in the saucepan. (You can mix it in a bowl if you would like, but mixing it straight in the pan eliminates an extra step and an extra dish).

Place your fish in the dish or bag with half the marinade and allow to marinate for 20 minutes. 
*Helpful Hint: Don't marinate longer than this. A lot of people think that marinating longer means more flavor, but the acid in a marinade will break down the fish and make it mushy if you marinate it much longer than this. You want flavorful flakey fish, not mushy fish. 

Preheat your BBQ grill to high while the fish marinates. Then, on the stove top, reduce the other half of your marinade in the saucepan over medium heat until it thickens enough to brush on the fish like a glaze. 

Once your fish has marinated for 20 minutes, reduce the BBQ heat to medium-low, and place your salmon fillets right onto the BBQ grill grates, skin side down. No oil or spray necessary; the skin crisps up and releases easily from the grates. Close the BBQ lid and allow to cook for 15 to 20 minutes or until your desired doneness: 
*Helpful Hints: 

  • When picking out fish, you want it to be a bright coral/pink color with defined striations in the flesh. If it is dull or grey in color, it is most likely not fresh. Old, grey fish= pungent, not fresh-tasting fish
  • Do not flip during cooking otherwise you will lose delicious flakes of fish into the fiery abyss of the grill
  • The fish should turn from a translucent pink to an opaque off-white when done. It will also become more firm and flakey when finished :)


 When you have about 5 or 10 minutes left, throw some veggies on the grill while the fish finishes cooking. You can also brush on a little more glaze at this point.


Use a spatula to lift your fish off the grill and remove it to a platter where you can brush it with your glaze.

We enjoyed ours with some lentils and grilled zucchini

Don't forget to garnish with a sprinkling of sesame seeds too! Not only do they look fun and pretty, but they also hint at the asian flavors in the glaze. 

Sunday, April 22, 2012

Watermelon Fruit Basket


These are so fun to make. These fruit baskets can even double as a center piece on a small or crowded table since they are so cute to look at but also serve a practical purpose.

I've made these for birthdays, showers, and bbq's. This particular basket was made for our Easter brunch table this year. I kind of had to make it in a hurry because everyone was ready to eat! The boys always play wiffle ball in the backyard, and once they are called inside to eat, they are not willing to wait long or else they comment about how they could still be playing outside. hahaha :) 

First, wash your watermelon. Then, rotate it around until you find which side would make the best bottom:

Place the tip of a sharp serrated knif right under the watermelon- right there where it is touching the counter top- and gently spin the watermelon around to etch a circle under your watermelon. Then take your knife and carefully shave that circle to create a 'foot print' for your watermelon to stand on (or else it might rock back and forth later and dump your salad out)... BUT be *very cautious* NOT to break into the red part of the melon.

With your melon standing on its 'footing', take your knife tip and etch the handle and sides of the basket. Essentially, it will just be two big wedges that you are cutting out. Make sure the two sides are basically even and matching before you cut into it. 

Cut the two wedges out and save them for eating later... I gave mine to the boys that were playing wiffle ball outside. 

Then carefully slice along the underside of your basket handle and release the entire inner section of fruit. 

Then use a melon-baller to get all the fruit out of the inside of the melon basket. 
*TAKE IT EASY at the bottom of the basket. Remember that foot you cut out of the bottom? If you are too aggressive getting the melon out, you might go right through the bottom and end up with a leaky basket (I guess there are worse things in life)

Then carve any detail you like around the edge of the basket. Mine isn't the prettiest or most professional-looking (since the boys were on their way in), but you get the idea here:

Then mix your melon balls with any fruit assortment you like for a fruit salad. Here is the final product presented on our easter brunch table:

I usually like to decorate around my basket with pretty and edible foliage, like grape leaves on a curly vine or bright orange nasturtiums.

Since your are removing all the melon from inside the basket and then filling all that melon PLUS other fruits back into the shell, you will have enough mixed fruit salad to fill and refill the fruit 'basket'.

Friday, March 23, 2012

Egg 'McMuffin'


I call these Egg 'McMuffins', but they're really more like omelette muffins, or a crustless quiche, or maybe even more like mini frittatas. 


I made these one morning for Pete and a few of his buddies a while ago when they came down for a Saturday morning in Laguna. That morning, Pete and I took an early Saturday morning stroll and walked down to the market to get some groceries for breakfast. Peter got a call on his cell phone and the next thing I heard, he was saying, "Sure, Meg's about to make breakfast- come on down!" Suddenly, my menu changed and I had to get back and throw a feast together fast! I had never made these before, but it was the easiest way to throw together a bunch of breakfasts for a bunch of boys with about NO times notice. They were such a hit that I have loved making them ever since then. This week, these little egg muffins made their debut as our St Patricks Day pots of gold :) 


Besides the fact that they are fun and fast for breakfast, they are also great because you can use ANY ingredients that you would normally like in an omelette or quiche. PLUS, they are awesome to keep in the fridge and reheat for an instant breakfast on a work morning. That's what we have been doing all week; Pete has just been loving these quick healthy little 'omelettes'. 


Recipe (for a large (6 muffin) sized muffin pan): 

  • 10 Eggs
  • 1 cup Skim Milk, or fat free Half & Half
  • 1/2 cup shredded Cheese (I use low moisture part skim Mozzarella, but Cheddar, Gruyere, or Swish would be good too)
  • Toppings (I use 2 Bell Peppers- 1 red & 1 green, 1 diced Yellow Onion, for the boys I added 8 oz. lean Sausage, I just used the veggies for Peter and I and it was great too!)
  • *Optional 1/2 teaspoon Salt
Directions: 

  1. (*If using sausage or bacon, cook that in your pan first.)
  2. Heat some Canola oil in a sautee pan and cook your diced onion and bell peppers for a few minutes. 
  3. Whisk your eggs and milk together (you can add a little salt here too. If you are using a breakfast meat though, those are usually pretty salty already; also cheese adds a little salt to it as well)
  4. Spray your muffin tins with nonstick spray.
  5. Divide your sauteed veggies and/or meat evenly between the muffin tins. 
  6. Ladle the eggs into each muffin tin over the fillings
  7. Sprinkle a little cheese on top of the egg
  8. Bake at 400 degrees F for about 20 minutes. 
Bake until they puff and golden on top:

Look at how beautiful and golden they get!

However, they do deflate within minutes of pulling them out of the oven. I've tried using a little baking powder whisked into the egg mixture to make them stay puffed... but that just leaves a funny taste to them. 
Nevertheless, these deflated little omelette muffins are still SO SO yummy and convenient just the way they are. 
I let these cool, then store them in the fridge in a giant ziplock bag. I've been SUPER busy with work and have had a lot of early mornings, so these are great for Pete. He just pulls one out heats it in the microwave and dabs a little tapatio on it. Instant homemade breakfast to go!

Other Ideas: 
  • If you have guests staying the night, you can make these ahead of time and cover them in the fridge until the morning when you can bake them off fresh.
  • You can toast a whole grain English Muffin and put one of these little egg muffins between it to make a breakfast sandwich.

Wednesday, February 29, 2012

Lime-Cilantro Chicken Tacos


I absolutely LOVE the crock pot. It is a working woman's best friend (besides her loving husband of course :). But this dish is unlike any other crock pot meal; if you just ate these tacos, you would never believe me that it was done in a crock pot! Usually the crock pot yields a yummy warming stew or a moist roast, but these taste just like Mexican street tacos. Who'd of thunk it!

We love getting tacos in Mexico from the sketchy little carts on the side of the road. Just make sure you choose the ones that have the most people hovering around 'em. Lots of people means GOOD FOOD... and it also means that if it's everyone else's favorite, they haven't gotten sick there so you probably won't either :) But still- take a peek and make sure their food looks safe, their cart looks (at least somewhat) clean, and that no one is sticking fingers in the toppings or double dipping into salsa or anything. 

ANYWAY, these crock pot 'street tacos' taste JUST like the ones we get in Mexico or from our hole in the wall Taco Tuesday joints around here.  'Street taco' refers to the way your taco is dressed up- which typically means your meat is stuffed into a warmed corn tortilla with ONLY Cilantro y Cebolla ("Cilantro and Onions"). I added a few extra topping options to our taco night, but you can pick and choose what you like to personalize your own 'Taco Tuesday' party :)


Ingredients (makes about 18 little corn tacos):

  • 4 Chicken Breasts (about 2 lbs)
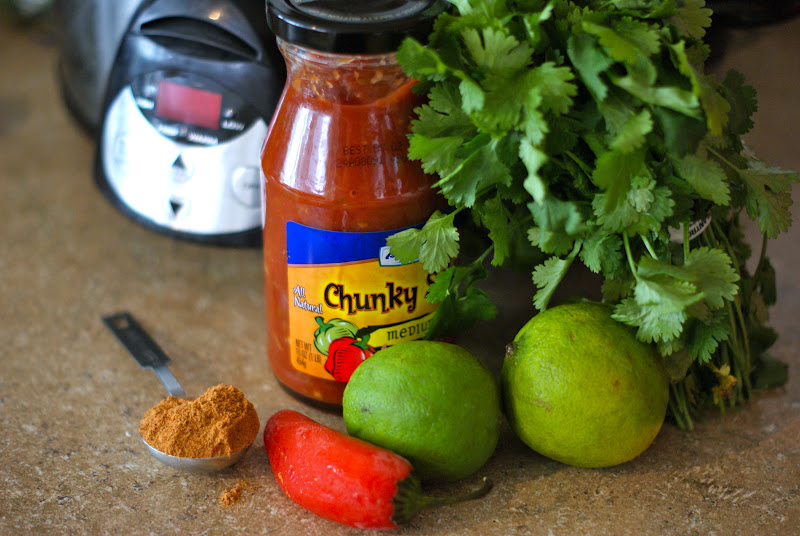
  • 1 generous cup of Salsa
  • 1 cup roughly chopped Cilantro
  • 1 minced Jalapeno
  • 2 Limes (or more if you like)
  • 1 Tablespoon minced Garlic
  • 1 Tablespoon Mexican Seasoning Blend or Taco Seasoning or your own mix of Chili Powder, Paprika, Cumin, etc.
  • plus extra Chili Powder for seasoning the chicken breast
  • about 18 little taco-sized Corn Tortillas
  • Toppings!
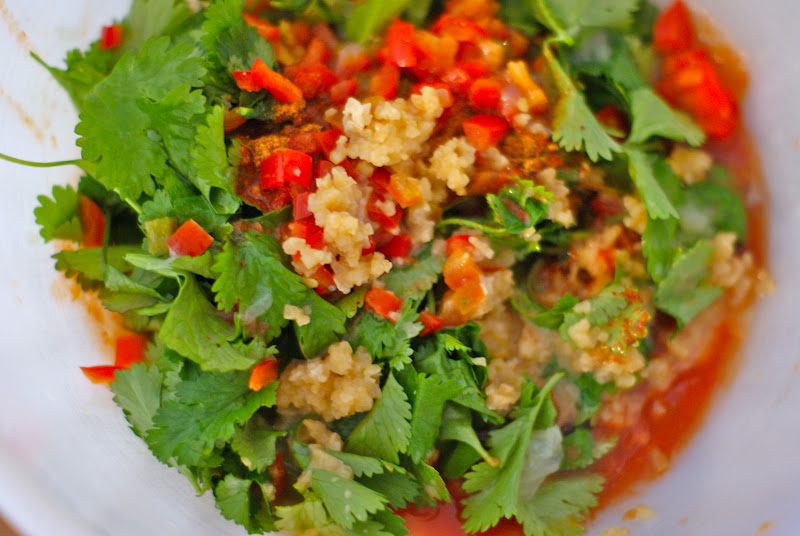
In a bowl, mix together the salsa, cilantro, jalapeno, garlic, mexican seasoning blend, and the juice of ONE lime:


Spray your crock pot with a nonstick spray and place your chicken inside. Sprinkle chicken with chili powder, flip and cover other side as well:

Top chicken breasts with your cilantro/lime/salsa mixture:

Cook on low for 6 hours (if it goes much longer you might need to add a little more liquid later- either a little bit of chicken broth, or a little extra salsa, or even just a little plain water)
After it has slow cooked all day, it will just FALL APART at the touch of your utensil:

Break up your all your chicken and mix together with all the sauce & flavors in the pot until your left with a big pot of beautiful and tasty pulled chicken. Now squeeze the juice of the second lime into your chicken and stir in until all the chicken is well coated.

Prepare your taco toppings. I have chopped cilantro, diced white onion, lime wedges, diced avocado, shredded cheese, and a smorgasborg of salsas and hot sauces:

Warm your corn tortillas, about 6 at a time, by wrapping them in a damp paper towel and warming in the microwave for about 30 seconds:

True street taco style is simply with 'cilantro y cebolla' (cilantro and onion):


I started with a street taco base, and added hot sauce and avocado to mine: 

Here, Peter is reminding you to not forget to squeeze some fresh lime juice into each taco... to die for! 

 ...aaaaand, Pete added some hot sauce and avocado to his too :)